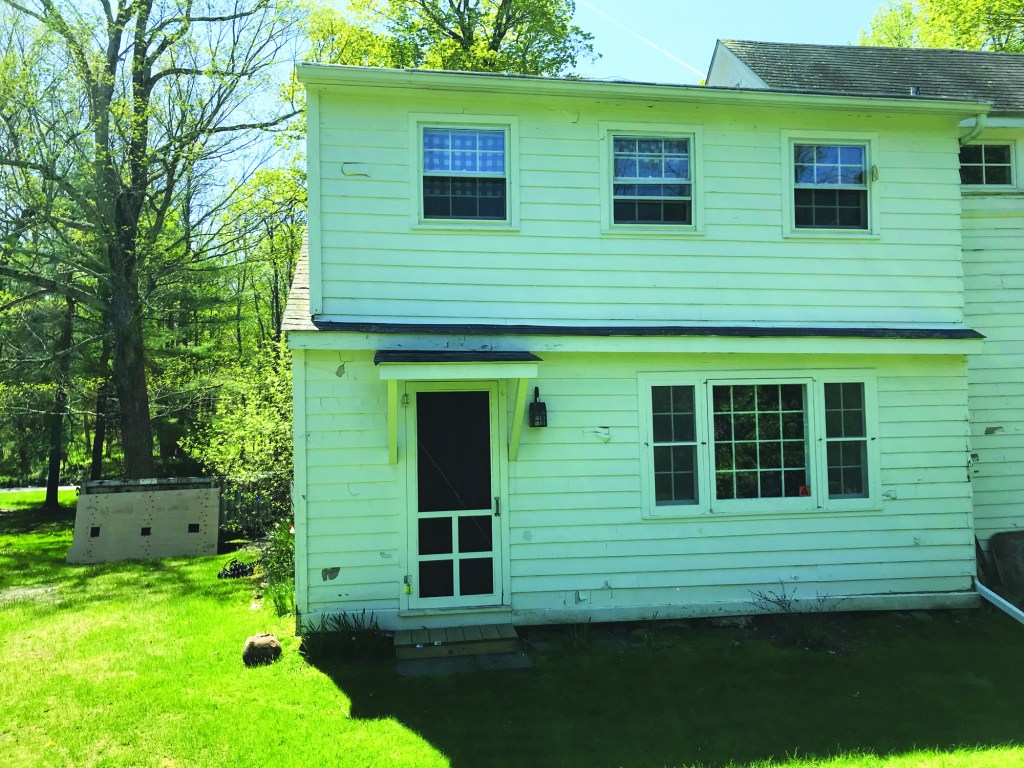
Dealing with out-of-level and out-of-square buildings is commonplace in remodeling. Whether it is an interior door or a tricky cabinet scribe, remodeling carpenters are used to being told by their client or boss to “make it look right.” Occasionally, we are presented with a structure whose out-of-levelness confounds the mind at every turn. My current remodel job at a mid-18th-century house with a 1970s dormer is an extreme case of this. In addition to having out-of-level floors and out-of-square rooms, the house presented us with a challenging exterior siding project.
The second-floor dormer and its flat roof are out of level 5 1/16 inches left to right across about 21 feet. It is set back from the first-floor elevation 8 inches, and the resulting rake roof section carries around and divides the dormer from the first floor below. This soffit was parallel to the out-of-level flat roof. Our scope of work included replacing the three second-story windows and the first-floor window, sheathing with CDX plywood, installing Gutex insulation, and applying new clapboard siding with a rainscreen detail. All were straightforward tasks—but “making it look right” would require creativity.
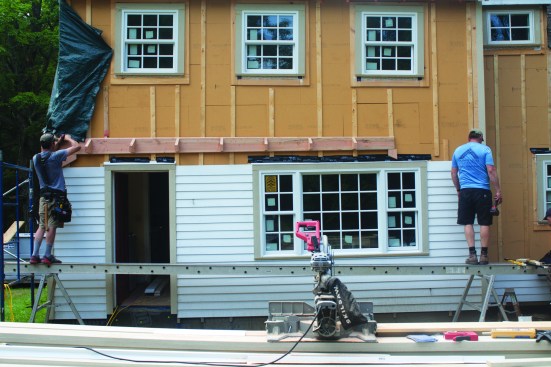
The crew packed out the wall with Gutex insulation and strapping.
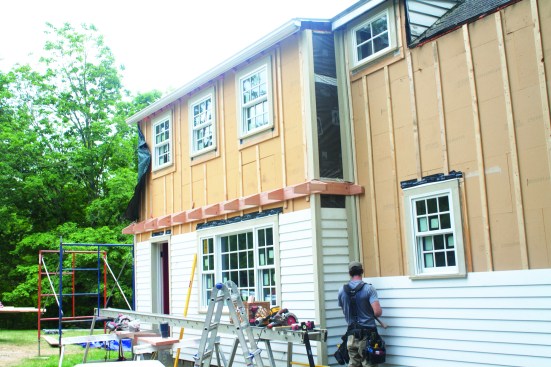
Then they fastened on a new, tapered roof-and-soffit frame.
After demo, which included removing the bisecting soffit up to the rake, we completed the scopes of work that brought us to the second-floor window install. The existing windows were installed out of level, but in a way that they stepped down across the wall elevation. We opted to install the new windows square, with the heads parallel to the out-of-level dormer roof, which gave the interior trim a cleaner look. The new first-floor window, at nearly 8 feet in length, left us no option other than to install it level.
This work left us with several conditions that needed to be tied together harmoniously—or at the very least, so that the facade looked right from the backyard picnic table. For our design parameters, we had the existing rake determining the height of our bisecting soffit; the second-story windows running 5 1/16 inches out of level; the first-floor window set level; and the siding reveals on the right side needing to match with the face of the adjacent original structure, set back 2 feet from the dormer face.
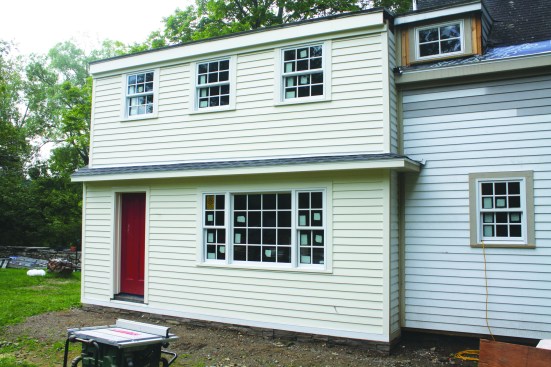
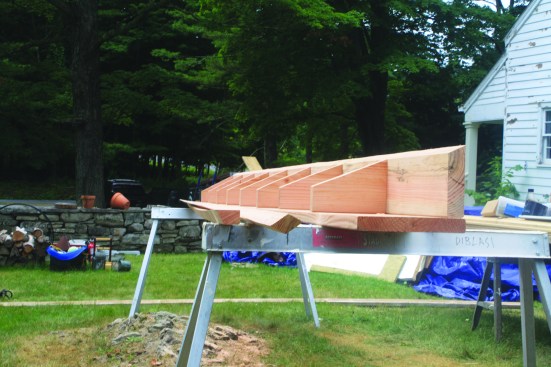
I started with setting out the siding coursing on the right side of the dormer and locked it in at 4 1/4 inches to match the old, possibly original, west gable end of the house. I knew that I wanted the siding below the bisecting soffit run level to match the large window, but this would not look right on the dormer. The dormer siding would need to be gradually cheated on the left side to make the siding course below the windows run parallel with the sills. This meant I had less than 4 feet to make up a 5-inch variance in level. Within this span, I had seven courses of siding, the roof-to-wall flashing, and the bisecting roof-soffit assembly in which to make up the difference.
Using some remodeler rules of thumb, I decided that the left side of the siding courses should vary no more than 1/4 inch per course, the reveal of the roof flashing should vary no more than 1/4 inch, and the bisecting soffit could not be more than 1/2 inch out of level. Following those guidelines left me with 2 1/2 inches to make up in the roof-soffit assembly.
The author adjusted for 2 1/2 inches of the more than 5-inch drop over the width of the building face.
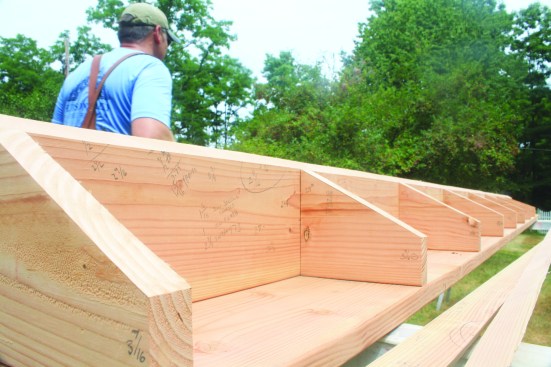
He calculated a 1/4‑inch decrease per rafter.
I had a suspicion the first time I saw the house that I would need to get creative with the bisecting roof to make this project look right. My solution to the remaining 2 1/2-inch variance was to taper the roof section by flattening the pitch of the roof from left to right.
The intersection of the left side rake with the dormer’s face set the layout for the peak, and the fascia height set the bottom of the soffit. Knowing that I needed to drop the peak 2 1/2 inches over 21 feet, I plugged those numbers into my Trig Solver app and found that the roof peak dropped at a 0.5685-degree angle. Using this angle along with my desired 24-inch rafter spacing, the app calculated a drop in rafter peak elevation of 0.2381 inch, rounded off to 1/4 inch per rafter.

The ledger board was ripped on a 29-degree angle and hand-planed the board to match the descending rafter angles.
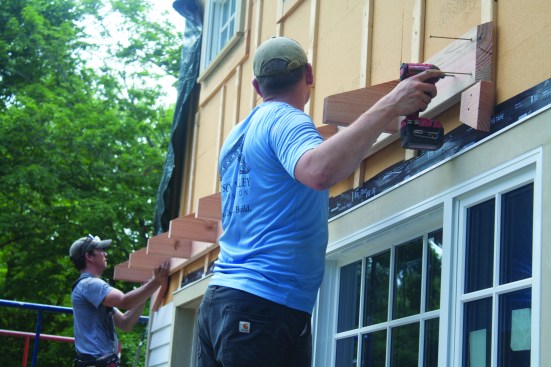
Then the whole assembly was screwed to the house wall.
We built the roof-soffit assembly in three sections on the ground before attaching it to the wall. After laying out the 24-inch rafter centers, I subtracted the 1/4 inch in height and snapped a line through for the peak angle and ripped the ledger at the 29-degree angle of the left side rake. After installing the rafters, which were laid out individually and free hand cut on the table saw, I used an electric planer to flatten the 29-degree angle to match the angle of each rafter. The last rafter, at the 21-foot mark, had dropped to a rake angle of 18 degrees. To complete the roof section, I carried the roof around the corner at the same 18 degrees to place the hip in plane with the end of the roof section.
Photos by Ian Schwandt