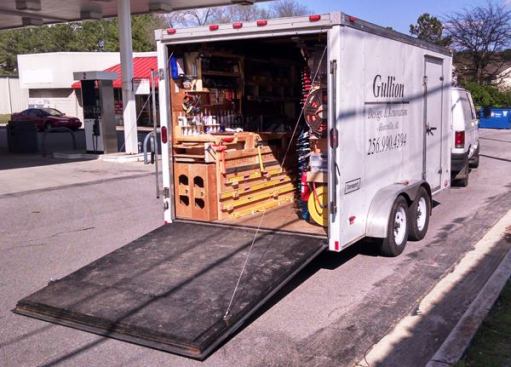
Gullion outfitted a used 7×14 soft nose (v-shaped in front to re…
Gullion outfitted a used 7×14 soft nose (v-shaped in front to reduce wind resistance) dual axle trailer.
Andy Gullion
The left side of the trailer contains a bench/work table and she…
The left side of the trailer contains a bench/work table and shelves and storage for tools, supplies, and equipment. Note the way everything is labeled.
Andy Gullion
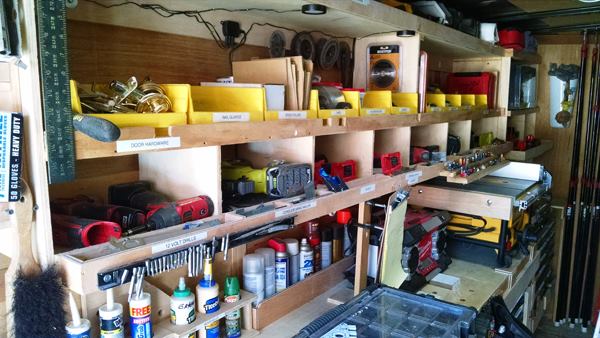
The right side of the trailer contains deep shelving. Heavy item…
The right side of the trailer contains deep shelving. Heavy items, such as the miter saw, are stored high so there’s no bending over to lift them. Note the
Kreg Foreman on the floor, just ahead of the hanging tool belts.
Andy Gullion
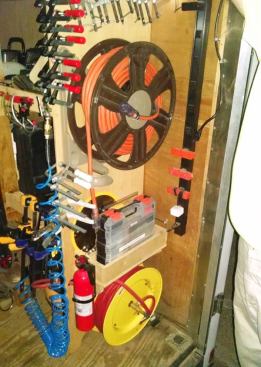
Power feeds into the trailer via the 10-gauge cord on the upper …
Power feeds into the trailer via the 10-gauge cord on the upper reel. The power strip to the right plugs into it. The hose on the yellow reel connects to a “permanently” installed compressor, and provides air for pneumatics used outside the trailer. The box above the hose reel contains collated brads and finish nails.
Andy Gullion
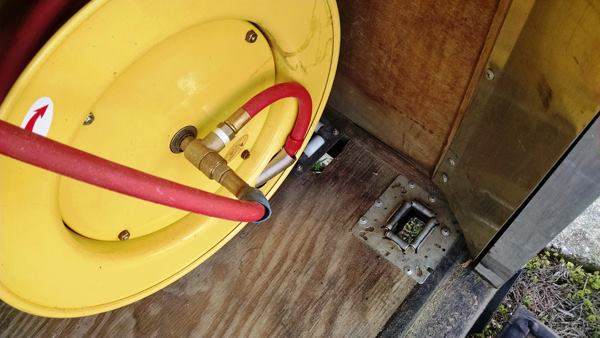
The air hose and electrical power cord pass through roller guide…
The air hose and electrical power cord pass through roller guides in the floor—which allows the door of the trailer to be closed without interrupting use of air and power. The idea for this came from Ron Paulk’s trailer.
Andy Gullion
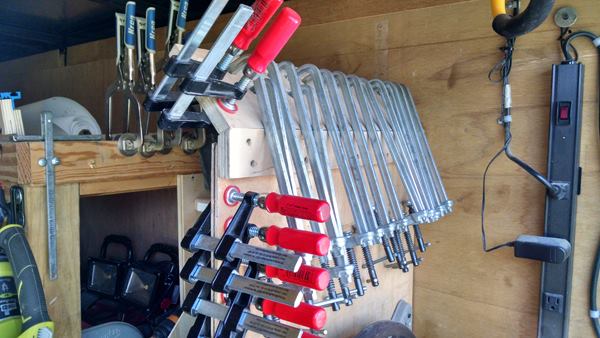
Clamps store at the back rear end of the trailer; F-clamps and K…
Clamps store at the back rear end of the trailer; F-clamps and Kreg clamps hold themselves in place. The all-metal clamps to the right hang from holes and are used with the dog holes in Gullion’s work station and the bench in the trailer.
Andy Gullion
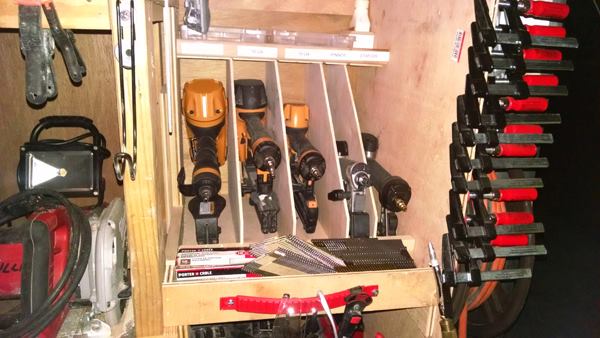
Nailers store in compartments just forward of the clamp storage….
Nailers store in compartments just forward of the clamp storage. Note the compartment for gun oil at the top right corner.
Andy Gullion
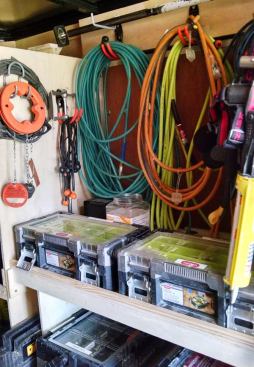
Hoses and cords store in a recessed area towards the front right…
Hoses and cords store in a recessed area towards the front right side of the trailer. The storage boxes below carry the Keter label; the same boxes can be found with the Husky label at Home Depot.
These boxes are subdivided inside and more reasonably priced than similar L-Boxxes and Systainers.
Andy Gullion
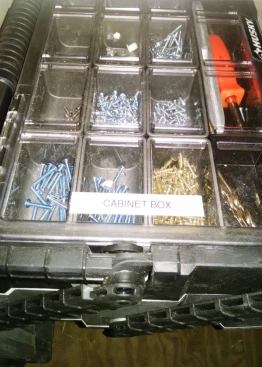
Here’s a closer look at one of boxes below the hoses and cords…
Here’s a closer look at one of boxes below the hoses and cords. This one is a Husky and contains everything needed to install cabinets—including screws, shims, and a screwdriver to adjust hinges.
Andy Gullion
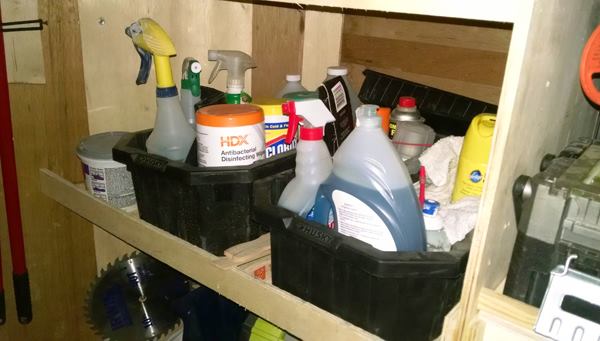
Cleanup is part of the job. Everything needed for cleanup is sto…
Cleanup is part of the job. Everything needed for cleanup is stored in easy-to-carry bins.
Andy Gullion
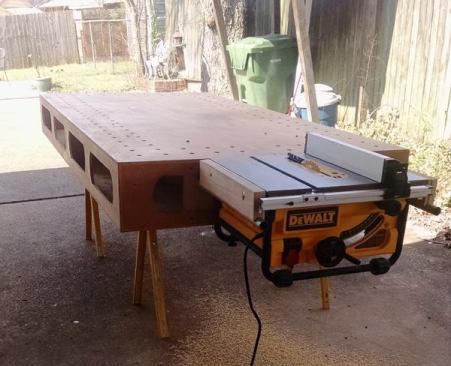
Gullion built and uses a
Paulk Workbench II—which he refers t…
Gullion built and uses a
Paulk Workbench II—which he refers to as Ron Paulk’s masterpiece. Paulk has since released plans for an upgrade portable bench called the
Paulk Total Station. The Total Station has spaces for both a table saw and a miter saw.
Andy Gullion
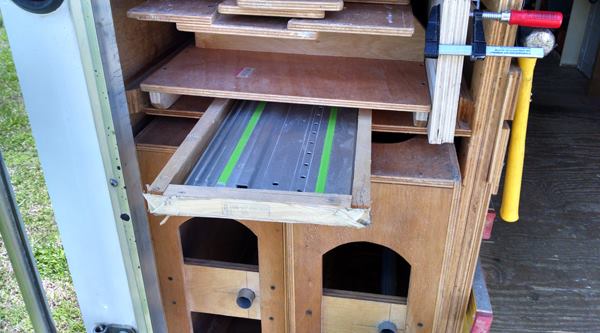
The Workbench II stores in a long opening at the left rear end o…
The Workbench II stores in a long opening at the left rear end of the trailer. The pair of “box beams” that make up the top can be seen at the bottom of this photo. Other parts store above. This area is also used for storing track saw guide rails.
Andy Gullion
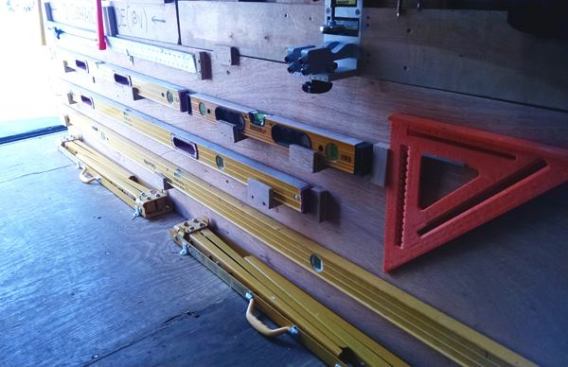
Long items, such as levels, store on the side of the console tha…
Long items, such as levels, store on the side of the console that houses the portable bench. If you look closely you’ll see the L-shaped clips that prevent the folding horses from sliding around on the floor.
Andy Gullion
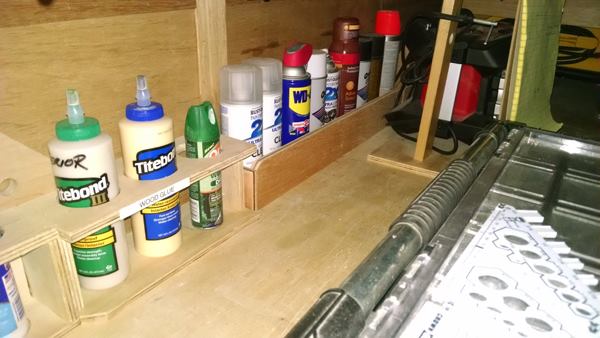
Wood glue and aerosols store in purpose-built slots along the ba…
Wood glue and aerosols store in purpose-built slots along the back edge of the work bench.
Andy Gullion
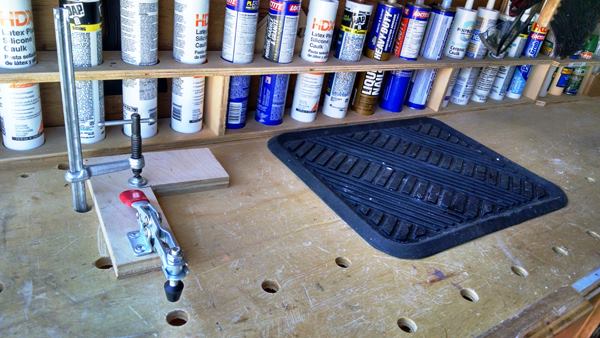
Caulk is difficult to find and keep track of when stored in a bu…
Caulk is difficult to find and keep track of when stored in a bucket or bin; Gullion keeps it out where he can see (and get at) it. Note the dog holes in the work bench. One is being used to clamp down a quick release clamping jig. The rubber floor matt to the right is used as a surface for mixing stain. If anything spills the raised edges of the matt keep it from spreading.
Andy Gullion
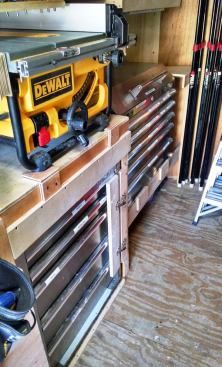
Mechanic’s tool boxes have been integrated into the trailer. N…
Mechanic’s tool boxes have been integrated into the trailer. Note the hinged piece that prevents the drawers in the rearmost unit from opening during transit. There’s no need for one on the forward unit because it’s an upper and the drawers won’t open when the top lid is closed. Note the many Zip Poles (for dust walls) at the front wall of the trailer.
Andy Gullion
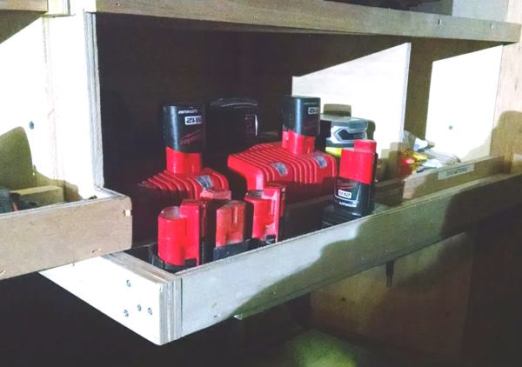
There is a charging station just above the mechanic’s box in t…
There is a charging station just above the mechanic’s box in the previous photo. The chargers are “live” and charging whenever the trailer’s plugged in.
Andy Gullion
A battery-operated light at the rear the trailer provides light …
A battery-operated light at the rear the trailer provides light 24/7. It charges (and provides illumination) when the trailer is plugged in and runs on an internal battery when it is not. The light is from
Flood-It.
Andy Gullion
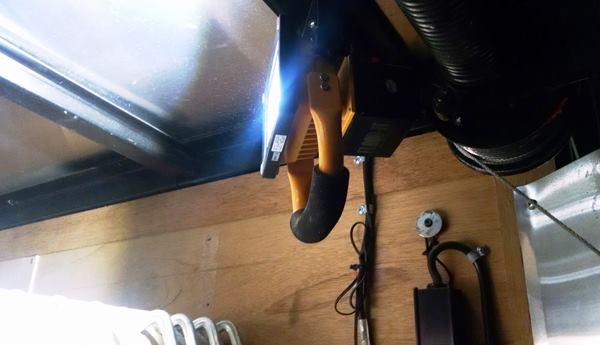
Gullion’s miter saw is screwed to a piece of plywood that conn…
Gullion’s miter saw is screwed to a piece of plywood that connects to a home-made stand with the kind of sash locks used on double-hung windows.
Andy Gullion
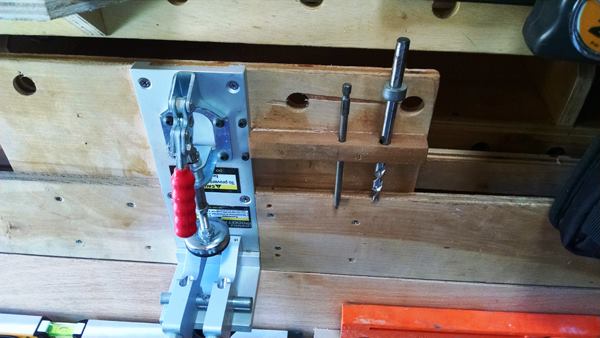
The drill and driver bits used with this
Drill Master pocket ho…
The drill and driver bits used with this
Drill Master pocket hole jig are store in the same board that the jig attached to. If you have the jig, then you automatically have the necessary bits.
After seeing a story we published about Ron Paulk’s new tool trailer, Andy Gullion of Gullion Design & Renovation sent me some photos of his trailer. Gullion lives in Huntsville, Alabama, and through the miracle of YouTube knew all about the things Paulk was building in Anacortes, Washington. In fact, the design of Paulk’s previous trailer was the inspiration for Gullion’s.
When I asked what made him decide to build a tool trailer, Gullion told me about an auto accident he had in 2013. He was driving a Ford E-350 loaded with tools when a car swerved into his lane, hitting his vehicle head-on and flipping it. Had the van not been equipped with a partition and rolled onto the passenger side, he could have been killed by his tools. As Gullion put it “seeing how close my miter saw came to my head got me thinking about other options for transporting tools.”
Gullion went online, and after weeks of searching for better ways to haul his equipment, decided to build a trailer along the lines of Paulk’s. So he bought a used 2009 Haulmark soft nose trailer for $1,650 and began to fit it out, with a place for everything and everything in its place. The compressor is bolted to the deck with a hose attached to the tank so it can be bled through a hole in the floor. The primary power and air leads also pass through the floor. This allows the trailer to be closed without the need to roll in hoses and cords. The trailer has 110-volt wiring throughout. Lights, microwave, pencil sharpener, and radio are always plugged in and ready to go when the trailer is connected to power.
One thing Gullion did differently than Paulk was build in a work bench/table so there’d be a place inside the trailer for making quick cuts and servicing tools. The bench and nearly every flat surface in the trailer has the kind of dog holes used for clamps on Festool’s MFT table and Paulk’s various work stations. The holes have worked out well. The bench includes a rack to hold individual tubes of caulk—because caulk is surprisingly hard to manage and identify when stored in a bucket or bin.
Gullion enjoys the reaction of customers, who perceive the quality of his work as better when they see how organized he is, “people love to see that you thought about the work well before you got there.” Click the photo on the left to see the details of Gullion’s trailer.