As a finish carpenter, I’m often asked to install wainscot to spice up a room, and pre-primed MDF sheets with grooves cut to mimic the look of T&G material make the job much easier. Before starting the wainscot, I make sure the baseboard is installed, along with the side trim on the doors and windows. (If I’m doing the window trim, I install the stool and apron after the wainscot is installed).
The MDF wainscot material comes in 4×8 sheets 1/2 inch thick, and the contractor for this project had spec’d a height of 42 inches above the baseboard. I started by cutting enough 3 1/2-footers from my stack to do the room. Then I cut 2-inch strips from a couple of the scrap pieces across their width and placed the strips on top of the baseboard along one wall.
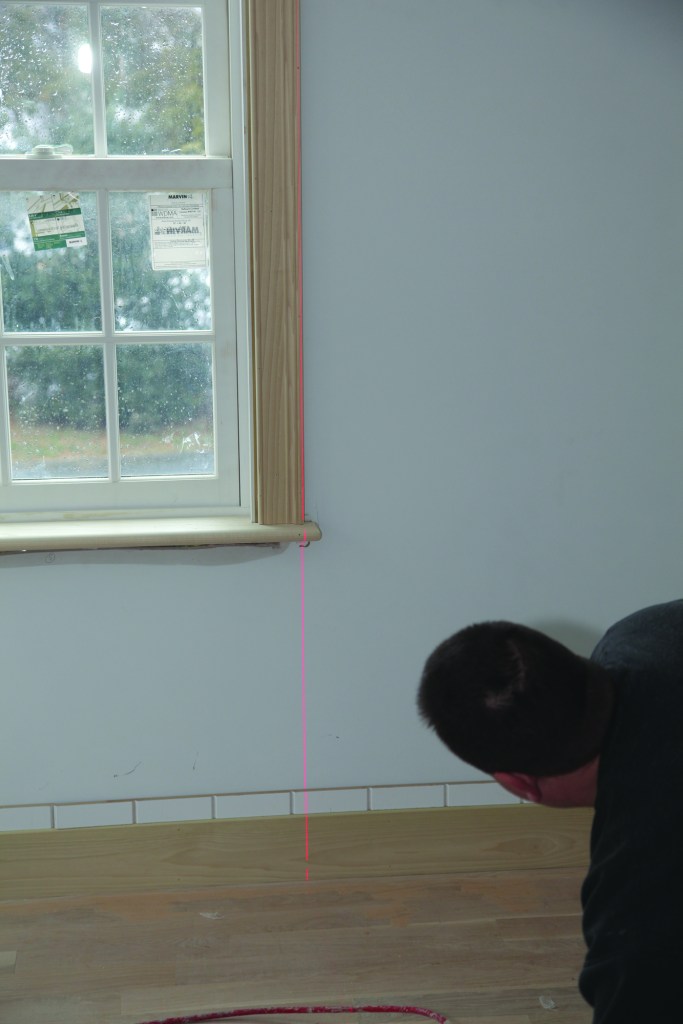
One of the keys to installing wainscot easily and having it look great is laying out the material so that the grooves don’t line up directly with vertical elements such as window casings and electrical outlets. I used the 2-inch strips in combination with a laser to fine-tune the layout. First, I lined up the laser roughly on the edge of the window trim and noted where it fell on the strip. I checked both sides of the window and made sure that the edges landed well between the grooves. With the strips running all the way across the wall, I also checked the layout at the other window.
Next, I moved to the electrical outlet in the middle of the wall and checked the layout there. On this wall, the layout for the outlet landed just to the side of the groove, so I slid the strips down an inch or so and rechecked the layout at the windows to make sure it was still acceptable. When I was happy with the layout, I marked the end of the strip nearest the outlet. That mark would align the first piece of wainscot.
A lot of carpenters would start running the sheets at one corner and work their way across the wall. But with the layout set, I actually started by installing the piece that went around the outlet and one corner of a window. That piece would key in the placement of the rest of the pieces on the wall.
When you’re installing sheet wainscot, it’s imperative that each piece be installed perfectly level and plumb. Any slight variation will cause the other pieces to “stair step” along the base as they’re installed. Our crew had scribed the baseboard to be perfectly level as it went in, which paid dividends when it came to installing the wainscot sheets.
I set the starter sheet of wainscot on the baseboard and lined it up with my mark. I then marked the edges of the window trim—along with both the side casing and the bottom of the apron. For the outlet, I slid the piece down the baseboard and marked the top and bottom of the electrical box. Then I measured from my layout mark to both sides of the box and transferred the measurements to the wainscot sheet. This was one of the few times I used a measuring tape during the installation.
I made the cutout for the window by making passes in two directions on a table saw and retracting the blade when I’d reached the intersection point. For the outlet, I squared my marks and cut out the rectangle for the box with a jigsaw. With the cuts made, I dry-fit the piece and drew a pencil line along the perimeter. I spread construction adhesive just inside the perimeter marks and then ran two or three beads across the width of the piece. Then it was just a matter of pressing the piece in place and driving perimeter nails at each of the stud locations.
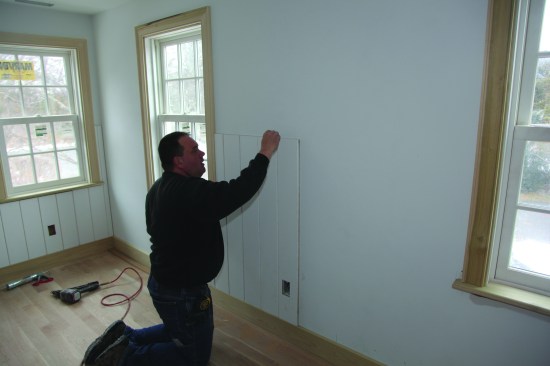
After making cutouts for the window and the outlet, the author dry-fit the piece and drew a pencil line on the wall along the perimeter.

The piece was secured to the wall with construction adhesive and nails.
The next piece that I installed butted into the first piece and wrapped around the window. I measured over and ripped the piece to width on a table saw. Again I set the piece on the baseboard and scribed the end slightly to fit. As before, I marked and cut out for the window and installed the piece. The rest of the pieces went in the same way, with factory edges abutting except at the ends.
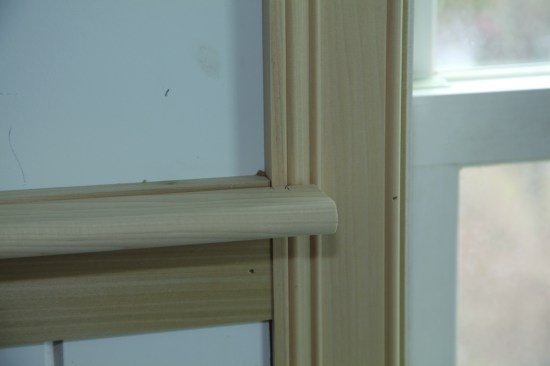
The trim for this wainscot project was in three simple pieces: a 1×4 rail along the top of the sheet, a bull-nose cap, and a cove molding between the cap and the rail. Because the project would be painted, we used poplar for the trim.
For the rail, I cut a 1/2-inch-square rabbet in the edge of the 1×4 that covered the top edge of the wainscot. To find the length of each piece, I squared one end, set it in place, and marked the length on the other end. I put a bead of adhesive on the back of the rail and a bead of white glue in the rabbet and on the ends before setting the rail in place. I nailed one end and then leveled it across as I nailed it in.
With the rail installed level, I set a laser on it. A crew member went around the room and marked the top of the rail at every door, window, and corner, to ensure that the rest of the wainscot would be at the same level all the way around the room.
The bullnose cap came next. We’d ordered 5/4 bullnose stock for this project, but ripped it down to 2 1/4 inches so that it stepped nicely to the cove molding once everything was installed. Cap molding never looks right if it just butts into the casing, so I lap the ends a little. The end detail depends on the type of casing; on this project, the casing started with a flat return about 1/2 inch wide. I made the return on the cap so that it ended on the flat part of the casing just before the rest of the profile began. Then I routed a bullnose on the return with a 1/2-inch round-over bit.
After making the detail at one end, I left the cap a little long and set it on the rail. I marked the overall length, as well as where the cap returned to the wall, and I cut the return with a jigsaw. After rounding over the return, I set the cap back on the rail and scribed it to the wall, remembering to subtract the same amount from the return. Then I glued and nailed it into place.
For cove molding, I always miter and glue returns onto the ends. For the best look, I let the long point of the cove end at the edge of the casing. Again I cut the cove to length by putting a return on one end and setting it in place to mark the length.
The author left the cap a little long and set it on the rail. He marked the length, as well as where the cap returned to the wall.
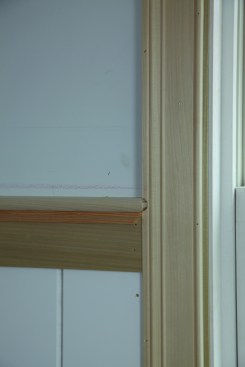
For the best look, the author lets the long point of the cove end at the edge of the casing.
The rest of the room was straightforward and most of it could be done without a measuring tape. I even have a way to do inside corners without measuring, but will leave that for another article.