Stuff happens, or at least that’s what I told myself when a client called to tell me that his car bumper had accidentally clipped the trim on the support between his two garage bays. I went by that afternoon to check it out, figuring that I’d probably only have to replace some damaged trim. When I got there and took a closer look, I realized how close he might have come to bringing the entire house down on top of him.
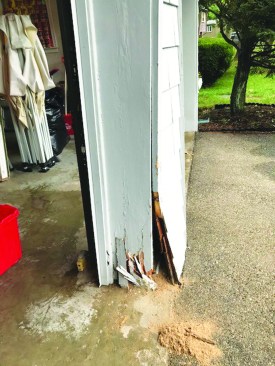
After being struck by a car, the garage support showed signs of internal rot as well as structural damage.
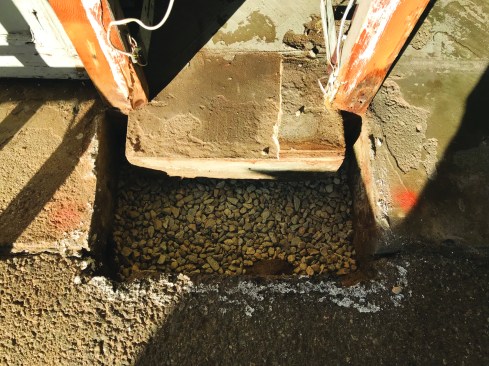
The author peeled back the siding and sheathing to find that the support framing had been placed directly on top of an untreated 4×6 timber that had rotted.
Investigation. The first thing I noticed was that the siding and sheathing had separated from the bottom of the support. The boards on the side jambs of the garage door opening appeared to be rotted at the bottom. I tore back the sheathing and siding and saw that the support had been framed on top of an untreated 4×6 timber in direct contact with the ground. The aprons for each of the garage bays had then been poured around the support. The timber had totally rotted and the studs were well on their way.
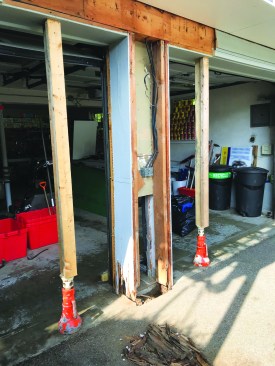
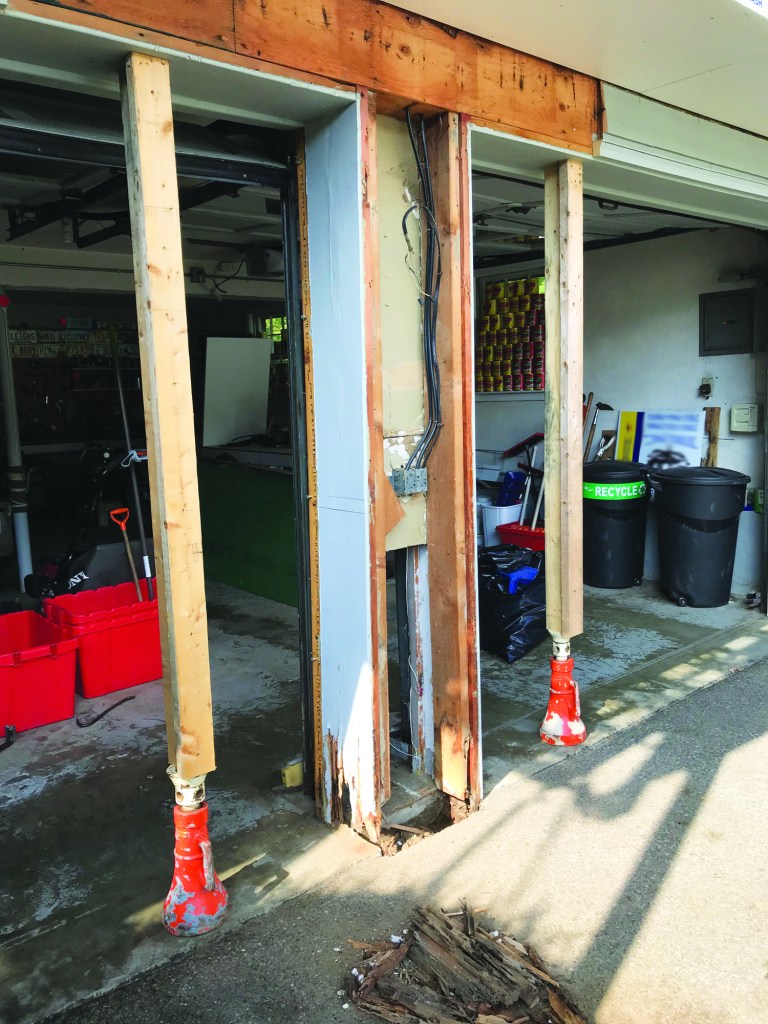
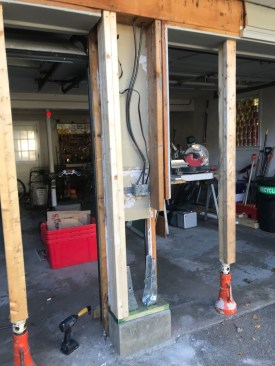
Before doing any more work on the support, the author propped up the continuous 6×12 header spanning the openings with a pair of house jacks.
The continuous 6×12 header that spanned across both garage bays was marginally large enough to support the garage opening and carry the weight of the house structure above. But to be safe, I got out my house jacks and set them up on either side of the center support to help carry the load while I repaired the support.
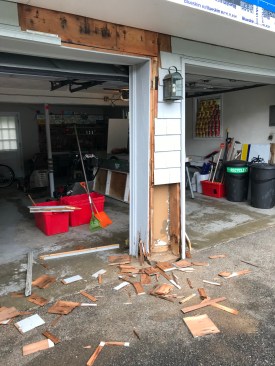
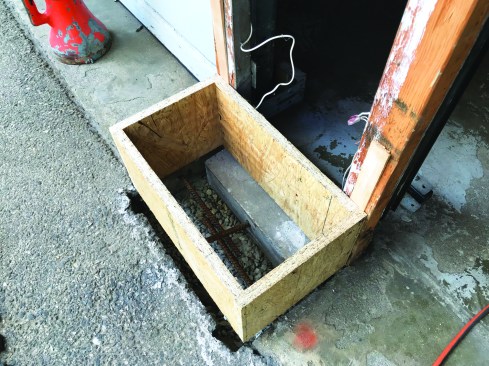
Pouring a footing. With the opening reinforced, I took out the rest of the rotted lumber and cleaned away the debris from the hole. To give the support a solid base and to raise it above the ground, I wanted to pour a concrete footing. I began by excavating down between the aprons, then added a layer of crushed stone on the bottom of the hole.
The author cleaned away the rotted wood, dug out the hole, and added a layer of crushed stone.
He epoxied rebar into the garage slab as well as the aprons.
Next, I drilled holes into the edge of the garage slab as well as into the sides of the aprons and epoxied lengths of 1/2-inch rebar into the holes. I then tied the lengths together where they overlapped in the center of the hole.
I wanted the footing to extend well up above the aprons and the asphalt driveway, so I built a rectangular form out of 3/4-inch OSB that was 8 inches tall. I shimmed the form level in both directions across the top and then tacked the form to the 2x4s holding the door track. I filled the irregular gaps between the base of the form and surrounding concrete and asphalt with spray foam.
After mixing the concrete and filling the forms, I gave the top surface of the footing a broom finish. I let the concrete cure for about a week before coming back to strip the forms. I wanted the concrete green enough that I could nail and drill into it easily, but I didn’t want it to chip out.
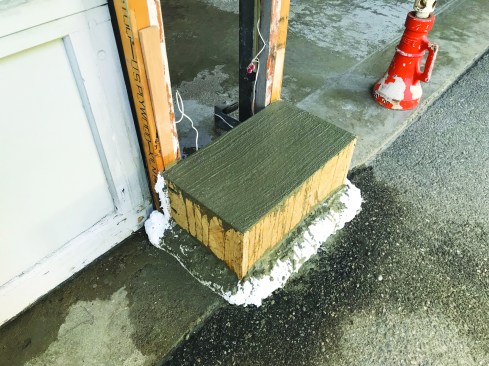
Then he poured the concrete footing.
After letting the concrete cure, the author capped the footing with a treated 2×8 sill.
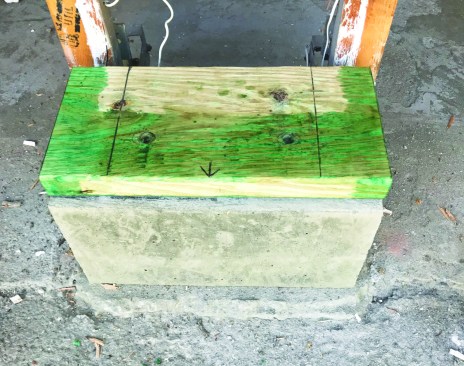
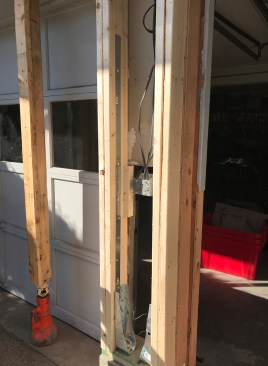
Framing and hold-downs. Reframing the garage support started with a section of treated 2×8 that I tacked to the footing as a mudsill. The original support had a single 2×6 on either side, with additional 2x8s that acted as the finish surface for the openings. To create adequate support, I planned to use double 2x6s from the footing to the header on both sides of the support. I started by measuring and drawing a line 3 inches from each end of the sill.
With the ever-present possibility of cars rolling into the support, I did not want to depend solely on nails for the connection between the support studs and the sill. So I reinforced the attachment to the sill with a pair of Simpson Strong-Tie HDU hot-dip galvanized hold-downs. The hold-downs are fastened to the sill (and to the footing) with 5/8-inch-diameter bolts, so I positioned the hold-downs on the lines inside the studs and drilled holes for the bolts. I epoxied the bolts into the holes and installed the hold-downs.
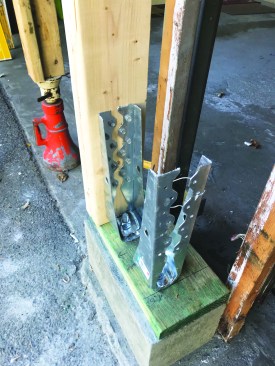
He drilled and epoxied galvanized holddowns into the concrete footing.
Special lag screws secured them to the bottoms of the new support studs.
Next, I plumbed up to the header to locate the positions for the double 2×6 support studs. After cutting the studs to length, I nailed them in place. I drove the SDS lag screws that came with the hold-downs to anchor them to the studs.
Flat straps attached with structural screws to the hold-downs and to the inside faces of the support studs reinforce the framing assembly.
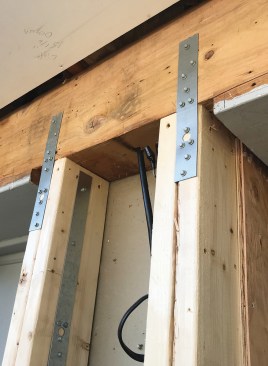
At the top, shorter straps reinforce the connection between the studs and the header.
Tying the support to the header. I was confident that the hold-downs would do a good job resisting the impact of a car bumper at the bottom of the support, but I worried that without reinforcement, the studs could crack in the middle or separate from the header at the top. So I installed 16-gauge SST HTP straps to strengthen the sides of the studs, attaching the straps to the hold-downs at the bottom and overlapping a couple of lengths to within an inch or so of the tops. These straps are screwed to the studs with the same SDS lag screws that I used to attach the studs to the hold-downs. SST HRS straps designed to be attached to the edges of 2-by stock reinforce the connection of the studs to the header.
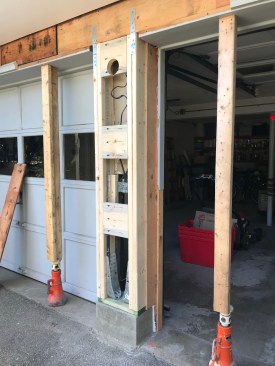
Solid 2-by blocks span between the studs on either side of the garage support to add rigidity.
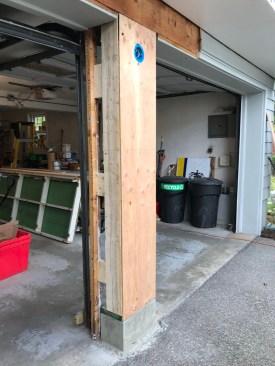
The treated sill had been kept back 1/2 inch from the face of the footing so the sheathing could be installed flush (13). The exterior of the support was finished with cedar shingles and PVC trim to match the house.
To finish the framing, I cut and installed solid blocking that I pocket-screwed to the double studs. To anchor the garage door tracks, I screwed blocking between the support studs and the 2x4s holding the track. Then I nailed 1/2-inch plywood sheathing to the support framing.
Finishing up. I replaced the old wooden trim with rot-resistant PVC, finishing the outside face of the support with a short water table with a drip cap. Finally, I installed cedar shingles that blend nicely into the original cedar shingles above the garage doors. The new support perfectly matches the rest of the house, and I’m confident that it won’t move in its next close encounter with a car bumper.
Photos by Emanuel Silva