This window replacement project, like most of the jobs I do, entailed repairing part of a house, not a full remodel. But unlike most of my clients, who hear about me through word of mouth, the homeowner learned about me from a JLC article I wrote.
The project was just big enough that another set of hands would have been nice to have for some but not all of it. I work alone mostly, though, so I’ve learned to be smart about how I organize the work, the jobsite, and my time. As part of my strategy, I try to break down the job into small pieces that I can manage by myself. On this project, one way I did that was by prebuilding the exterior window trim as one unit. This method saves a million trips up and down the scaffold, measuring, cutting, and installing parts one by one, and gives me better control over the joints and final finish.
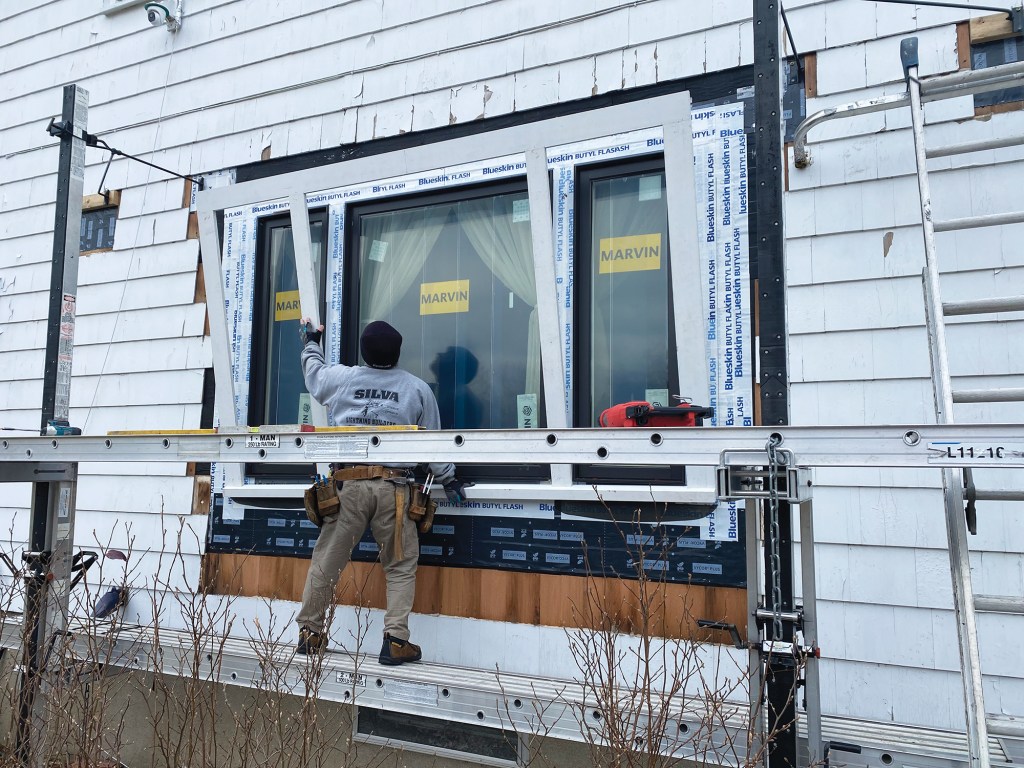
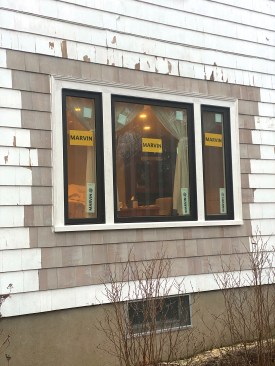
The original window was one piece, and the client wanted its replacement to look similar. By using three windows but trimming them out to look like a single unit, I could both manage the install on my own and satisfy the client.
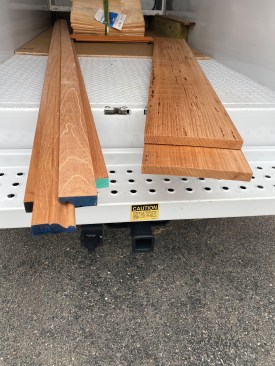
The client also wanted the trim to match what was on the rest of the house as closely as possible. That meant using wood on the exterior and reusing the old trim on the interior. I chose a clear Spanish cedar from a local mill shop to provide as much rot resistance as possible without going over the budget.
Emanuel Silva
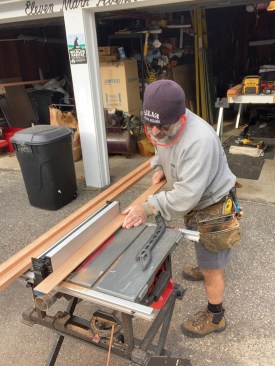
The old window is to be replaced by three new units. After remov…
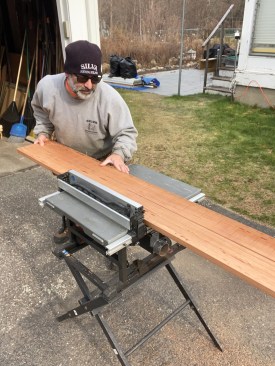
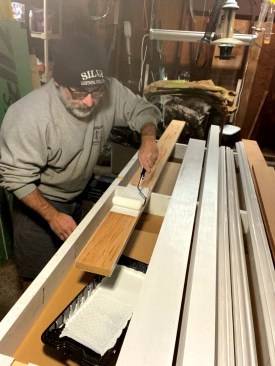
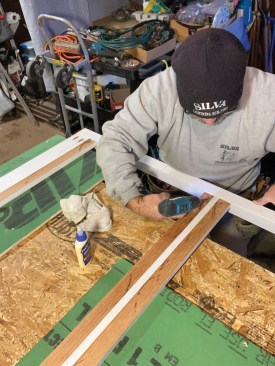
Because the mill shop didn’t have 1×5 or the exact profile of the shingle stop (also called a back band), I needed to modify the lumber. I ripped 1×10 to make the casing and the header. To match the other windows, the profiled casing I bought needed to be narrowed and part of its profile beveled off. Then, to make the sill, I ripped and glued up 1-by stock. I left all the pieces long to allow for any final adjustments. Once I ripped, sanded, and glued up the pieces, I painted them with an oil-based primer. I put on two coats because I didn’t know how long it would be until the homeowner brought painters in.
I made mock-ups of the trim corners to check fit and mark lines on the house for final lengths. After setting the header on spacers across the windows, I marked it for length and drew placement lines for the verticals. I took the same steps with the sill. From those lines, I measured the lengths for the vertical pieces. With the measurements and the marks on the sill and header, I was able to make just one trip to the miter saw and cut all the material.
While I was measuring, I noticed that the wall was built-up close to the windows. Because of the flashing tape and the window flange, the trim wouldn’t sit flat against the wall. To allow for that, I cut a ⅛-inch rabbet on the side that would be against the wall so the trim and the outside edge of the window would be flush when installed.


Emanuel Silva
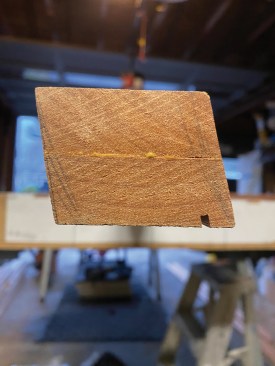
By making a mock-up of the sill and casing, the author is able t…
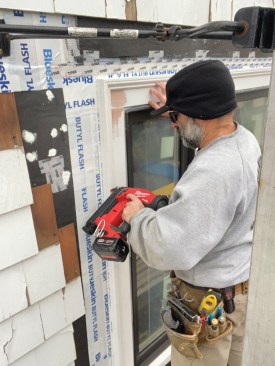
When I cut all the parts to size at once, I can predrill for pocket screws, glue, and fasten the joints tight, which I can’t do if I do one piece at a time. I double-check the layout, paint the cut ends, and let the glue cure before installing the assembly. I make sure the pump jack is set correctly and do a final check for square before I set the assembly on the pump-jack deck.
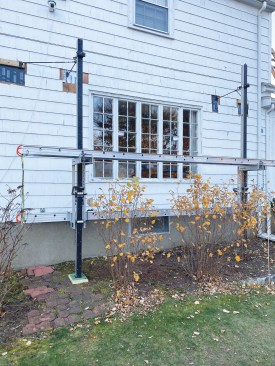
I place spacers above the windows to align the trim, and then I lever the unit in place. With the trim hung from the spacers, I can check the spacing at the sides and middle. As I fasten the assembly with headless screws, I adjust for plumb.
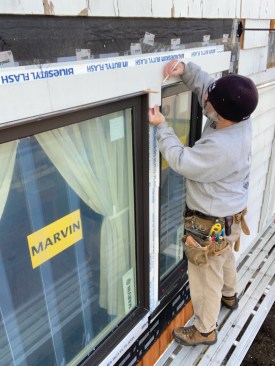
Then I install the shingle stop (back band). On this project, I used the new profiled casing I had modified to match the existing detail on the house. I did this a piece at a time to hide some of the screws on the flat stock and to ease transport. The other screws I filled with wood plugs. I then tied in the shingles and prepped for caulking the gap I set between the windows and trim.
Emanuel Silva
Before he ties in the cedar wall shingles, he fastens a shingle …
In my years of working alone, I have found that by managing jobs as I did this one—prebuilding where I can, keeping a clean site, and breaking the job down into steps and completing each one before moving on to the next—I can keep the jobs progressing and organized and achieve the quality of work I’m aiming for. My work comes from referrals, so I take the time needed to do it right. Doing things like premaking parts helps me control the quality of the finished product.
Since I completed this job, the homeowner called me back to do more work, which is the best compliment I can get. I also found out that he hasn’t had the final painting done a year on, so I’m glad I took the time for extra primer coats and caulking. The window still looks as good as the day I finished the job.
Keep the conversation going—sign up to our newsletter for exclusive content and updates. Sign up for free