
One of the strongest ways to frame a roof is using a hip-roof design. The planes of the roof slope up from every side, so the framing braces the roof from all sides. If the building is square and the sides are of equal length, the roof planes will meet at a point, as in a pyramid. On a rectangular-shaped building with a hip roof, the roof planes on the two longer sides meet at a ridge, as shown in the illustration below.
The key structural member is the hip rafter, which spans from the building corner to the peak or the ridge. Before we explain hip rafters, you need to understand how to lay out and cut common roof rafters; this is covered in “Cutting Common Rafters” (Mar/17). There are many variations on hip roofs and their construction, but for the purpose of this article, let’s assume that the roof planes are all the same slope (6:12) and that they meet at a ridge. For simplicity, we will make all of the framing out of 2-by stock.
Spoiler alert
If you were to show the method I describe here to many seasoned framers, they would dismiss it as the work of a weekend warrior or a newbie. But given that this column is for tradespeople just starting out or those who may not frame roofs on a regular basis, I wanted to present a simple foolproof approach that anyone can follow for laying out a hip roof. This method is a great fallback that eliminates having to go through the mathematical machinations that the traditional methods for laying out a hip rafter typically require. For an excellent article on the traditional way to frame a hip roof, take a look at Tim Uhler’s Framing a Hip Roof, Sep/13.
Objective:
To understand how a hip rafter functions in a hip roof and to understand this particular method of calculating and cutting the hip rafter
Prerequisite skills:
- An understanding of basic roof framing and rafter cutting.
- Familiarity and basic skills with a circular saw.
- Ability to take accurate measurements and record them.
- Familiarity and basic skills with a framing square.
Tools:
- Measuring tape
- Framing square
- Stair gauges
- Circular saw
Vocabulary:
- Common rafters: Roof framing members that go from the top wall plates to the ridge.
- King common rafters: Common rafters in a hip roof that meet at right angles on either side of the hip rafter.
- Height above plate: Distance on a rafter measured in a plumb line from the top outside edge of the plate to the top edge of the rafter.
- Hip rafter length (or line length): The length of a hip rafter based on calculations from a framing square or a construction calculator.
- Plumb cut: A cut on a rafter or other angled framing member that will be plumb vertically when the member is installed.
- Seat cut: A cut on a rafter or other angled framing member that will be level when the member is installed.
- Bevel cut: A cut made with the saw blade set an angle.
- Birdsmouth: The triangular cut at the bottom of a rafter where it sits on the plates.
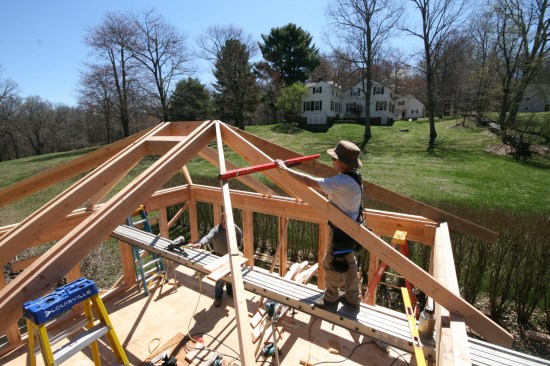
King Commons and Ridge
Start by framing the common rafters along the ridge. The last common rafters that support the ridge are called king commons (see illustration). An additional common rafter that extends from the end of the ridge down to the plate at the end of the building is also called a king common. The king common at the end of the ridge and the king common on the side of the ridge intersect at a 90° angle. The hip rafter intersects this 90° angle at a 45° angle and runs diagonally down to the building corner.
The king commons at the ends of the ridge are the same length as those at the sides. Each common, including the kings, has an “adjusted run” that equals the run shortened by half the thickness of the ridge (in this case, using 2-by stock, the run is shortened by 3/4 inch). If both ends of the building end with a hip, the length of the ridge is the total length of the building minus two times the adjusted run of the common rafters. (For details on calculating ridge length, see “Framing a Hip Roof,” Sep/13.)
Tim Healey
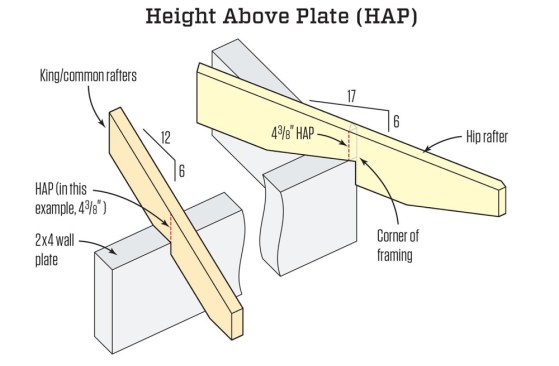
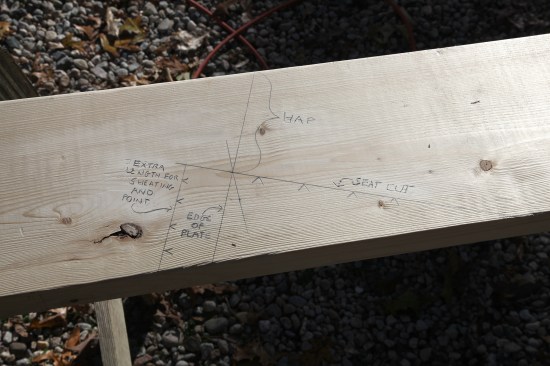
To keep the hip roof sections in plane with the main roof, the hip roof rafter must have the same height above plate (HAP) as the regular rafters. Measured at the common rafters, HAP is the vertical distance from the tops of the rafters to the plate at the edge of the wall framing.
Height Above Plate (HAP)
Before we lay out the hip rafter, we must first figure out the height above plate (HAP), or the vertical distance from the seat cut of the birdsmouth (or the top of the wall plates) at the edge of the wall framing to the top of the rafter. This measurement is taken off the common rafters (see Height Above Plate (HAP)). Using the same HAP on the hip rafter and the common rafter ensures that the top edges of both rafters will be in the same plane. This measurement is crucial for laying out the hip rafter.
Tim Healey

The easiest and fastest way to layout the angles for the hip raf…
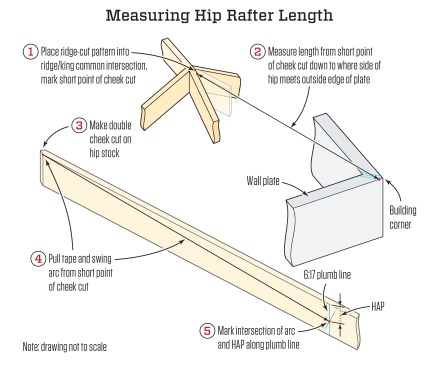
Hip Rafter Length
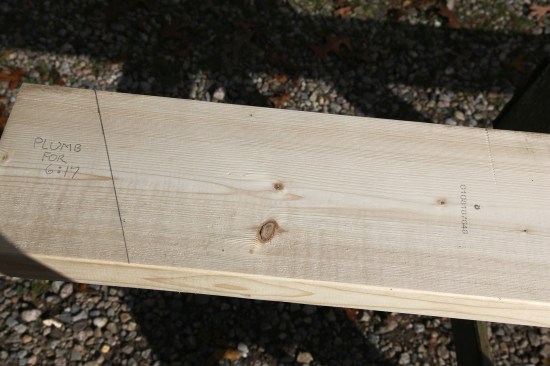
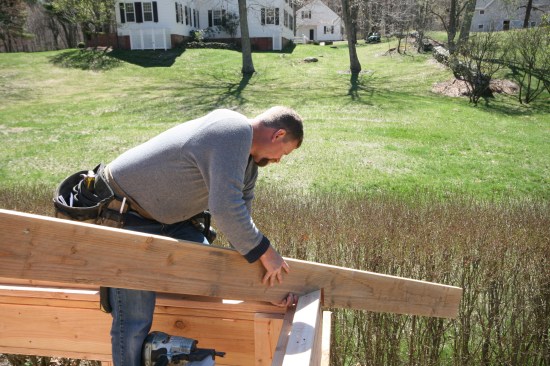
The conventional way to determine the length of a hip rafter is by using the “Length of Hip per Foot of Run” table on a framing square or by using a construction calculator. But rather than depending on the math, I find it easier (especially on smaller roofs) to physically measure the length as shown in the illustration Measuring Hip Rafter Length. I start by making a short pattern of the ridge cut for the hip. For this, I need the plumb angle for the hip, which is calculated as the rise-per-foot/17. So for this 6:12 roof, the plumb angle on the hip is based on a 6:17 slope.
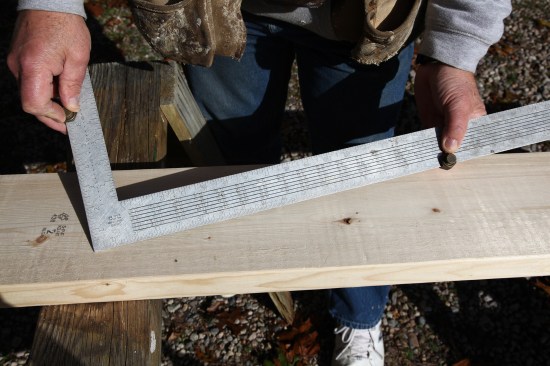
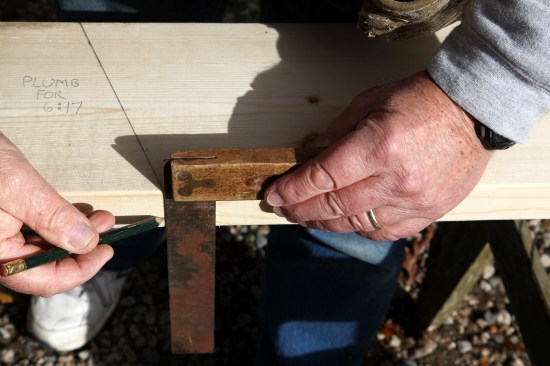
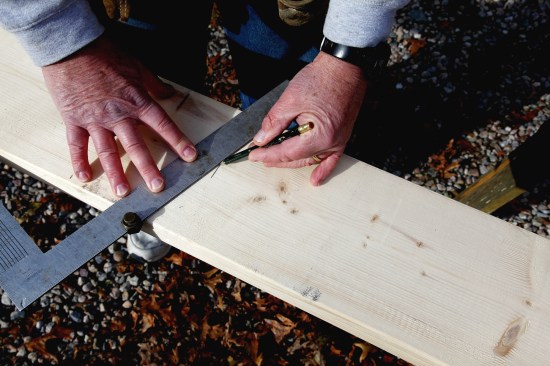
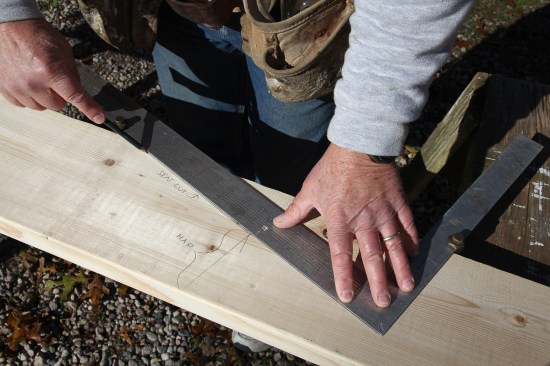
The easiest way to lay out the angle is with stair gauges attached to a framing square. These little hexagonal devices clamp on the edge of the square—one at the 6-inch mark and one at 17. When you slide the square to the edge of the board, the gauges “stop” the square at the proper angle for the hip slope.
Using this angle, I make a double 45° cheek cut on my pattern. I then place the pattern in the corner between the two king commons and mark where the shoulder of the cheek cut meets the kings.
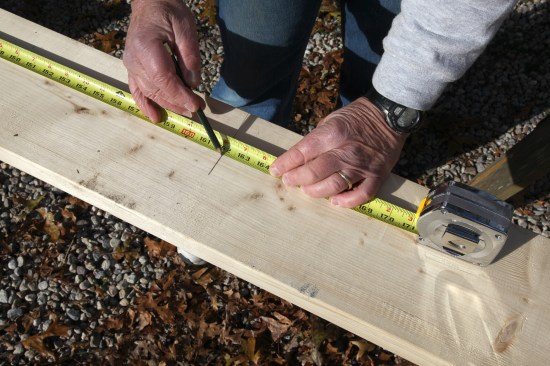
Next, I move to the building corner and on top of the plates, I draw a 45° angle that bisects the corner. I then measure over half the width of the hip rafter—3/4 inch for 2-by stock—and draw a parallel 45° line.
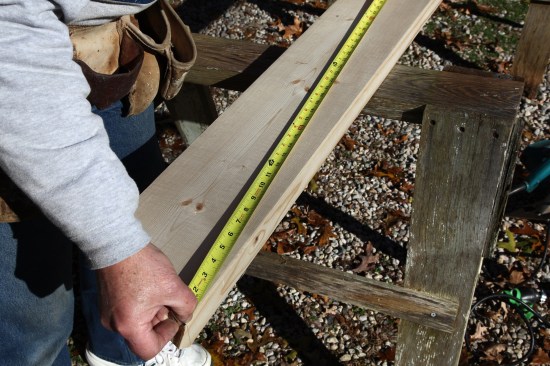
Holding the tape on the shoulder mark that I made on the king common using my ridge-cut pattern, I measure down to where the line for the side of the hip meets the outside edge of the plate, and I record that measurement. (Note: This is not the same length as the hip rafter “line length,” which is the figure you would find using a calculator or the table on a rafter square to determine the hip rafter length.)

After taking the measurement as seen in the illustration, one cr…
Hip Rafter Layout
For the hip rafter, I choose a lumber dimension one increment up from the size of the common rafters. In this case, I’d used 2×6 stock for the commons, so I went with 2×8 stock for the hip. (If the commons were 2×10, I would have used 2×12 stock for the hip). Be sure to mark the direction of the crown on the hip board and keep this as the top edge of your hip rafter.
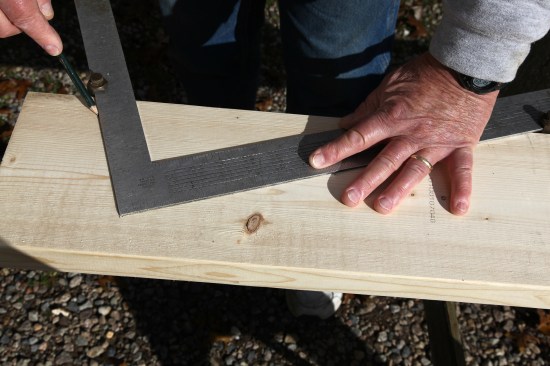
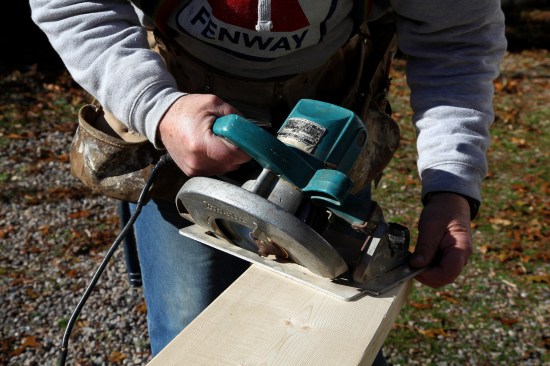
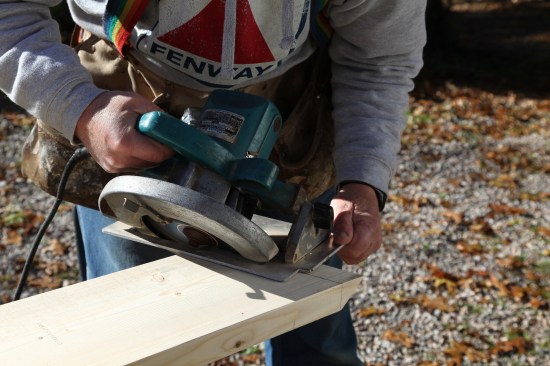
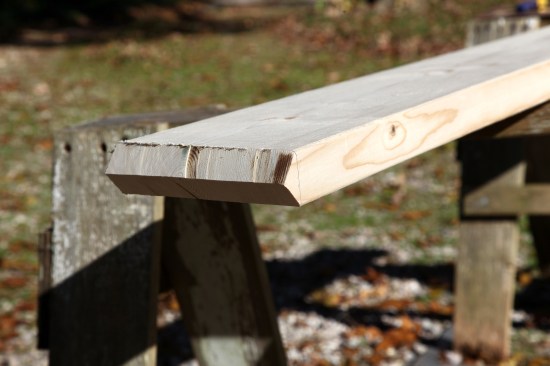
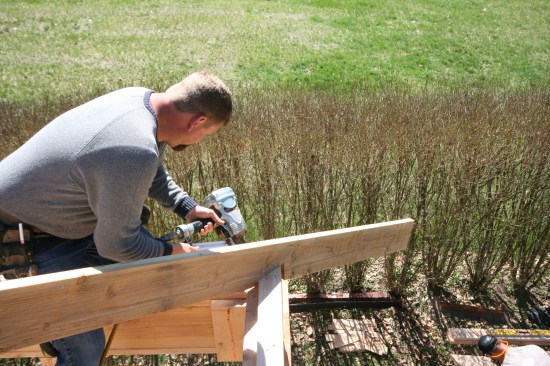
On one end of the stock, I cut a double 45° cheek cut along a plumb line for a 6:17 roof. To lay out this double cheek cut, I draw a plumb line on one side, square this line across the edge, flip the board over, and draw another plumb line on the opposite side. These define the short points of each cheek cut. After setting the blade angle on the saw to 45°, I cut all the way through the board from one side. (Because I am cutting the short point line, I keep the saw blade angled towards my offcut.) Then I flip the board over and cut from the other side. The cheek cuts should meet in the middle of the hip stock.
Next, a crew member holds the end of the tape on the short point of the cheek cut (at the top edge of the hip rafter) while I hold a pencil at my length measurement and trace a shallow arc across the width of the board. With the framing square set at the 6:17 angle, I slide the square up to the arc and mark the point where the HAP distance along the plumb side of the square intersects with the arc. That point is where the seat cut of the hip rafter starts, so I slide the square down and draw a level line to the edge of hip stock, using the “level” side of the square. (Note: The plumb cut for the birdsmouth has to be moved out to clear the plates and sheathing.)

Here a crew member draws a line half the thickness of the hip st…
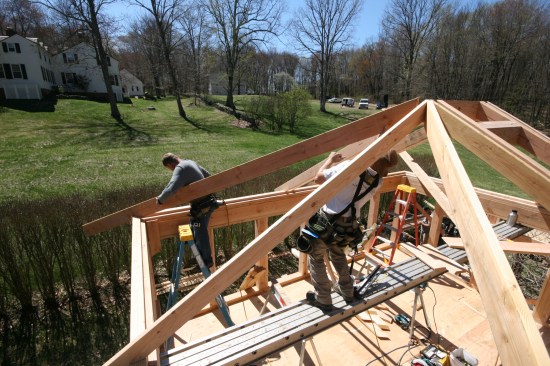
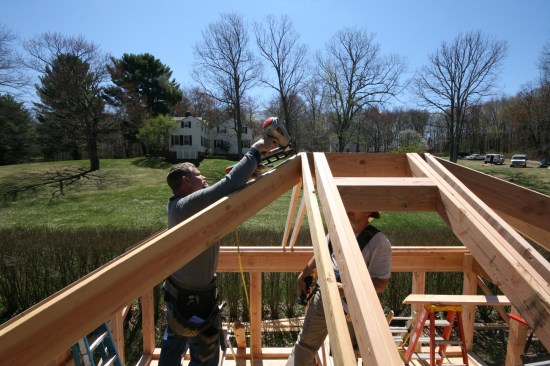
Install the Hip Rafter
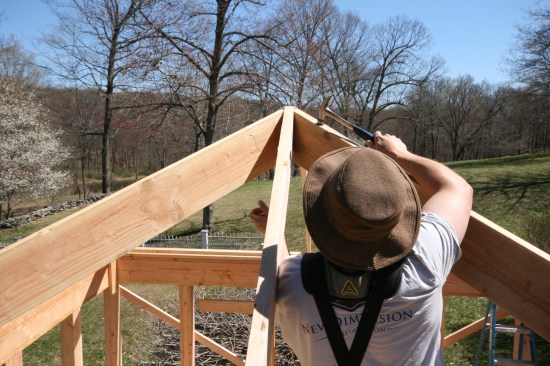
Recall that we drew lines on the plate at the corners when we took our measurement. Those are also our layout lines for placing the hip rafter. When we install the hip rafter, one crew member holds the bottom of the hip rafter on the layout line while another crew member sets the top end between the king commons and taps it down until the shoulders of the cheek cuts are flush with the tops of the king commons.
When the top is set, I make sure that the side of the seat cut is on the layout line, and then drive toenails to secure the hip to the plates on both sides. To secure the top of the hip in place, I drive nails through the king commons. If that isn’t possible, I drive a nail through the top of the hip and into the ridge. If everything is done properly, the roof planes from the king commons to the hips should be perfectly flat.
Next, I cut and install the jacks (see “Fast Jack Rafter Layout and Cutting,” Sep/17). When the jacks are in place, I extend a line from the tails out to the hip rafter from both directions and make plumb cuts at a 45° angle. I then project a line from the bottoms of the jack rafter tails to the hip and make a level cut to catch the corner of the soffit.
All photos by Roe Osborn