Whenever I’m asked what material is the best to use for a particular job, my answer is always the same: “The one that’s installed properly.” With building assemblies becoming more and more complex, industry technologies—adhesives, sealants, tapes, and weather resistive barriers—seem to be improving every day. And the choices out there all have something good to offer—if they are installed properly.
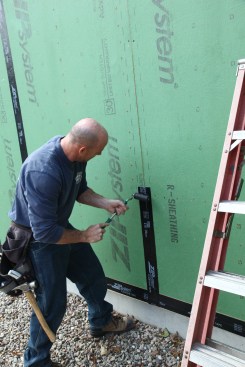
On a recent project, we chose to use Zip System R-Sheathing for the walls for a combination of the weather resistive barrier, air barrier, and exterior insulation. One of the keys to this material functioning successfully is the proper installation of the flashing tape that seals the joints between the sheets.
Trust the tape. Flashing tape comes in many different materials and configurations with many different properties, but installation for all of them is similar. There’s a correct sequence of steps to follow, including preparing the surface, applying the pieces of tape in the right order, and applying proper pressure after the tape is positioned. These tasks are not difficult, but they are important, ensuring that the tape will function correctly.
Truth be told, tape scares me—it’s not that I think the tape won’t work, but rather I worry that it won’t be installed properly. To ease my fears, I always reinforce my expectations with the builders I work with by specifying the details of the tape installation on all my drawings as an extra reminder.
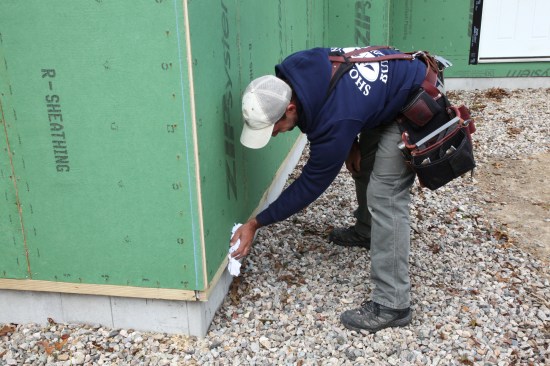
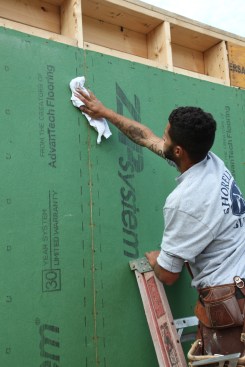
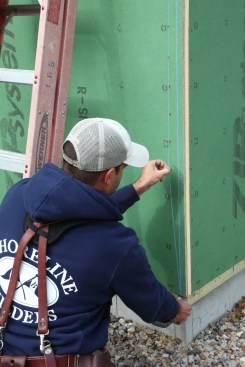
Prep the surface. One of the most important steps, but maybe the one most overlooked, in installing flashing tape is wiping the surface clean and making sure that it is completely dry. Jobsites can be dirty places, with sawdust and soil dust on just about every exterior surface, even though it’s not always visible. So the crew begins by wiping down every seam with a rag.
Wiping the surface should also remove any dampness from the sheathing. The crews I work with are strictly instructed to never install flashing tape if the surface is at all damp. Most often, wiping the dust off the surface also takes away any dampness, but on a foggy morning or if rain is imminent, the smart move might be waiting for drier conditions before applying the tape.


To ensure the best adhesion for flashing tape , always wipe down…
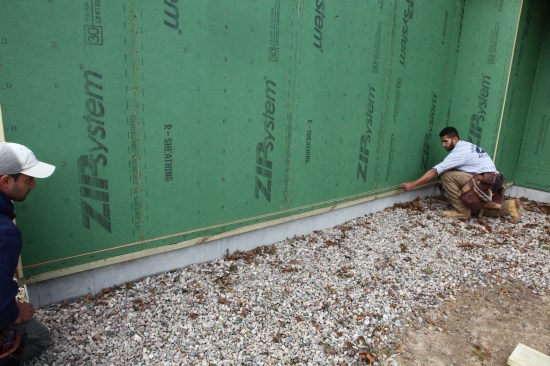
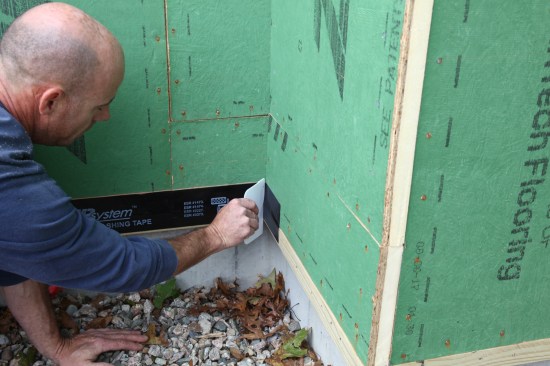
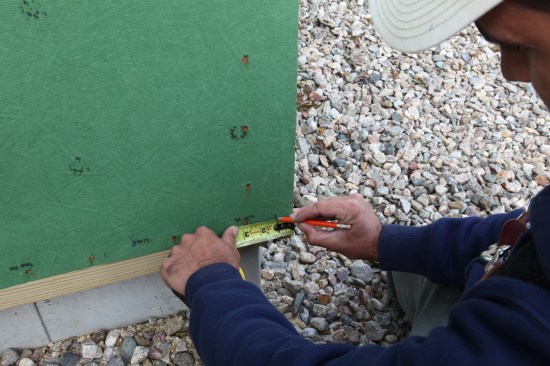
Start at the bottom. With the 1 1/2-inch-thick Zip R-Sheathing, I don’t like to leave the bottom of the panel exposed. The panel insulation is dry and warm, and creatures such as insects and rodents can burrow into it quite easily. The solution here was to install a treated 2×2 ledger that we bedded in acoustical caulk and attached to the bottom sill plate. We then set the panels on top of the 2×2 to close off the bottom edge.
The ledgers would go a long way toward keeping the critters out, but we needed to seal the bottom joint between the panels and the ledger to maintain the integrity of the WRB. To avoid a reverse lap, that bottom joint had to be done first. After wiping the surface, the crew snapped lines on the sheathing to guide the placement of the tape for the proper overlap.
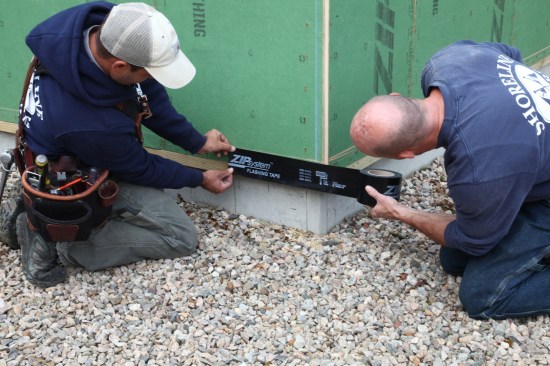
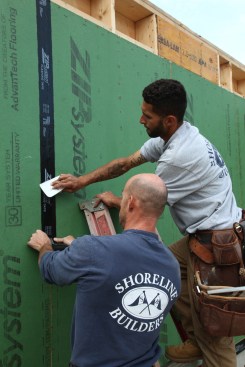
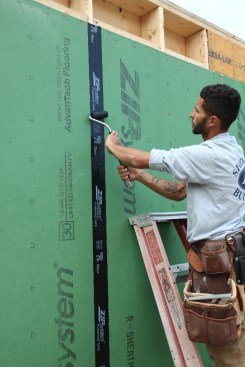
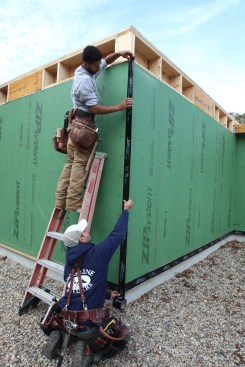
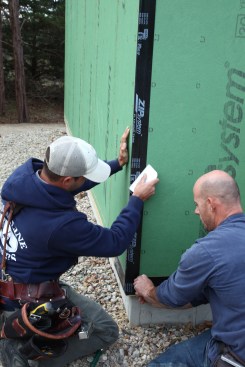
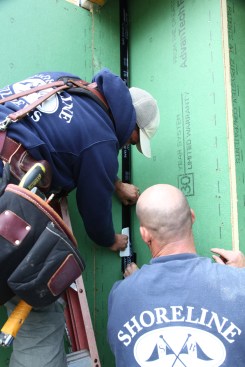
While one person can install flashing tape without help, this crew always works in pairs, with one crew member unrolling the tape and holding it out straight while another sets the tape in its proper position, applying initial pressure to adhere the tape (more about the pressure later in the article). The person unrolling the tape can also add tension by stretching the tape, something that manufacturers recommend to enhance the tape’s performance.
The crew installs the tape along their snapped lines. At inside corners, the crew uses a plastic spreader to push the tape into the corner. To make the tape easier to work with, the crew cuts it with 4 to 6 inches extending onto the adjacent wall. When that length is adhered properly, a new length overlaps the previous length from the corner. Treated wood is a poor surface for tape to adhere to, so the crew hammer-tacked the bottom of the tape to the ledger to help it stay put.
As with all tape applications, installation of tape on vetical j…
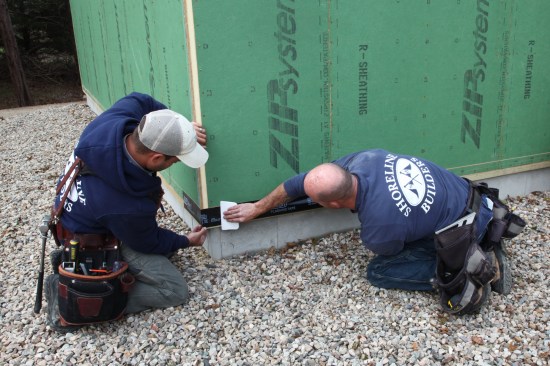
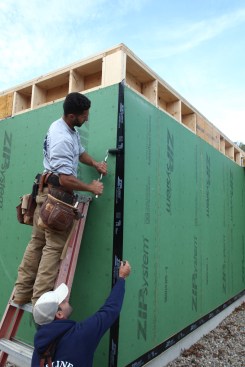
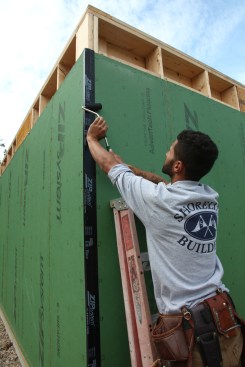
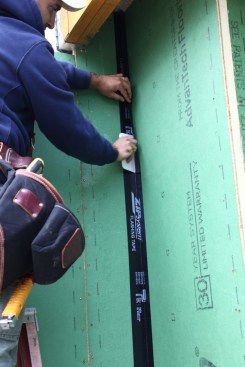
Applying pressure. Next, the crew turns its attention to the vertical joints. As before, the crew first wipes all the joints clean to ensure they are clean and dry. Zip Sheathing has guidelines printed along the edges to position the tape. Starting from the top, one crew member unrolls the tape, keeping it on the lines while the other crew member applies initial pressure.
Like most tape, flashing tape uses pressure-sensitive adhesive to make it stick to surfaces. Adhering the tape is usually a two-step process. First, pressure is applied to position the tape; this is usually done with a hand. The OSB surface of the Zip panels is textured, and this initial pressure is enough to make the tape stick to the high points of the texture. Hand pressure keeps the tape on the lines, but it’s light enough that the tape can be unstuck and repositioned if absolutely necessary.
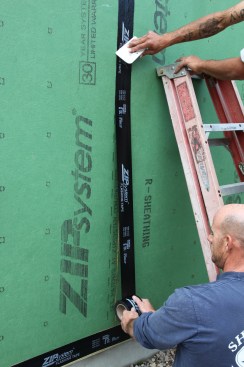
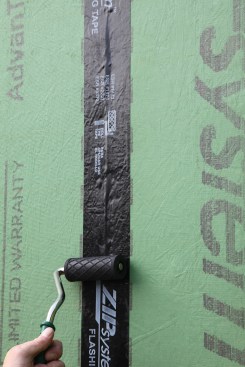
The second pressure pushes the tape into the irregularities of the sheathing surface. The engineers I’ve spoken with call this step “wetting”; the tape’s adhesive actually flows to make contact with the entire topography of the sheathing surface. This pressure marries the tape and the surface of the panel into a strong, irreversible, and long-term bond.
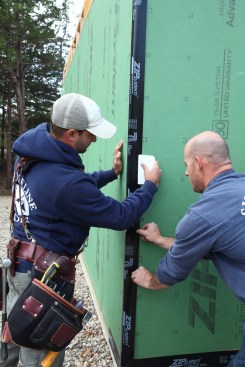
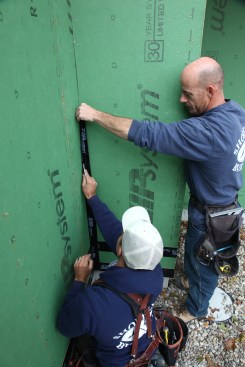
How much pressure is enough? The recommended method for applying this pressure is with a roller. But most rollers are tough to carry easily in your tool belt, and applying proper pressure at the top of a two-story ladder can be tough to do safely. Instead, our crews often use plastic spreaders, which also work fine providing you apply enough pressure.
After wiping off the corner, the crew marks off 1 inch, the mini…
These spreaders are also great for working out any air trapped under the tape, and the edge is handy for tucking the tape into inside corners. While it’s possible to develop enough pressure with one of these spreaders to properly adhere the tape, I always recommend finishing the installation with a roller whenever possible. One indication that enough pressure has been used is that the texture of the sheathing telegraphs through the tape. Recently, Huber came out with a new roller, with a raised “Z.” When proper pressure has been applied, the roller leaves an embossed Z on the tape, taking the guesswork out of rolling the tape.
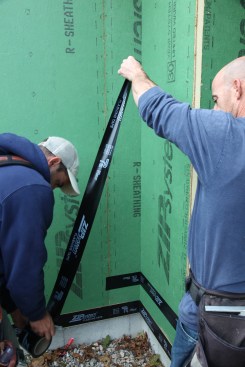
Corners—both inside and outside—can be the most challenging part of any tape installation and are where a tandem crew is most valuable. On outside corners, the crew begins by snapping a line 1 inch from the corner, which is the minimum coverage allowed by the manufacturer. The crew aligns the tape with the snapped line and adheres that side first. Then starting in the middle of the joint, they carefully wrap the tape around the corner and adhere it to the adjacent side. One of the crew stretches the tape out tight while a second person uses the spreader to adhere the tape, working out any air bubbles at the same time.

The sheathing was installed in pieces at this inside corner. The…
Before taping the inside corner, the crew had to tape a horizontal joint where the sheathing had been pieced in. The tape for horizontal joints like this one should end inside the tape line of a vertical joint, where it will be completely captured.
Shorter lengths of tape work best for inside corners. After cutting a length of tape, the crew folds it in half lengthwise. Then, working from bottom to top to lap the tape correctly, one of the crew keeps the tape folded and pulled tight, while the other adheres the tape, pushing it into the corner with the plastic spreader. When the tape is adhered to one wall, the crew uses the spreader to stick the adjacent side in place. Then they cut and install successive strips the same way, overlapping the strip below by a few inches.