The Best Air-Sealing Tips and Tricks for Homebuilding and Remodeling
Use specialized tools and materials and a methodical approach
15 MIN READ
An intentional 1/4-inch gap below the drywall on exterior walls is easily filled with canned foam. In a retrofit project, it’s a good idea to protect the finish floor with paper or tape first.
Drywall corners can be sealed with caulk before application of c…
Drywall corners can be sealed with caulk before application of corner bead and joint compound.
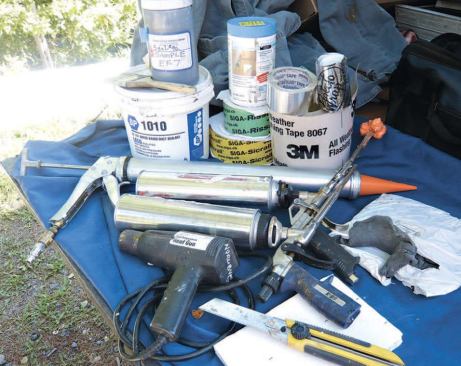
Depending on the situation, air-sealing can call for caulk, cann…
Depending on the situation, air-sealing can call for caulk, canned foam, tape, sheet material, or a combination of materials. The author’s jobsite arsenal covers all the bases.
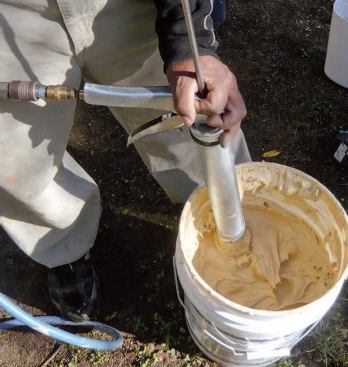
High-performance bulk caulk, applied with refillable pneumatic c…
High-performance bulk caulk, applied with refillable pneumatic caulking guns, is a useful alternative to canned foam for many applications.
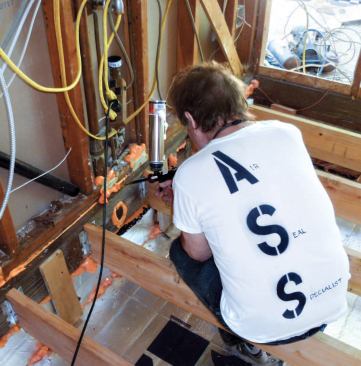
If air-sealing is going to be done right, someone has to sweat t…
If air-sealing is going to be done right, someone has to sweat the details. The author’s shirt leaves no doubt as to who that person is.
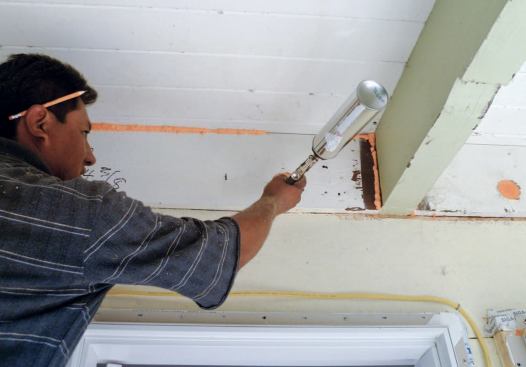
Small-diameter pipe penetrations through drywall or plywood are …
Small-diameter pipe penetrations through drywall or plywood are efficiently sealed with two short pieces of tape.
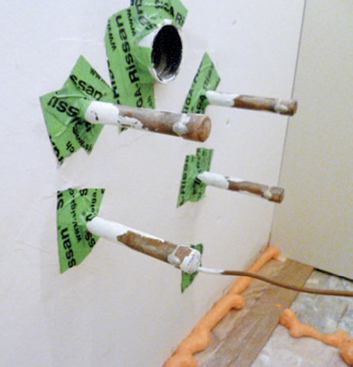
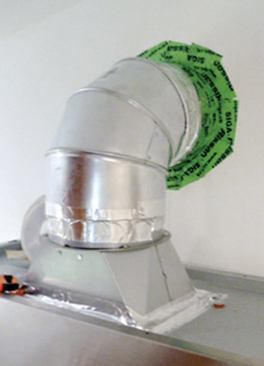
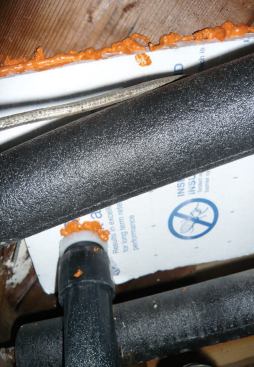
Larger pipes, like this rangehood exhaust vent, may require a do…
Larger pipes, like this rangehood exhaust vent, may require a dozen pieces or more.
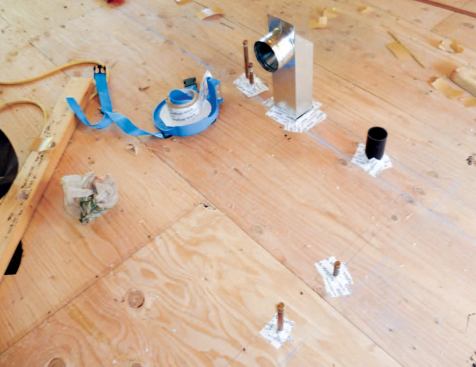
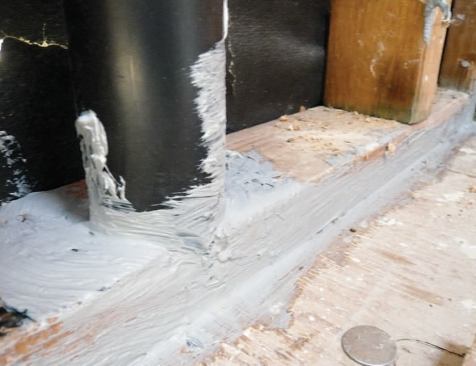
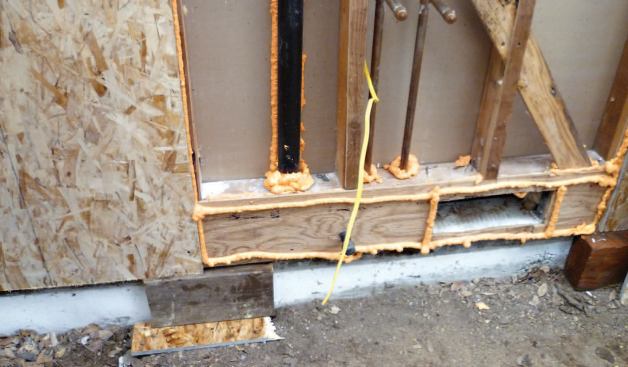
Floor penetrations that will be enclosed in a partition wall are…
Floor penetrations that will be enclosed in a partition wall are best sealed at the level of the subfloor, rather than where they pass through the plate.
In retrofit applications where that’s not an option, air leaka…
In retrofit applications where that’s not an option, air leakage under the plate can be reduced by sealing the area with duct mastic.
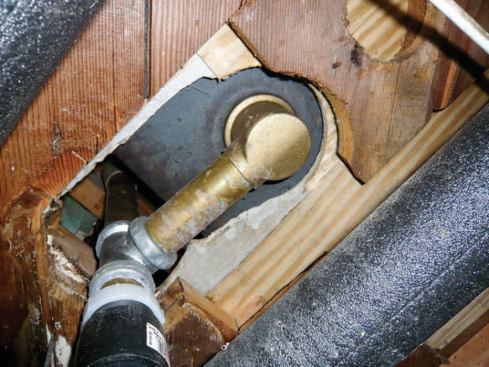
Floor openings around bathtub P-traps can leak as much air as an…
Floor openings around bathtub P-traps can leak as much air as an open window. They’re best closed off with a piece of polystyrene — notched on one edge to fit around the pipe — set in a fresh bead of canned foam.
A small filler piece at the drainpipe is foamed in place to comp…
A small filler piece at the drainpipe is foamed in place to complete the seal.
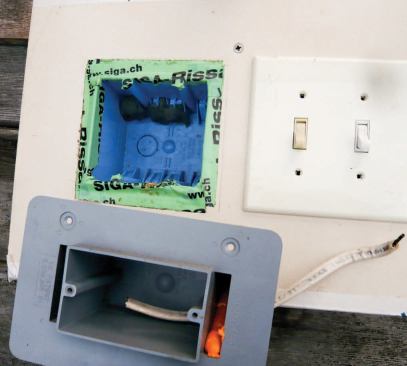
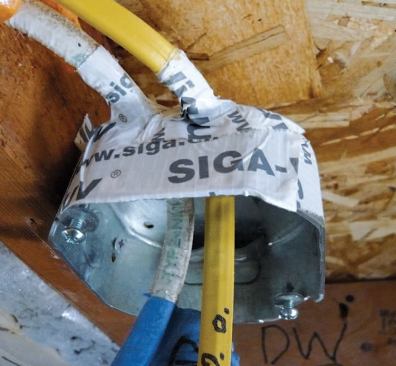
Conventional plastic electrical boxes can be sealed to partition…
Conventional plastic electrical boxes can be sealed to partitions by sticking a strip of tape against each of the inner walls of the box and folding the portion that extends beyond it against the drywall. The width of the flange has been sized to fit under a oversized outlet cover, or "goof plate." The manufactured airtight box below is easier to seal but expensive; for economy, the author uses this type of box mostly on outside walls.
Leaky metal boxes exposed in the course of a retrofit can be sea…
Leaky metal boxes exposed in the course of a retrofit can be sealed to the back of the drywall with tape.
Leaky metal boxes exposed in the course of a retrofit can be sea…
Leaky metal boxes exposed in the course of a retrofit can be sealed to the back of the drywall with tape.
Where a new metal box is called for, tape provides a more reliab…
Where a new metal box is called for, tape provides a more reliable seal around the cable than foam, which is prone to cracking when the electrician installs the fixture or receptacle.
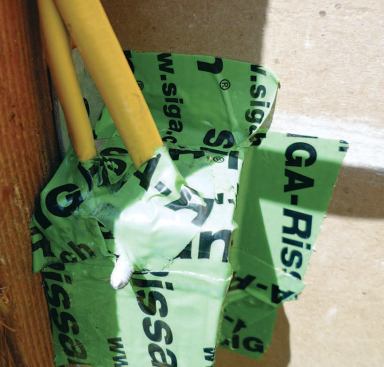
A scrap of pre-drilled plywood or OSB can be used to create an a…
A scrap of pre-drilled plywood or OSB can be used to create an air-sealing “sandwich” where closely spaced pipes or wires penetrate wall framing at a plate.
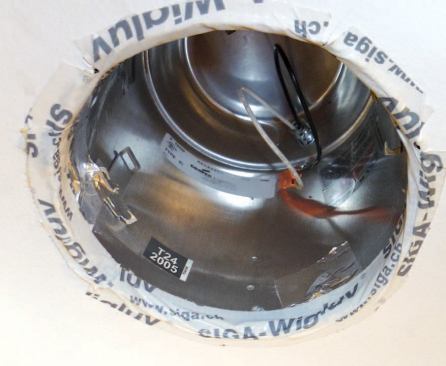
A strip of foil tape seals an air leak in an "airtight"…
A strip of foil tape seals an air leak in an "airtight" ceiling can.
The much larger — and often overlooked — leak between the fi…
The much larger — and often overlooked — leak between the fixture and the ceiling drywall has been sealed with tape.
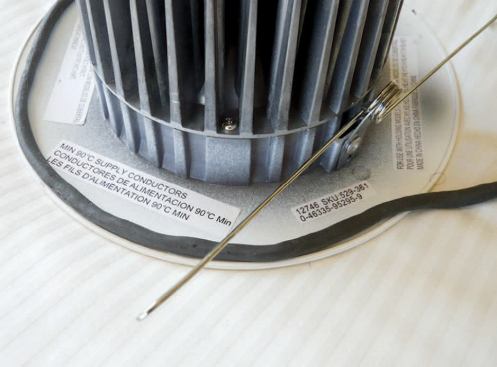
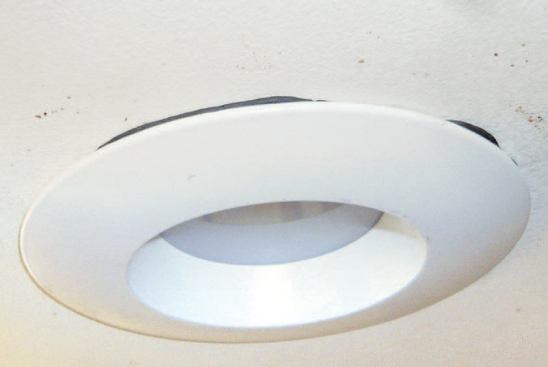
On a can with an integral trim ring that prevents the use of tap…
On a can with an integral trim ring that prevents the use of tape, a rolled "shoelace" of duct putty forms a seal.
Excess putty that squeezes out is removed later.
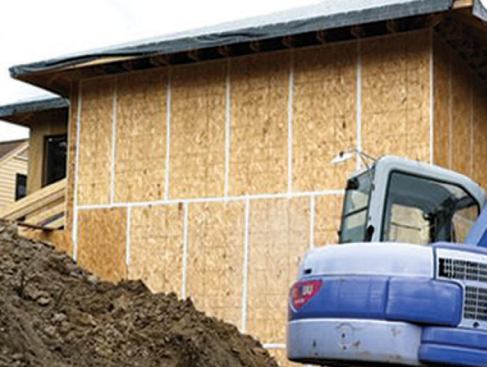
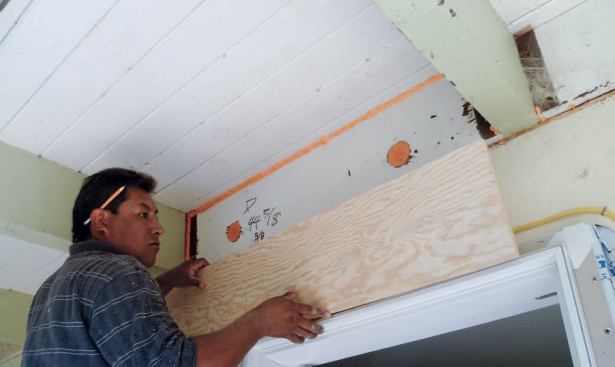
When wall sheathing is set in beads of polyurethane foam, tempor…
When wall sheathing is set in beads of polyurethane foam, temporary blocks at the base make it easier to position the sheet without smearing the sealant.
For extra insurance, seams between panels are also sealed with t…
For extra insurance, seams between panels are also sealed with tape.
An intentional 1/4-inch gap below the drywall on exterior walls …
An intentional 1/4-inch gap below the drywall on exterior walls is easily filled with canned foam. In a retrofit project, it’s a good idea to protect the finish floor with paper or tape first.
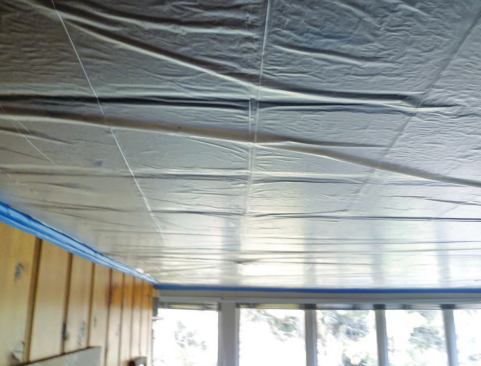
Warm air venting from the attic above sucks a protective plastic…
Warm air venting from the attic above sucks a protective plastic sheet against this single-layer T&G ceiling, illustrating its extreme permeability to moving air.
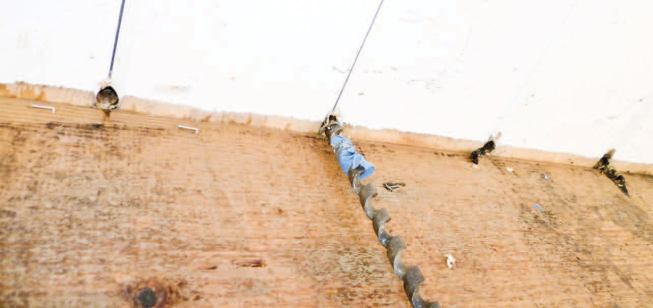
To stop air penetration at the gable overhang of a T&G cathe…
To stop air penetration at the gable overhang of a T&G cathedral ceiling, a 3/4-inch bit is used to bore holes where the boards cross the outermost pair of rafters.
The holes are then injected with foam.
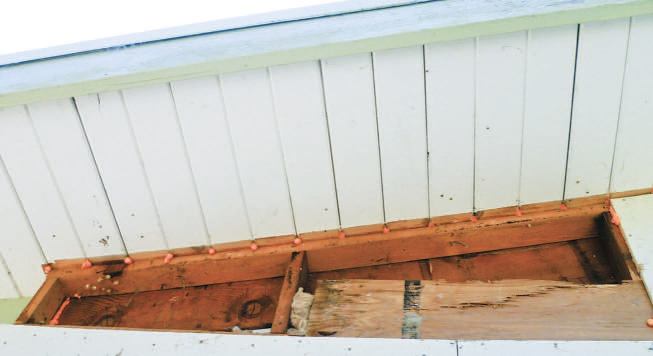
Plywood bedded in polyurethane foam seals air leaks between bloc…
Plywood bedded in polyurethane foam seals air leaks between blocking and rafter tails. A stucco wall finish will cover the raw bottom edge of the plywood. A nearby rafter bay has been sealed with tape instead of foam — a time-consuming but more positive solution.
The excess foam that marks an injection hole for dense-pack cell…
The excess foam that marks an injection hole for dense-pack cellulose will be trimmed off, and the tape covered with a plywood trim piece.
Several years ago, when I first became interested in the benefits of air-sealing, I enrolled in a Building Performance Institute (BPI) training program that taught me the basics. I later learned a lot more while working on a Passive House project, which called for air-sealing to a very high standard (see “Building a Simple Passive House,” 8/11). I now consider air-sealing to be a routine part of every remodeling and new-construction project, and I have a good-sized bag of tricks at my disposal that allows me to deal with a wide range of situations. Some builders may worry that aggressive air-sealing can lead to a building that’s “too tight,” but that’s looking at the problem the wrong way. Rather than deliberately building a structure that leaks uncontrolled amounts of air, I think it makes more sense to build as tight as you can and provide fresh air with a correctly sized, balanced ventilation system.
And while air-sealing isn’t a glamorous or sexy job – no one is going to drive by the house you just completed and say, “Wow, they did a beautiful job air-sealing that envelope” – it has an enormous bearing on both a home’s energy efficiency and the comfort of its occupants. If you are trying to sell green building, energy reduction is about as green as it gets.
Someone has to do it. Perhaps the single most important lesson I’ve learned in the past few years is that you can’t count on crew members or subs to do their own air-sealing as the job moves along. There has to be someone on the job who oversees all of the trades to make sure the air-sealing gets done, and who is willing to give this role the focus and attention to detail it requires.
On my projects, that person – known to my crew as the air-seal specialist, or ASS – is me. I do as much of the air-sealing myself as I can, working just ahead of or behind others on the site as the situation demands. Doing the job correctly calls for an unbending attitude: I recently had to make one member of my crew – an experienced guy who’s been with me for years and should have known better – remove a just-installed kitchen cabinet when he admitted that he hadn’t sealed the pipe penetrations behind it. Neither of us was happy about it, but the result was a tighter, better house.
Testing and Retesting
I don’t think it will be long before a blower door is as much a fixture in the back of every good builder’s truck as a circular saw and laser level. Unless you know how much a building leaks before you start, you’ll never know how much progress you made when you are done. Solid before-and-after figures mean more to clients than a generalized assurance that the building has been air-sealed.
I perform a blower-door test on all remodeling projects before any work has been done. Once the house reaches 50 pascals, I might occasionally use a smoke pencil to home in on air leaks, although the smoker becomes less and less necessary as you gain experience. (From the standpoint of finding leaks, it doesn’t matter whether the pressure is positive or negative, although positive pressure is a better choice if you’re concerned about sucking mold, dust, or fumes into the living space.)
But the smoke pencil has another use. I like to hand one to the homeowners at the beginning of a remodeling project and go through the house with them looking for leaks. It’s easier to sell the job once the client understands just how much expensively heated or cooled air is escaping out the holes. In many cases you can actually hear or feel the air whistling through outlets, baseboards, windows, light cans, plumbing penetrations, and other common problem areas.
I do a second test after rough-in of wires, vents, and plumbing but just before insulation. That way, I can still access most of the leaks if additional work is needed. At this stage, a smoke pencil is very useful to find small remaining leaks. I perform a final test upon completion of the job.
In new construction, I ordinarily perform four separate blower-door tests: after the shell is closed in and the windows are installed; after rough-in and initial air-sealing of the plumbing, electrical, and other mechanicals; after the drywall has been hung and taped; and, finally, when the job is done.