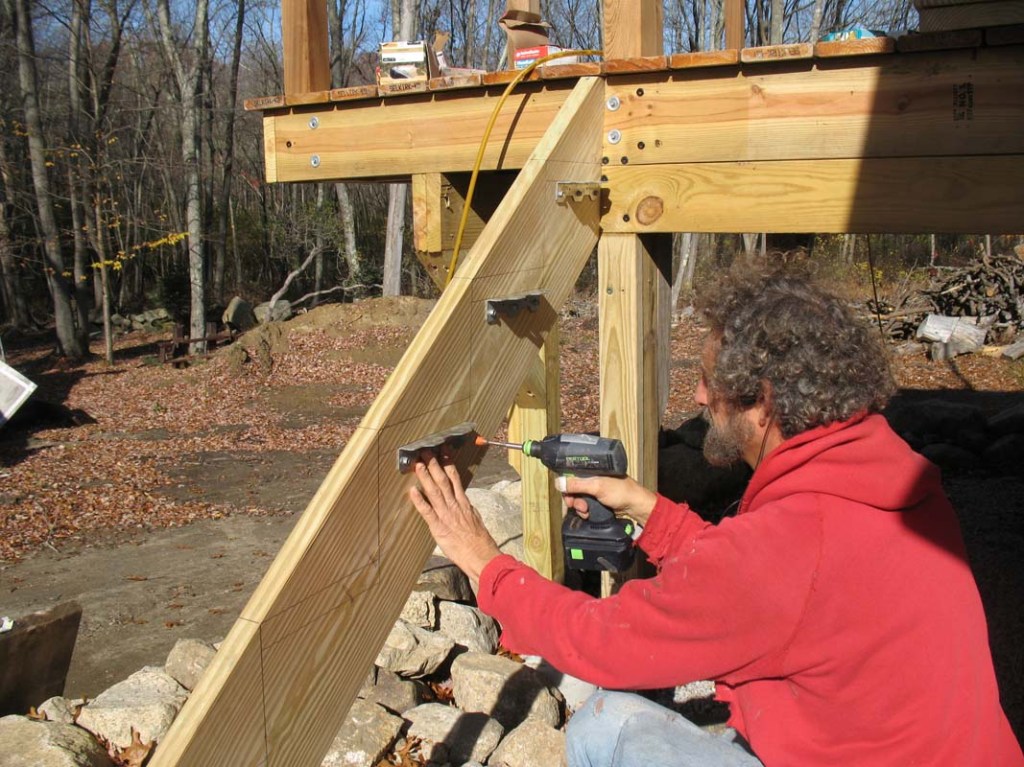
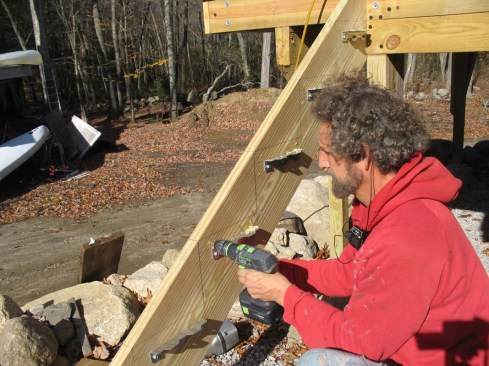
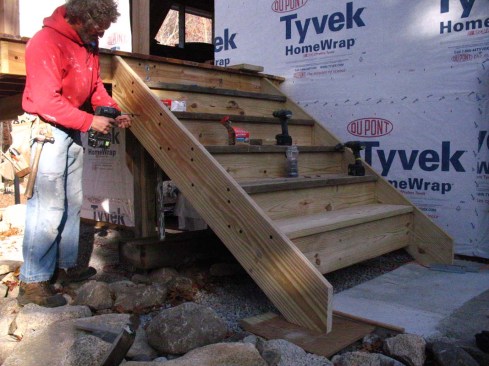
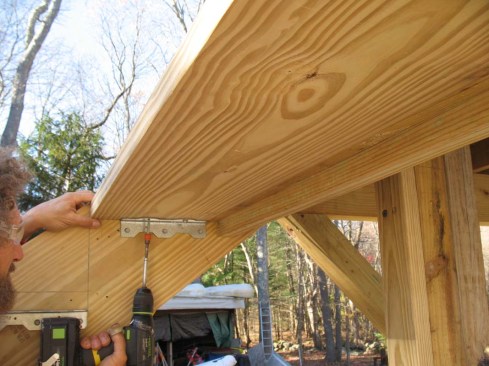
I prefer to support the head of stairs independently of the deck…
I prefer to support the head of stairs independently of the deck frame to avoid overloading an end joist or a rim joist. Here a single 2×6 is screwed to 4×4 posts and supported by 2×4 jacks resting on top of footings. The 2×6 is in plane with and provides additional support to the end joist of the deck.
Mike Guertin
The layout starts the same as when marking out for cut stringers…
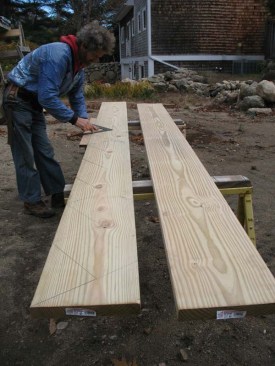
The layout starts the same as when marking out for cut stringers with determining the overall height from top of finish deck to grade landing at the point where the bottom step will fall.
Mike Guertin
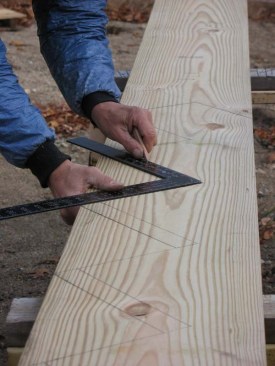
Stringer calculation and layout is the same as for marking cut s…
Stringer calculation and layout is the same as for marking cut stringers (see PDB …… URL) I draw a heavy line for the tread mark and a light line for the riser mark. Since the marks aren't cut out and the actual position of the risers will be 3/4 in. behind the stringer nose, the light riser lines can be erased later. I lay out the stringers so the tread mark is the actual top of the finish tread – different than cut stringers where the tread mark is the cut line. A 1x strip of wood is screwed to the framing square matching the tread and riser heights – I find this is a more precise way to mark stringers than stair gauges or placing the framing square on the stock by eye.
Mike Guertin
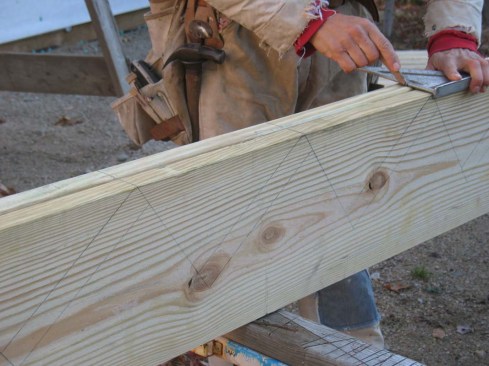
After the primary stringer layout I make a second pass to scribe…
After the primary stringer layout I make a second pass to scribe the bottom lines for the treads using the 1 1/2 in. tongue of a framing square. This lower line is where the top of the tread brackets will align to.
Mike Guertin
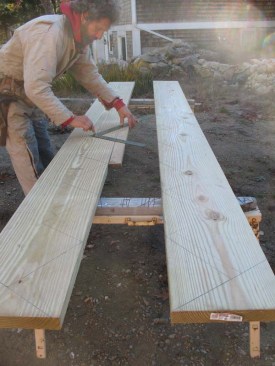
To transfer the layout onto the mating stringer I square a line …
To transfer the layout onto the mating stringer I square a line where each of the riser/tread marks meet along the top edge of the pattern stringer.
Mike Guertin
Then I align the pattern stringer with its mate flush across the…
Then I align the pattern stringer with its mate flush across the top edge and transfer the edge marks to the mate.
Mike Guertin
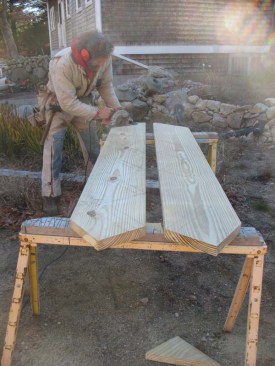
I face the two stringers to mirror one another and use the frami…
I face the two stringers to mirror one another and use the framing square to mark the mate with the light riser line and the top of tread and bottom of tread lines. Positioning the stringers to mirror one another ensures that I don't mark the same face on both stringers and end up having to remark one.
Mike Guertin
The top stringer cut is one straight line with the top ear clipp…
The top stringer cut is one straight line with the top ear clipped for the decking to pass over. I cut the bottoms at both the heal line and the riser line. Cutting the riser line is optional – the stringer can be left to run out onto the landing but I think it looks better terminating with the nose of the tread.
Mike Guertin
Mike Guertin
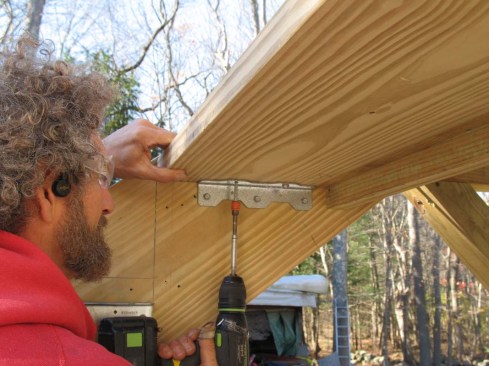
After setting the brackets, pilot holes are drilled for structur…
After setting the brackets, pilot holes are drilled for structural screws to be driven through the outside of the stringers and into the end of the treads to help keep the assembly tight.
Mike Guertin
Each tread is positioned between the stringers and the structura…
Each tread is positioned between the stringers and the structural screws are driven through the tread angles and into the treads.
Mike Guertin
Mike Guertin
Mike Guertin
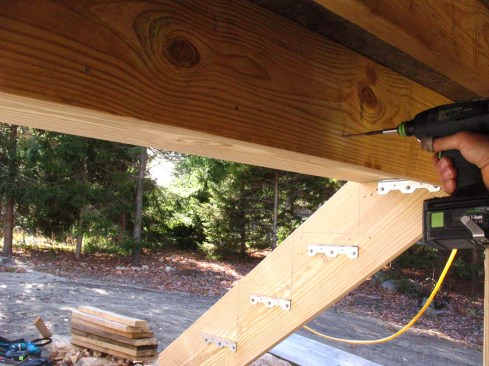
Five inch flat head structural screws are driven through the str…
Five inch flat head structural screws are driven through the stringers and into the treads and risers.
Mike Guertin
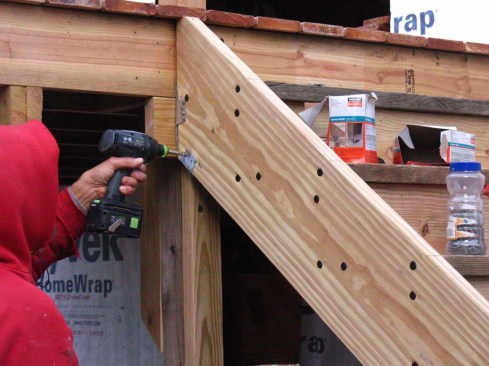
Finally the stringers are fastened to the rim board and header u…
Finally the stringers are fastened to the rim board and header using stair stringer connectors and structural connector screws.
Mike Guertin
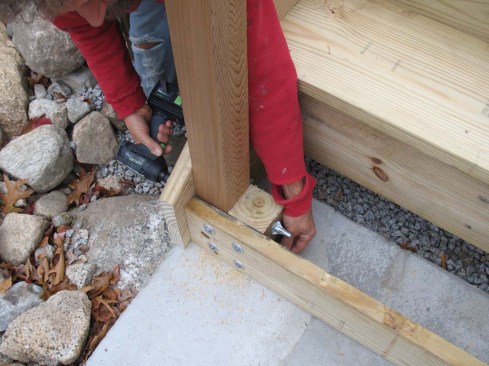
The bottom guardrail posts on a set of stairs need to be secured…
The bottom guardrail posts on a set of stairs need to be secured well to prevent them from becoming wobbly over time. Bracketed stringers are taller and provide more attachment surface than cut stringers so they tend to be more stable front to back. But to keep the posts from moving in and out (side to side?) I use a block and screw system for deck guard posts I first learned from FastenMaster about 6 years ago using ThruLok nutted screws. The 4×4 posts and blocks cut the length of the riser board height are ThruLok'd to the structural riser. Longer ThruLok screws are driven through the stringer, post and block.
Mike Guertin
The bottom tread is notched around the 4×4 posts and screwed in …
The bottom tread is notched around the 4×4 posts and screwed in place like the other treads.
I don’t see many deck stairways built with bracketed stringers, but they’re a good alternative to notched stairs in certain situations. The design is similar to housed stringers–where dadoes are routed into the framing to provide shoulders for the treads and riser boards to rest in–but is simpler to build. And bracketed stairs are stronger than stairs with notched stringers, because the 2×12 stringers aren’t weakened by notches that effectively leave only 2x6s to support the loads on the stairs.
I like to use solid stringers and brackets whenever a design calls for wide stairs or long spans. Notched stair stringers have a limited unsupported run of 6 feet, according to the AWC’s Prescriptive Residential Wood Deck Construction Guide, or DCA6-12. Compare that with solid stringers, which can span more than twice that distance–13 feet 3 inches–without intermediate supports. And while DCA6 limits tread width to 36 inches, that can be increased substantially by installing structural risers. Adding those also satisfies the building code requirement to block openings that are greater than 4 inches–including underneath the treads–when the stair is more than 30 inches above grade.
Metal Brackets
On this project, the stairs access a landing for a storage building, so I built them using ordinary pressure-treated lumber rated for ground contact (AWPA UC4A). For a more finished look, the stringers, treads, and risers could be made from any finish-grade naturally decay-resistant lumber, such as cedar or a suitable tropical hardwood. The treads are 2x12s that I ripped down to 10 1/4 inches. Because the risers are structural to help support the 4-foot span of the treads, I used 2x10s for them.
Mike Guertin
DCA6 provides a tread-support detail that features 2×4 PT cleats fastened to the solid stringers, but on this project I used stair angles. While stair angles look like ordinary angle brackets, they are made of much- thicker-gauge steel and are stronger. Stair angles are made by both Simpson Strong-Tie (TA9Z & TA10Z) and MiTek/USP (SCA9-TZ & SCA10-TZ) and are weight-rated depending on how many structural screws or lag screws are used to mount them to the stringers.
Another option is to use EZ Stairs metal support brackets, which have a right-angle design that supports both the treads and the risers. According to the manufacturer, its system can be used with a single pair of stringers to build exterior deck stairs that are as wide as 7 feet.
Mike Guertin
Framing
To avoid overloading an end joist or a rim joist, I prefer to support the head of the stair independently of the deck frame. On this project, I screwed a 2×6 to the 4×4 posts; the 2×6 is also supported by a pair of 2×4 jacks that are fastened to the posts and that bear on the footings that support the posts. The 2×6 is in plane with and provides additional support to the end joist of the deck (see slide show).
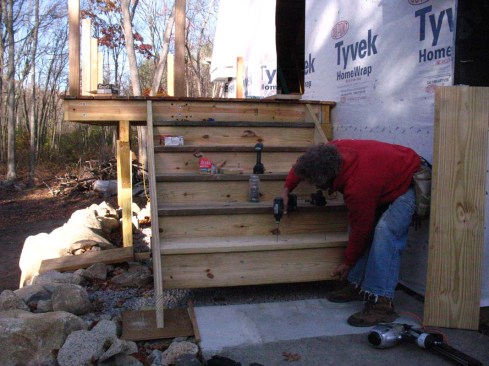
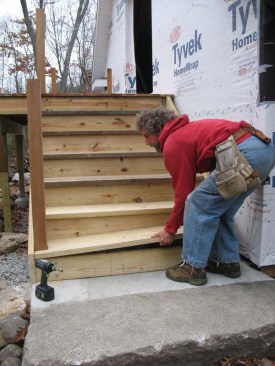
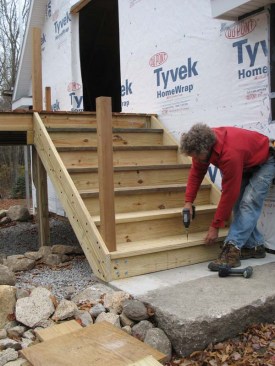
Even though the tread brackets are screwed to the inside face of the stringers, I also like to drive 5-inch structural screws through the outside face of the stringers and into the treads and risers to tighten up the stair assembly. Here, the stairs run next to a wall, so I assembled the staircase about a foot away from its final position, then slid it into place after it was completed.
This technique leaves a lot of screw heads exposed, which was not a problem on a set of utility stairs like this. I used black HeadLOK flat head structural screws, which probably stand out more than would Simpson Strong-Tie’s SDWS screws, which have tan heads. Another option might be to trim the stringers with separate skirtboards that conceal the fasteners (though this would present other trimming challenges).
Mike Guertin is a builder and remodeler in East Greenwich, R.I., and frequent presenter at JLC Live and DeckExpo. You can follow him on Instagram @mike_guertin.