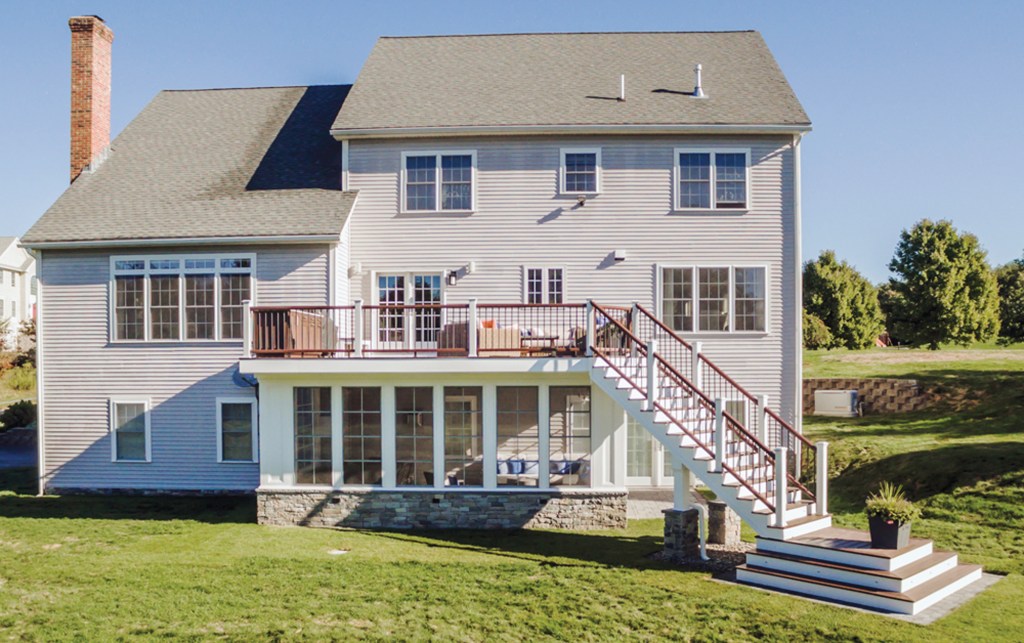
When the clients on this project first contacted us, they were interested in replacing their old, elevated pressure treated deck with one that would allow them to optimize the use of their yard and beautifully finished basement. One design goal was to have a small outdoor kitchen on the upper level for al fresco dining when the weather was nice, and a dry, weathertight space below the deck for dining and entertaining when the weather turned too hot, too cool, or too wet.
The clients were also looking for some flexibility. For example, one option we discussed was a roof over the second level, which would require beefier footings and framing. They also expected to expand their outdoor living options at some point with the addition of an inground pool and so wanted a staircase that projected out from the deck, with dry storage underneath.
Steel Framing
Like most of our projects, this deck is supported by helical piles. After we deconstructed the original deck, our GoliathTech sub installed the piers according to our layout.
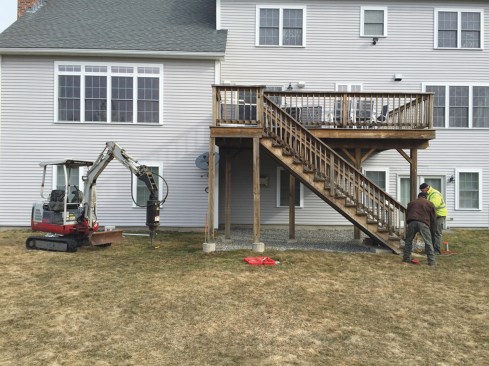
While workers dismantled the original upper level deck, helical pile footings were installed for the new deck.
In the area where we work, the company’s 1 7⁄8-inch-diameter helical piles are OK for most residential work, but we typically specify 2 3⁄8-inch-diameter piles, which have about an 8,000-pound bearing capacity. On this project, however, because the clients expressed an interest in adding a roof to the deck and because of the added weight of the outdoor kitchen, we offered them an upgrade to 2 7⁄8-inch-diameter piles, which have a bearing capacity of about 13,725 pounds. They decided that the small cost increase for the larger piles was worth the upgrade.
Later, after we had reframed the new deck, we removed the old concrete piers. Typically, we pull old piers out of the ground with an excavator, but when we can’t remove them for some reason (such as limited site access), we break them off below grade and bury them.
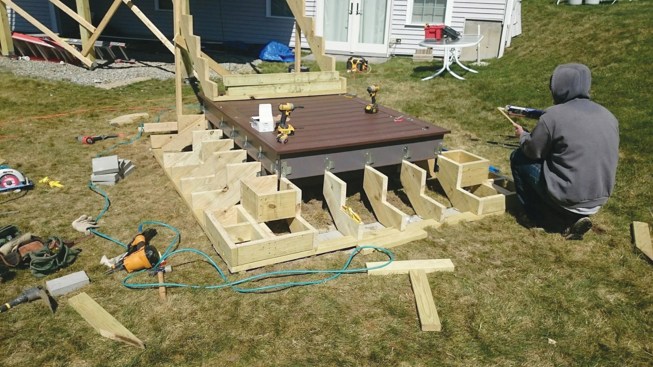
We used Trex Elevations light-gauge steel components to frame the deck. This is our preferred substructure system, due to the consistency of materials and the greater span capabilities of steel framing. We supported the steel framing with 6×6 PT posts that bear on the helical piles.
Because of the added weight of the outdoor kitchen components and the furniture that the clients planned to use on the deck, we doubled up the single Elevations 2×8 galvanized steel box beam that we would have normally used to support the joists on a deck this size. This upgrade also gives the clients future design flexibility in case they decide to add a roof or other enhancements to the upper deck.
We clamped and bolted the two box beams together, then fastened them to the wood framing with pairs of Simpson Strong-Tie AC6 post cap connectors and coated structural screws.
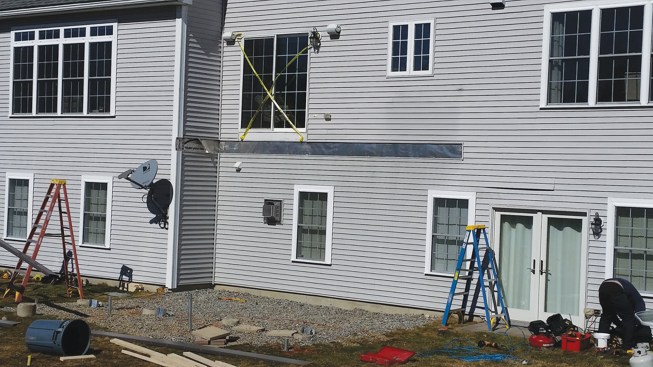
After removing the existing deck and installing new helical piles, workers started pulling back the siding in order to install an expanded deck ledger for the larger deck.
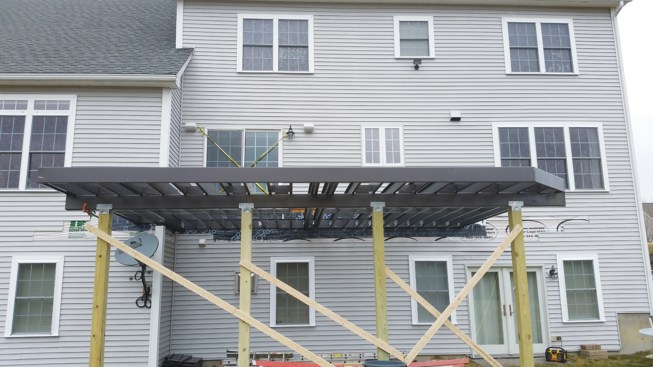
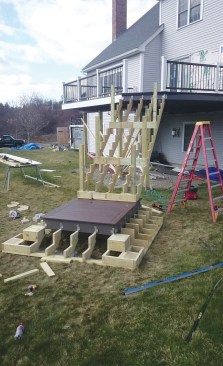
The new deck was framed with Trex Elevations light-gauge steel, supported by 6×6 PT posts that bear on the helical piles. On the right-hand outside corner of the deck, the framing has been clipped at a 45-degree angle to accommodate the stairs leading to the upper level.
Waterproofing
To create the dry space underneath the deck, we installed a Trex RainEscape system, which consists of proprietary downspouts, 20-mil trough material, and compatible flashings, single and double-sided tapes, and sealant. We always install the troughs to have the maximum amount of fall from one end of the joists to the other, which increases the velocity of the water flow and helps keep the troughs clear of organic debris.
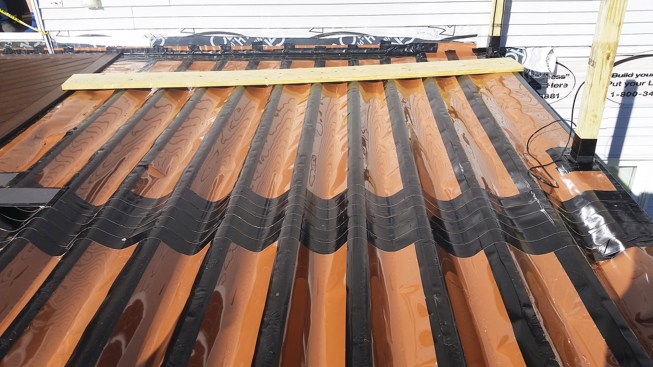
To keep the area below the deck dry, workers installed a Trex RainEscape under-deck drainage system.
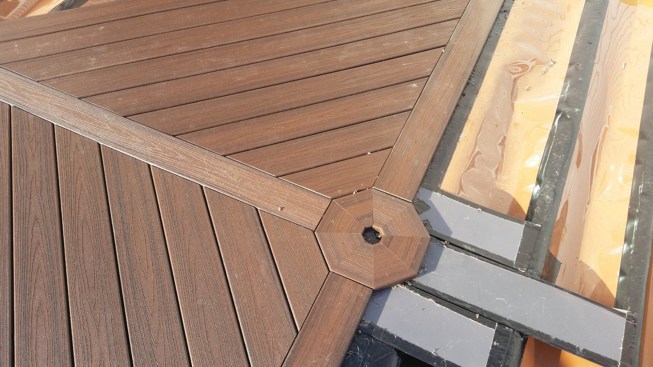
Wherever we know we are going to have additional fastening, such as where there will be a decking pattern or an inlay, we install plenty of sealing tape to ensure there is a great seal between the frame and deck boards. In this case, we applied the tape where we would install the blocking and divider boards used to create the deck’s octagonal center inlay and diagonal decking pattern. Afterwards, we carefully water-tested the installation; we need to make sure the drainage system is 100% watertight every time.
After we ran the low-voltage wiring for the deck lighting system and were satisfied that we hadn’t pierced the waterproofing troughs, we installed the Trex decking and composite railing. We bolted 4×4 guard posts to the steel framing prior to installing the decking, then finished the posts with composite post sleeves. To complete the low-maintenance rail system, we installed contrasting composite rails and round aluminum balusters.
Extra courses of waterproofing tape underneath divider boards and over the blocking needed for the octagonal inlay protect the troughs from damage.
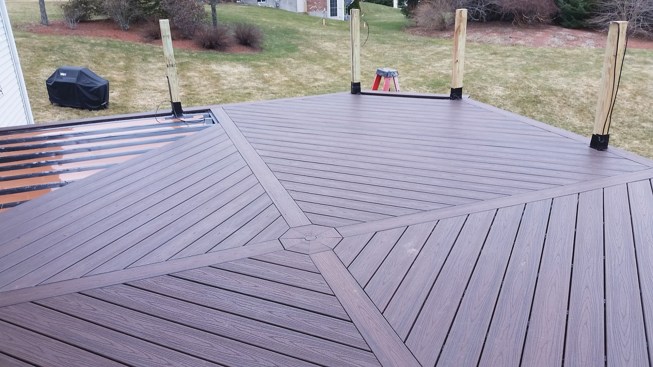
After the drainage system passed water-testing, Trex decking was installed using hidden fasteners.
Finally, we trimmed out the perimeter of the deck with PVC fascia material and installed the outdoor kitchen cabinets, along with a granite countertop. The original slider leading out onto the deck had significant rot damage, so we replaced it with a new French door sized to fit in the original rough opening.
Stairs
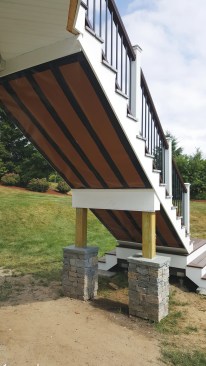
The distinctive stair design was driven by the homeowners’ request to be able access the stair landing from three sides to accommodate future plans for their backyard, including a possible inground pool. Because of the way the staircase extends out from the corner of the deck and into the yard, it is clearly visible from multiple directions, including from inside and outside the house and from within the enclosed area underneath the deck. To give the assembly a finished look, we wrapped the stringers with PVC trim and installed a “ceiling” on the underside of the staircase.
We framed the landing like a mini deck, supporting the four corners of the steel-framed platform with helical piles. To make sure the landing was at the correct elevation, we waited to install the piles for it until the main deck was framed and we could establish an accurate TOD (top of deck) elevation for determining the precise rise and run of the stairs.
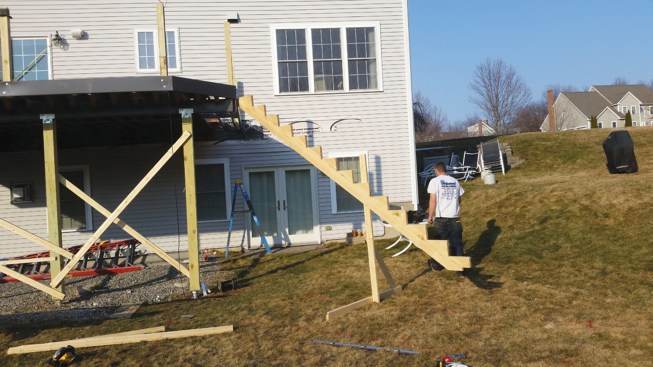
Workers determined the position and elevation of the stair landing with the help of a stringer for the upper flight of stairs.
The landing was framed with steel and supported by helical piles.
Steps lead up to the landing from all three sides.
RainEscape troughs were fastened to the stair stringers so the underside of the stair could be finished with beadboard.
Because the underside of the stairs would be clad with PVC beadboard trim, the same material used to finish the ceiling underneath the deck, we also needed to fasten under-deck drainage troughs to the bottoms of the stringers before installing the trim. These don’t empty into downspouts, but just divert water down and away from the back of the ceiling material. After installing the troughs, we strapped the stringers and nailed up the beadboard.
On many projects, we then close in the area underneath the stairs for useful storage, but in this case the area remains open and highly visible, which is why we trimmed out the midspan support with the same trim detail used on the three-season room under the deck.
Finishes
The clients wanted the new three-season porch underneath the deck to feel completely separate from their indoor spaces, so there’s no direct access to that area from inside the home. To provide a solid subfloor and base for the screen porch’s knee walls, we poured a concrete slab with a thickened perimeter. Then we laid up the CMU knee walls, which are clad with natural stone veneer finished with a bluestone cap.
The porch slab is finished with porcelain pavers with a wood-grain texture. Outside the porch, a small stone paver patio that the homeowner installed provides a solid walkway from the screened porch to the French doors leading to the basement.
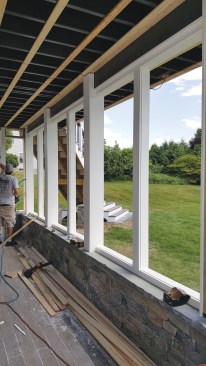
Under the deck, the crew poured a concrete slab floor, built CMU knee walls finished with stone veneer, and framed the window openings.
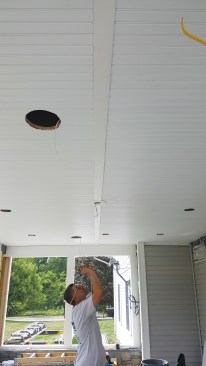
PVC trim was used to prep the openings for the prefabricated aluminum screen windows and to finish the ceiling.
After strapping the joists for the beadboard ceiling, we framed the window and door openings with PT 2x4s and trimmed them with PVC. While we were working on the deck design, the clients had been researching screening options for their new space. They settled on EZ-Screen units, which are multi-track aluminum frames fitted both with sliding screens and with aluminum-framed 10-mil vinyl panels. They ordered the units early on in the project, and they were delivered to the site preassembled. One of the benefits of using this company was that only a few weeks of lead time were required, instead of a couple of months for similar products from other manufacturers, which helped keep our schedule on track.
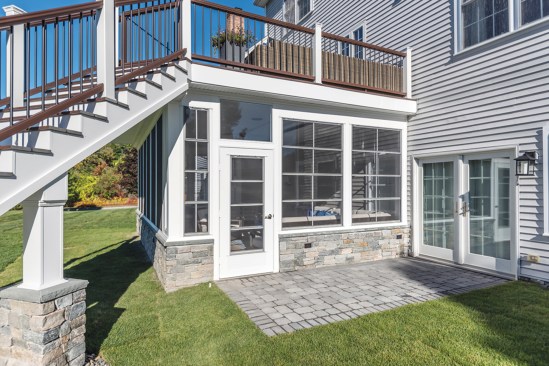
A small paver patio links the new three-season porch with the home's walkout basement.

The concrete slab floor within the enclosed porch was tiled with porcelain pavers with the look of a wood floor.
After we installed the screen window panels and door, we finished trimming out the room. Finally, we reinstalled the vinyl siding that had been removed to install the deck ledger and tie the new double-decker deck to the house. ❖
Photos Courtesy Professional Building Services