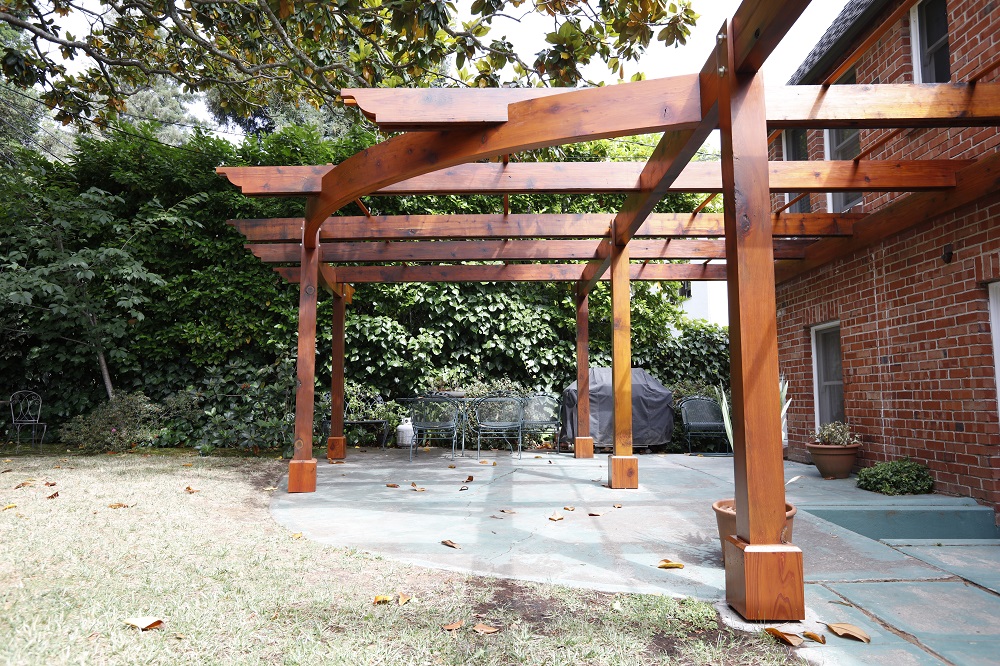
Years ago, before California’s Filoli estate became a tourist attraction, I spent a lot of time there in its beautiful formal gardens courting a woman. So when my client – a Berkeley art history grad and docent at the historic site, which is now owned by the National Trust for Historic Preservation – approached me about building an arbor similar to one of the structures on the grounds there, I already had an inspired connection to that magical place that I could draw on. The result is the curved redwood arbor shown in the photos here.
The heart of the design is a 37-foot-long laminated redwood beam, which follows the curve of the home’s existing half-round concrete patio. I formed the glulam beam on site, using the patio as my template as I drove stakes into the ground to support the glue-up. The 4×10 beam is made up of six plies of ½-inch to 9/16-inch thick redwood, which I planed down from 20-foot lengths of 1-by stock purchased from iconic Redwood Lumber & Supply Company in San Carlos, probably the best source for redwood that I’ve found. For this project, the cost for clear, milled-to-spec redwood turned out to be prohibitive, but our client was adamant that she didn’t want the arbor built out of PT lumber. Our compromise was to hand-select roughsawn #2 grade redwood at the lumberyard, then mill the lumber on site in a long process that added time to the project, but saved our client thousands of dollars.
David Bullene
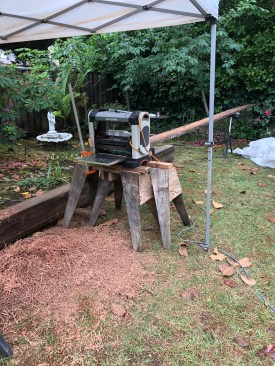
The author milled all of the rough-sawn redwood on site, including the multiple 1/2-inch- to 9/16-inch-thick plies needed for the glulam beam.
David Bullene
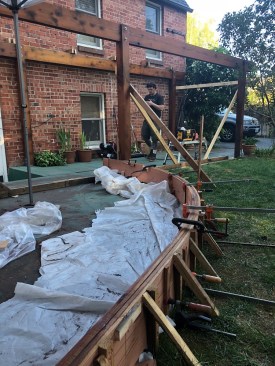
The curved beam was formed around stakes driven into the ground around the perimeter of the curved concrete patio and was glued together one lamination at a time.
I used Titebond III waterproof glue applied with a roller to bond the laminations together, working from the outside in and gluing together two plies (one lamination) at a time. I used screws on the inner plies to help hold the laminations together, along with plenty of clamps to apply pressure. But I didn’t want any of the screws to show on the outside faces of the beam, so the innermost and outermost plies were simply clamped to the assembly during glue-up. I allowed each lamination three or four days to cure before moving on to the next, and checked carefully for plumb and level at each step of the process to avoid twisting the beam. Afterward, I cleaned up the top and bottom edges with a power hand planer.

David Bullene
The curved beam measures 3 5/8 inches thick.
The 4×10 arbor framing is supported by 6×6 posts, which in turn bear on 28-inch-deep footings. I had to cut access ports through the concrete patio to dig the footing holes, then placed 8-inch-diameter cardboard tube forms into the holes dug into the ground. Metal Simpson Strong-Tie post brackets cast into the concrete tie the posts to the footings. I worked from the top down to lay out the footing locations for the posts that support the curved beam, using the beam as a guide.
David Bullene
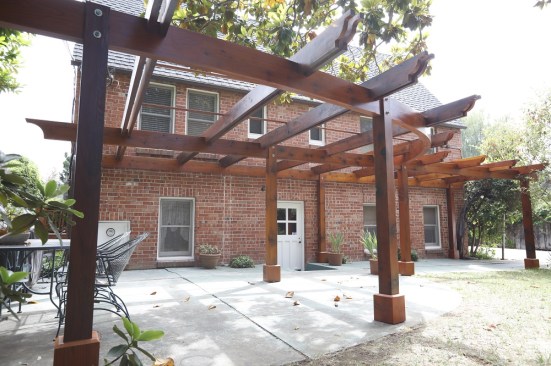
After assembling the arbor, the author gave all of the components a final coat of finish, and installed 2×2 vine holders on top of the purlins.
Before assembly, I sanded the 6×6 columns, 4×10 beams, and 2×8 purlins smooth, starting with a belt sander fitted with an 80-grit belt, and finishing up with a random orbit sander and 200-grit disks. Then I applied one coat of Sikkens clear matte finish. As I assembled the arbor, I filled screw holes with black-walnut plugs, then gave everything a final coat of finish. To wrap up the project, I installed 2×2 vine holders across the top of the arbor, for the bougainvillea that my client will plant to add color to the design.