

To make stucco work, you have to back it up with a drainage plane based on the shingle effect: water-resistant papers and flashings that direct the water down, out, and away from the wood structure of the home. The failures that I see in hard-coat stucco are usually traced to a few common mistakes in the drainage plane details.
Proprietary one-coat stucco systems and drainable (“water-managed”) EIF systems come with water-handling details supplied by the manufacturers. Some are better than others, but reading and understanding all the evaluation reports and company specs out there would be a daunting task for anyone — by now, the details for all the many systems amount to thousands of pages.
The good news is that every stucco system — even EIFS — can be made to work by applying the same principles that have always applied to traditional stucco. Stucco is a porous, drainable system. Rain penetrates it and drains through it.
As you look at the following examples, keep in mind that coordination and organization on site are keys to implementing them correctly. Most flashings and transitions occur at spots where more than one trade is involved. Terminations at grade may involve landscapers or foundation crews, window flashings can involve roofers as well as window installers, roof-to-wall connections of course involve the roofers, and soffit transitions can involve trim carpenters or framers.
It’s the general contractor’s job to make sure those transitions are built correctly, by managing the schedule, communicating with all the subs, supervising, and inspecting. Even on custom homes, it’s easy to lose control of those critical areas; on tract homes where subs put in unrealistic bids based on incomplete plans, crews are untrained, everyone is in a hurry, and confusion reigns on site, we see many, many failures at spots where two trades were not coordinated.
Weep screed. Hard-coat installations start with the application of a “weep screed” at the bottom edge of all walls. This flashing, which is perforated at the bottom, defines the bottom edge of the stucco coats. It goes on first because it is lowest: The other papers will lap over it to begin the shingle-style layering.
Weep screed is a standard item in markets where stucco is established. In new markets, people may not have heard of it. But it’s vital to the performance of the system. Rain will soak into any stucco coating; the water will head downwards, and it must escape at the bottom. Weep screed lets water out through its perforations, and it stops the stucco from bonding to the cement foundation and creating a dam where water might pool. The screed should span between the wood framing or sheathing and the concrete foundation, and it should terminate at least 8 inches above grade.
Other flashing assemblies are acceptable. In some places we use a perforated J channel above a Z flashing for a bottom termination. The key principle is just that water must be allowed to escape and must be directed away from the building.
A common mistake is to pour a slab, patio, or step after the stucco is applied, and to trap the weep screed and the bottom edge of the stucco between the slab and the house. This traps water in the stucco at the bottom and ponds it against the building paper, which will eventually let moisture through. Of course, if there are reverse laps in the paper and flashings above this point, the water will already be behind the paper and in contact with the wood. This scenario can quickly destroy sills, wall plates, and studs.
Building paper. Lapping over the weep screed, as it must lap over all other flashings, is the water-repellent building paper, installed shingle-fashion from the bottom up. Code minimum is two layers of Grade D building paper.
Grade D paper is a tar-impregnated kraft paper that comes in different thicknesses with different minute ratings, based on the time it takes for water to penetrate in standard tests.
The most common varieties are 15-minute and 30-minute papers. You can pull two layers off the roll at once; because of the space between them, paired sheets of 15-minute paper installed on the wall offer more than 30 minutes of weather protection, and doubled 30-minute paper provides more than 60 minutes. There is even 60-minute Grade D paper, which, doubled, gives more than 2 hours of water resistance. Rain takes a long time to soak into the stucco itself before reaching the papers, too; so the combination of good papering under a properly applied base coat and finish offers many hours of weather protection.
Housewraps have approval for use under stucco, but I don’t recommend any of them in single-sheet applications. Our experience shows that whatever sheet comes in direct contact with the stucco base coat will lose water repellency and break down over time. We use housewrap, but only with Grade D paper over it.
The latest building codes don’t specify a “minute rating” requirement for paper under stucco. We adjust our paper choice to local climate conditions. In interior Southern California, we use double 15-minute paper. In the Salt Lake Valley, we use double 30-minute paper. In the Galveston Bay of Texas, we use double 60-minute paper. In some remedial work, where everyone is eager to be absolutely sure, I will even install wrinkle wrap first, then two layers of 30-minute or 60-minute paper — all lapped over or under any flashings as appropriate to achieve the shingle effect.
Builders should learn any local code requirements, and I would advise asking an experienced and reputable local stucco contractor what works in your area. If you can’t consult the voice of experience, err on the side of caution: Heavier paper is cheap compared to removal and replacement.
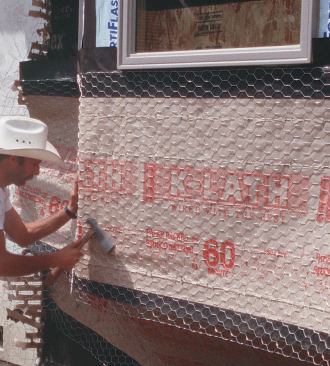
Metal lath. Good installation of the metal lath over the papers and flashings is critical. Stapling is a big concern: I have seen bad leaks develop when the only mistake was that the lath was overstapled or stapled in the wrong places.
Lathing staples should be placed only at studs, plate lines, headers, or other solid framing members. Code requires the fasteners to penetrate 1 inch into the framing, so if the sheathing is 1/2-inch plywood, you need staples with a 1 1/2-inch leg. A wide-crown staple is the appropriate fastener, and the only way to get both legs of a 7/8-inch or 15/16-inch crown staple to consistently hit a 1 1/2-inch stud is to orient the staple vertically (this also prevents the staple from creating a water trap in the papers).
The staples should be placed no closer than 6 inches to each other. If you have to use a staple between studs — for instance, to fasten the edge of the lath near a vent penetration — use short staples that will not go all the way through the plywood. Locate all laps in the wire over studs or other solid framing members.
I’ve seen cases where poorly trained applicators have placed a hundred or more staples in a 1-square-foot area between studs, to pull lathing flat or close a joint. The results can be disastrous. It seems to take a certain number of staples to break apart the wood flakes in an OSB piece enough to create a channel for water flow. Once you get above that critical mass of staples, you’ve opened a path. In heavy storms with turbulent winds, water in the saturated stucco gets forced through the paper and the OSB along the paths created by the staples, and flows down the inside of the OSB within the stud cavity. I’ve opened up walls from the inside and watched the water stream in. No wall system in the industry is designed to drain water out of the stud bays — when that area gets soaked, your wall is doomed. When I tear apart a wall like that after four or five years in service, what I find is a compost pile.
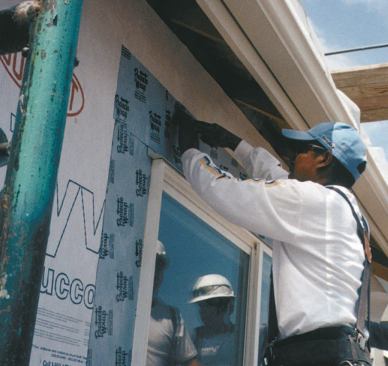
Window flashings. Many one-coat manufacturers supply window flashing details, but they aren’t necessarily good ones. The key, as always, is to establish good overlapping for the shingle effect. We see many houses in Utah and Texas where the paper has been applied well, but the window flashings dump under the paper. Invariably this leads to rot.
Coordination on site can make or break this installation. Where window flashings dump under the paper, it’s probably because the window installers put the flashings in before the stucco installers came to paper the building. The paper has to go on first, then the flashings, then the window, and finally the lath. Each trade has to wait for the one before, or you have to figure out a way to leave the flashings hanging so they can be integrated into the building paper later.
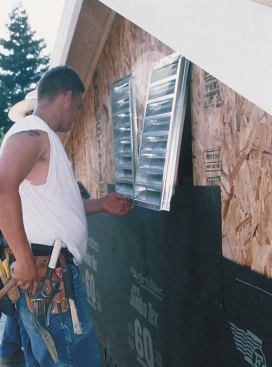
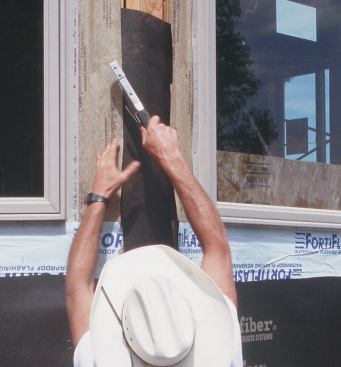
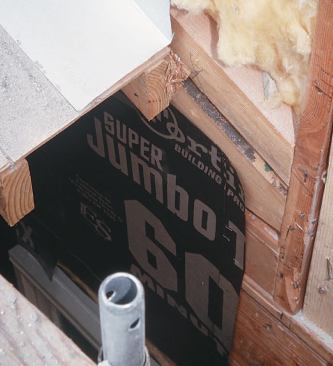
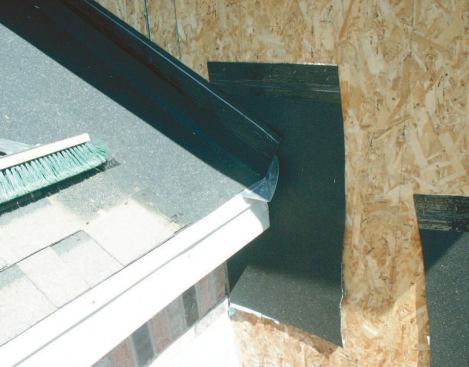
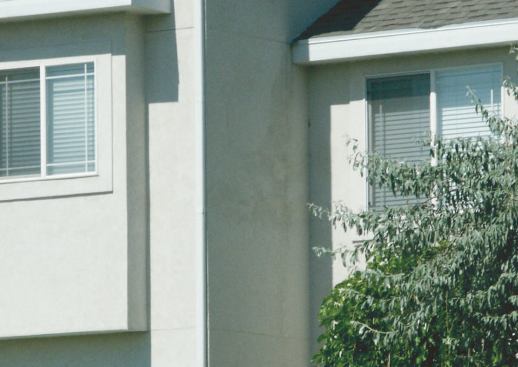
Another typical case is shown in the photo below. Here, the window flange is likely to dump behind the roof flashings if someone is not careful. This situation was found on one of my company’s retrofit jobs. My crew removed the window, papered the wall with papers lapping on top of the roof flashing, flashed the window opening so the flashing dumps on top of the paper, then reinstalled the window with flanges outboard of the papers and flashings so that water always moves away from the building as it heads downhill.
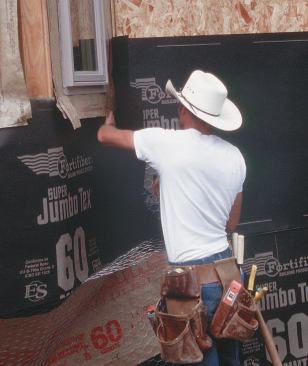
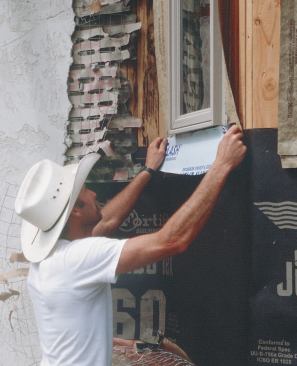
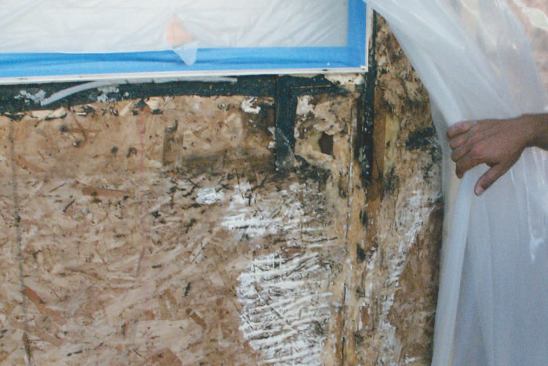
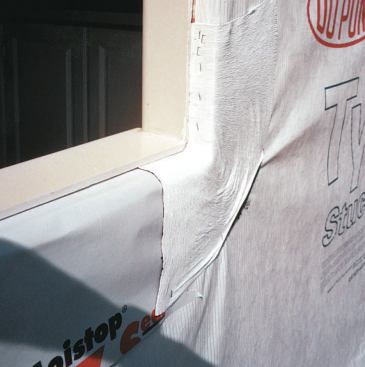
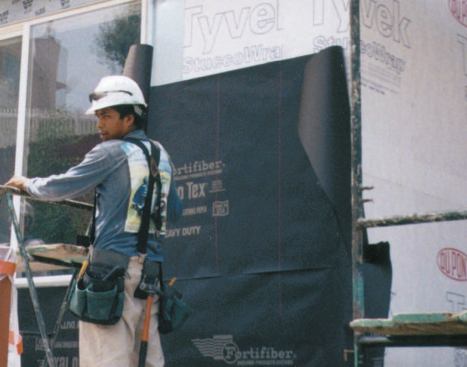
Bad window details damaged several spots on the building in the photos below. Though it was less than ten years old, this building had been repaired twice previously with surface-sealing methods that did not work. After pulling out the window, we repapered the wall with Tyvek StuccoWrap, then applied membrane and Tyvek FlexWrap to the opening to protect the wood structure if the window should ever leak (as many on this building have). We then replaced the window, sliding the top flange under the Tyvek and sealing the flange to the Tyvek on all four sides. Finally, we applied a second protective layer of Grade D building paper. More than a hundred houses in this one neighborhood, built by different builders both large and small, need this treatment.