I built my first deck about 35 years ago, and remember that—given the tools I was working with and my level of expertise—it was all I could do to keep the ends of the 5/4×6 pressure-treated (PT) decking trimmed to length evenly. I was learning about ledgers and joists, and not thinking too much about borders and inlays then.
Now, of course, it’s rare to see a deck without some sort of design detail that the builder created using decking, at least in the pages of PDB. That’s mostly due to the skill level of the builders who are designing and building these decks, who in turn are inviting their clients to expand the scope of their projects and ask for these details. But I also think that it’s partly in response to the wide range of hues available in composite and synthetic decking, which makes it easier to feature contrasting borders, patterns, and inlays. In many cases, the same techniques can be used on a wood deck by weaving together various wood species to create the design.
Blocking
Most of these design details require blocking between the joists for support, which must be installed during the framing stage. This is especially true when you’re installing composite decking, which typically requires closer joist spacing for support than wood decking. In addition, most decking—wood or composite—should overhang end supports by no more than 3 inches. When planning and pricing an inlay or other decking design detail, be sure to include a generous allowance for the labor needed to install this blocking.
Bayn Wood
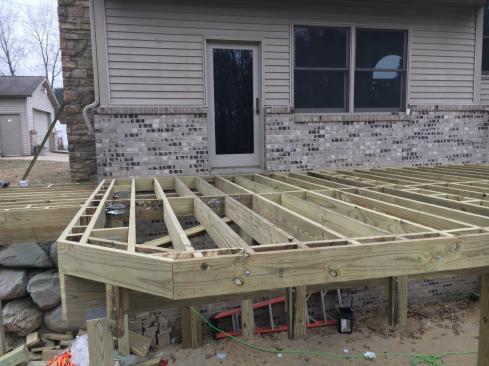
Vertically oriented for drainage, blocking has been added to the deck framing in preparation for installing a picture-framed border.
The fastest and easiest way to install 2-by blocking is on the flat, but Tacoma, Wash., deck builder (and frequent PDB contributor) Kim Katwijk points out that blocking is a lot stronger when it’s oriented vertically, like a mini-joist. Vertical blocking is also better able to shed water and less likely to trap moisture between the blocking and the decking.
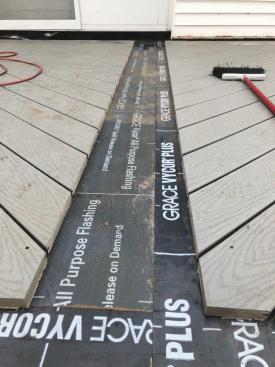
Whether the blocking is installed vertically or horizontally, covering the top surface with a self-adhering flashing membrane before installing the decking will help to protect it from water damage. Doubled rim and end joists, which often support a picture-frame border detail, also benefit from flashing installed over the top surface of the assembly.
Simple Borders
Picture framing a rectangular deck with a simple border is a great way to conceal the ends of the decking and to add visual interest to the deck. Doubling-up the size of the border with another course of decking will double the visual impact; using different-colored decking for the border can take the deck to the next level.
Picture-framing isn’t limited to the borders of a deck. On larger decks, picture-framed decking can be used to visually define specific areas on the deck, such as dining areas and outdoor kitchens. Picture-frame details also improve safety, by helping to define deck edges, transitions between levels, and stairways.
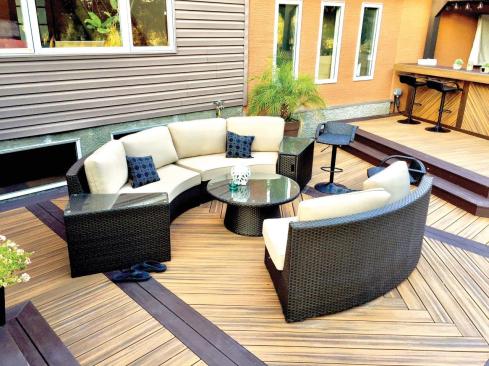
On this project, builder Calvin Cerilli of Blue Chip Decks installed a herringbone pattern on the diagonal to help define a sitting area.

On a large-scale project like this one with multiple levels, the use of contrasting borders, seam boards, and treads is a key design element that helps define transitions between areas and make the deck safer.
One technique that Rhode Island builder Mike Valente uses to add interest to his picture-frame borders is to turn the field decking on the diagonal. By installing a contrasting double seam board in the middle of the deck (a common technique for avoiding butt joints in wide decks) and installing the field decking diagonally, Valente creates an interesting chevron pattern.
Installing decking on the diagonal can be fussy work—measuring the lengths of individual boards (accounting for the gaps between boards) and getting the mitered end cuts perfectly aligned—if the boards are cut to length prior to installation. To speed up the process while ensuring perfectly straight cut lines and an accurate layout, Valente installs the field decking first, allowing the ends of the decking to overlap the border areas that he has identified on the deck. Then he uses a track saw to cut out the areas where the seam boards and borders will be installed, setting the depth of the saw blade a hair less than the thickness of the decking to avoid cutting through the flashing that’s on top of the framing and blocking underneath.
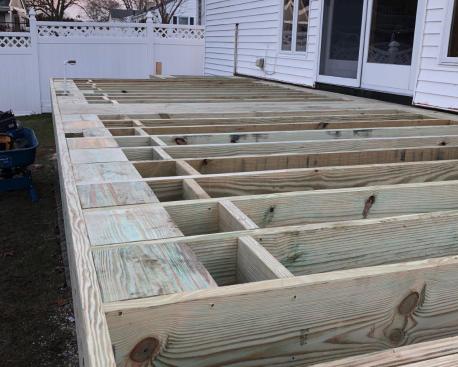
Blocking can also be installed on the flat, but it doesn’t drain as well as vertical blocking and should be protected with self-sealing flashing.
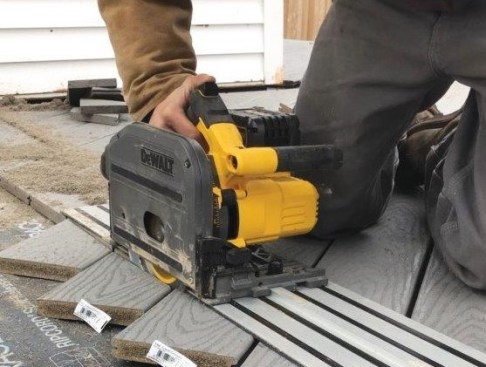
For a precise cut, builder Mike Valente likes to trim the ends of decking installed on the diagonal with a track saw.
When trimming the decking to length in place, set the depth of cut to slightly less than the thickness of the decking to avoid cutting through the flashing membrane over the blocking.
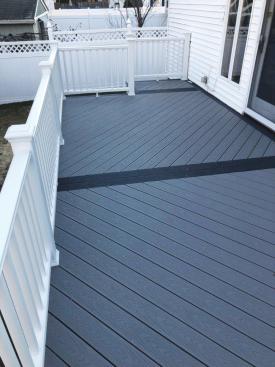
While the seam board and chevron pattern add visual interest to this wide deck, they also play a practical role, allowing Valente to avoid butt joints in the decking.
On the project shown here, Valente used Tiger Claw hidden fasteners to install the field decking and used FastenMaster’s Cortex system, color-matched for Trex decking, to install the seam boards and the picture-frame border.
Patterns in Wood
Picture-framing designs aren’t limited to composite decking. Even a standard builder-grade deck with 5/4×6 PT decking looks better when the cut edges of the decking are framed by a border. But Maryland deck builder Brendan Casey took this technique one step further on a recent tropical hardwood deck by mixing and matching decking species to create both a border and a basket-weave inlay pattern in a compact space.
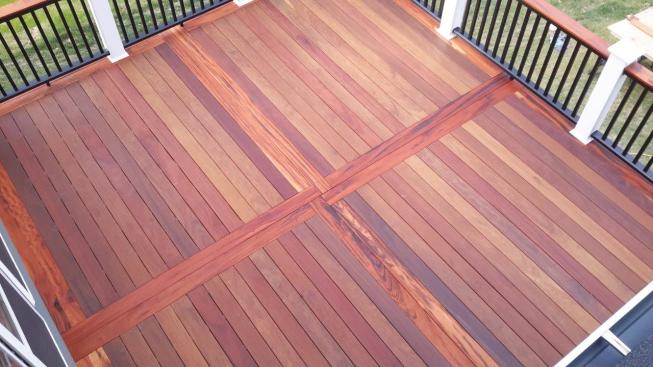
On this Brazilian teak and tigerwood deck, builder Brendan Casey installed a double picture-frame border and a matching crisscross inlay with a basketweave pattern in the center.
The design suited a practical purpose. Some decking species are available only in shorter lengths, and certainly usually not available in anything approaching the 20-foot lengths of some composite decking materials. So to efficiently use shorter boards without creating a lot of unsightly butt joints, Casey designed the deck with a double picture-frame border and a matching crisscross inlay.
To emphasize the design, Casey installed Brazilian teak decking in the field and created the basket-weave pattern in the center with Brazilian tigerwood decking. Before installing the decking, the crew prefinished the boards on all four sides and sealed all of the end cuts with wax.
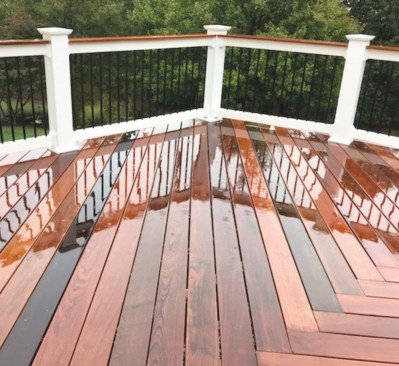
Ipe decking installed in a herringbone pattern adds an interesting twist to this wood deck’s classic look.
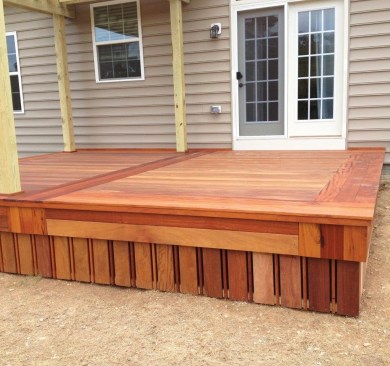
On this low deck, Casey framed the Brazilian teak decking with a Brazilian tigerwood inlay, fascia, and border.
Curves and Inlays
For the adventurous, curved borders and inlays are always an option. The key to this approach is uniformly heating composite or synthetic decking so that it becomes pliable without being damaged structurally, then forming it to various shapes and patterns.
Tyler VanKatwijk
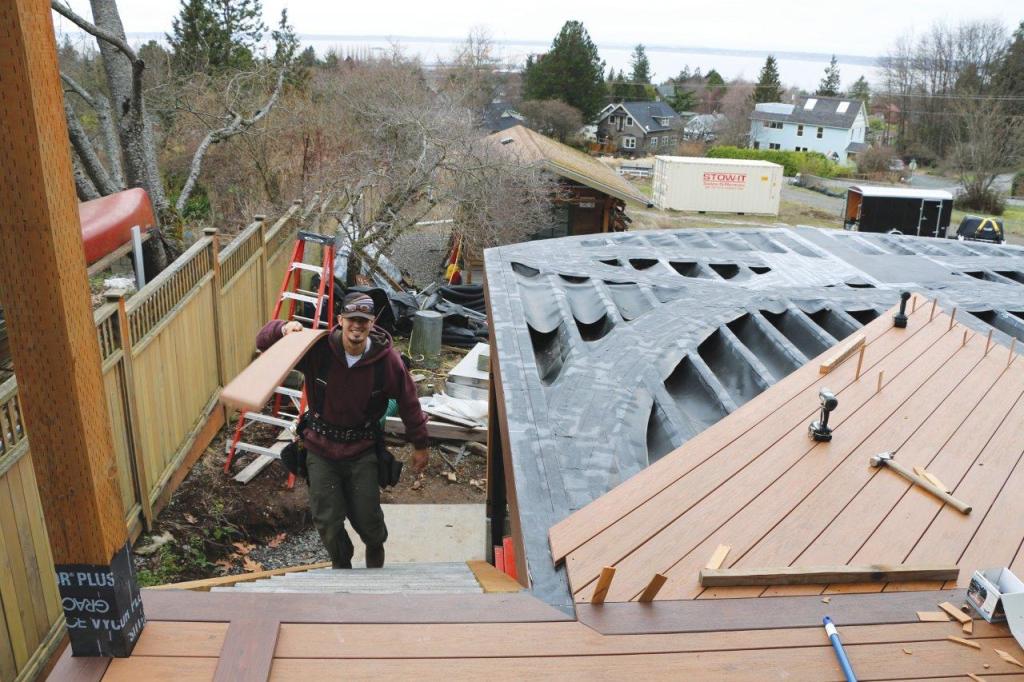
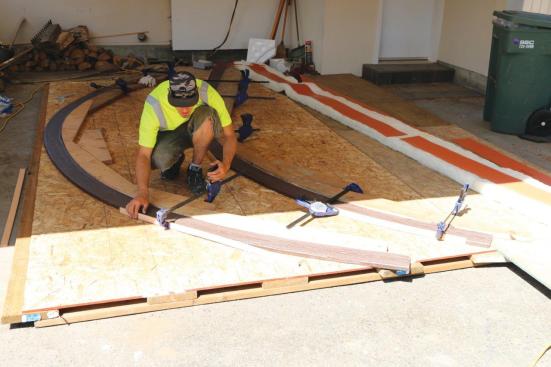
Special heating blankets make synthetic decking hot enough—around 220°F—to be pliable; here, Jeff Blotsky of Artistic Decks molds the hot decking around wooden forms cut to the radius of the desired curve and screwed to a flat plywood table.
Once cooled, the boards become rigid again and can be installed, often first serving as a template to transfer the pattern to the field decking.
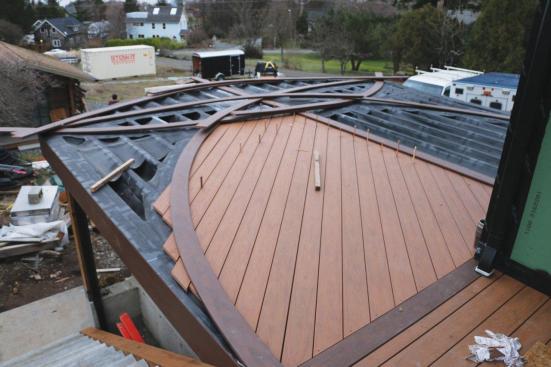
Once heat-formed synthetic deck boards have cooled, they retain their shape, and so can be used as templates when creating designs as intricate as the one on this deck.
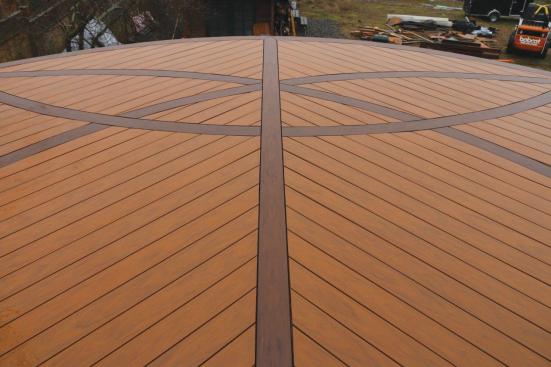
This stylish deck was built by Tyler VanKatwijk and his team at Artistic Decks.
It isn’t necessary to invest in heat-forming blankets to add inlays to your repertoire: From simple geometric patterns to compass roses and other more elaborate designs, inlays can be custom-fabricated on site using contrasting decking colors.
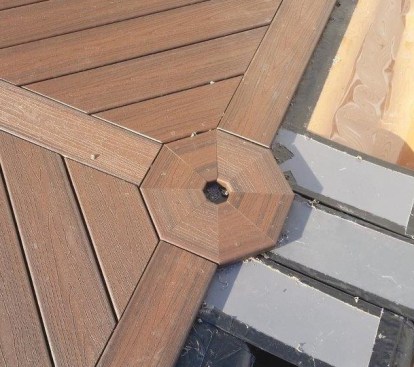
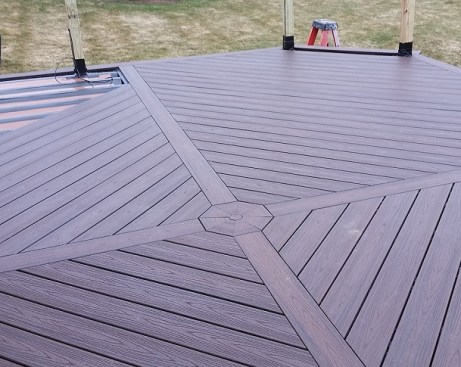
On this deck, New Hampshire builder Pete Ciaraldi crafted a site-built octagonal centerpiece out of the decking.
Pete Ciaraldi
Even without using contrasting decking colors in the design, the geometric inlay adds an effective accent to the deck.
Prefabricated inlay kits are also available that are ready to install. ❖
John Solari
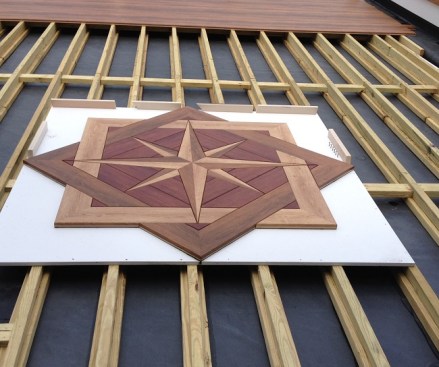
Here, builder John Solari installed a prefabricated compass rose on inset framing atop a rooftop deck.
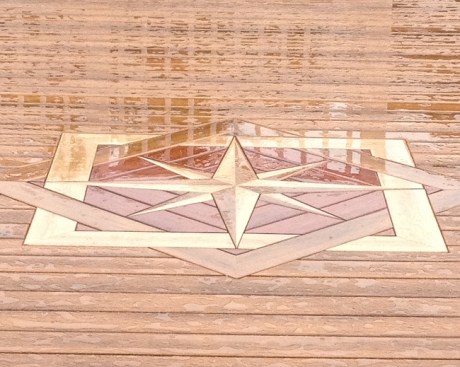
John Solari
The field decking was then used to fill in around the design.