


Susan Burnet
To remove the old window, first separate the trim from the openi…
Replacement windows come in two flavors: insert, or “pocket,” windows (which I discussed in a previous article, “Quick Wood Replacement Windows,” April/07) and full-frame units. Where to specify each type is something every remodeling contractor should know. We often replace windows less than 20 years old that have failed due to poor quality, improper installation, or both. On this particular job, a developer had converted a vintage YMCA structure into 35 condo units around 1990. The off-brand wood windows he installed were doomed to failure from the start, thanks to the manufacturer’s liberal use of untreated, finger-jointed pine, and the lack of care paid by the carpenters during the installation.
We start the replacement process by measuring each window and window opening. We always try to maintain historically accurate details, such as elaborate trim, so accurate measurements are important. With this particular brick building, we measured each masonry opening at several different spots because openings are often not true, especially in vintage structures. I also always check whether the opening is plumb and level. If it’s not, I may need to add blocking so that the window sits true in the opening, or I can add trim to mask the out-of-level or out-of-plumb condition. Either way, I want to be aware of any special requirements before we ordering the window and attempting to install it.
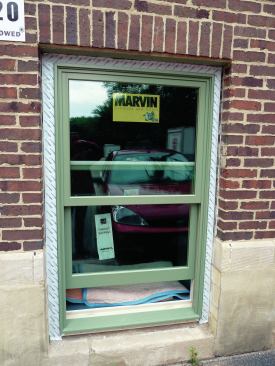
One lesson I’ve learned over the years is to always install top-quality windows. We usually specify clad wood windows for our projects, assuming they’re permitted by local (preservation) codes. The Marvin Clad Ultimate Double Hung units we use have extruded aluminum exteriors, which have very crisp profiles and a finish that mimics painted wood. The cladding is durable and minimizes the maintenance required on the exterior. The interior and exterior jambs on these “block-frame” units are in-plane and come without any exterior trim or sill; instead, a nailing flange is affixed to the perimeter for installation.
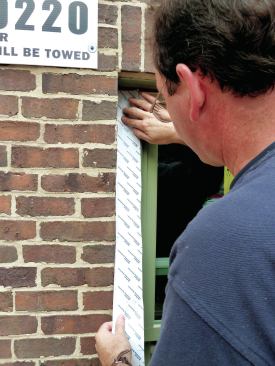
In many modern buildings, windows like these are often installed without additional exterior trim—something that just doesn’t fly in the older, well-established areas where we typically work. So when ordering, we deduct 2 1/2 inches from all four sides of the opening, which allows us to use standard 2-inch-wide brick mold on the sides and top, leaving about 1/4 inch between the trim and the opening and the trim and the window. Leaving these gaps, which eventually will receive backer rod and sealant, greatly simplifies the installation. The space between the window and limestone sill receives a custom-fabricated sill nosing, which mimics the appearance of a thick, traditional wood sill.
To speed installation, we order windows that have painted interiors—either primed or completely finished—directly from Marvin. This slightly increases the cost of the window but saves us the time and aggravation of painting all of the various nooks and crannies. For this project we had to match an existing color that was not available from Marvin, so we took delivery of the primed units at our shop and did the final painting there, including the PVC brick mold used for the exterior trim. While it was not as efficient as using pre-finished windows, we were able to paint several units at a time, and it eliminated the need to paint installed units from ladders.
For interior trim, we primed MDF sheets and added one coat of finish paint before ripping them into simple square-edge 1x3s. We then primed the exposed edges and applied a final finish coat to the sides that would be visible.
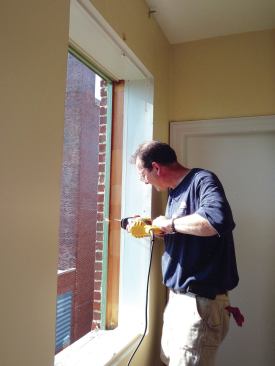
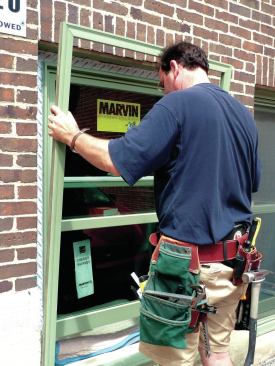
After the painting was done, we scheduled the installation. To use staging and site protection more efficiently, we generally try to work in one room or section of a building at a time. In this case, we worked on one condo unit at a time, completing the installation before moving on to others.
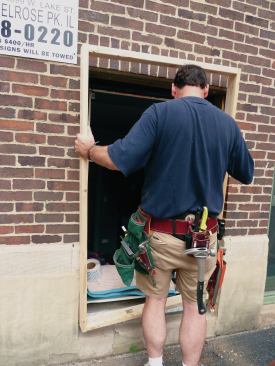
Demolition
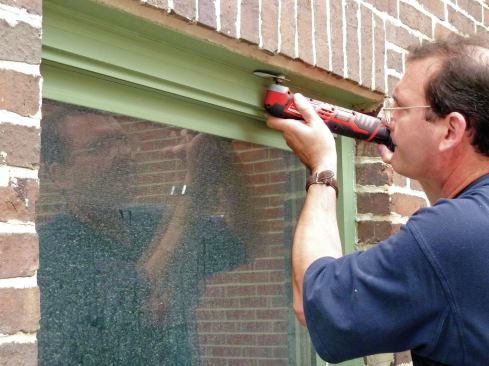
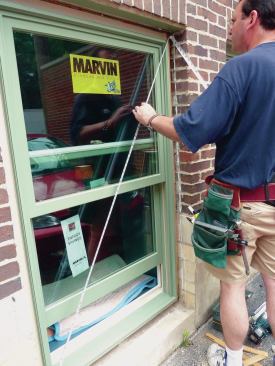
Before new windows can go in, the old ones have to come out. This operation is generally straightforward and takes 10 to 15 minutes per window. We start by removing the sash, then use an oscillating tool with a straight blade to cut the sealant between the trim and the masonry.
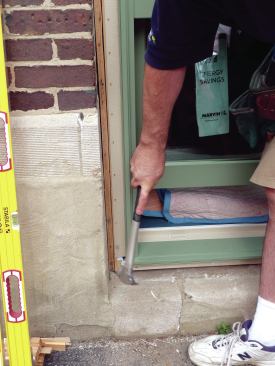
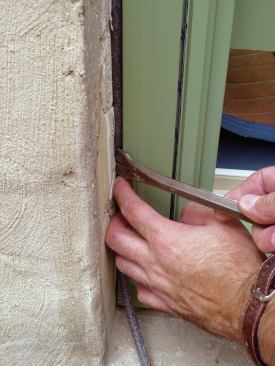
The easiest way to remove an old window is to leave as much of the frame and exterior trim intact as possible and collapse the frame onto itself. First, we cut through the trim and jamb with a reciprocating saw midway up each side jamb. Then, using a large pry bar, we pull each section of frame away from the masonry. The frame will hinge at the corners and fold into the opening. With the old sash and trim removed, we scrape off any residual lumps of paint or caulk in the opening and give the masonry a thorough sweeping.
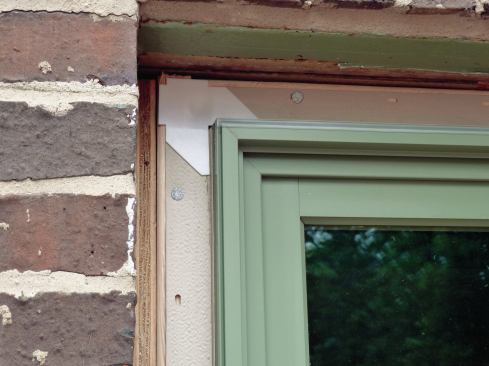
Installing the Window Buck
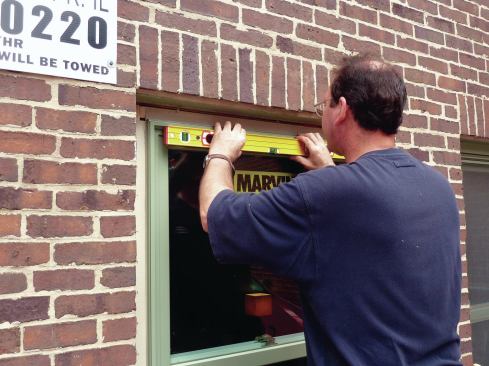
The next step is to install the window buck—blocking that provides a nailing base for the new window. In most masonry buildings we see, nailers are embedded around the window openings during construction for attaching the bucks. If those nailers are in good shape (as was the case here), we just nail our new bucks to them, taking care to level and plumb them as needed. If necessary, we replace any bad nailers with 2x4s attached to the masonry with Tapcon screws.
To determine the thickness of the window buck, we measure the opening again and subtract the window dimension from the smallest measurement in each direction. Because of the deduction we made when we first measured the openings, we usually have enough room for a 2-by on all sides. If the masonry is irregular or the opening is way out of square, it’s easy to rip 2-by stock to the thickness needed on a table saw.
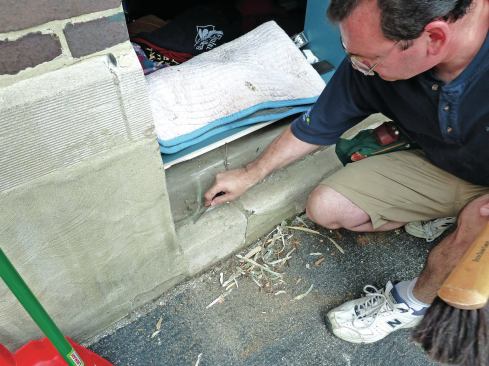
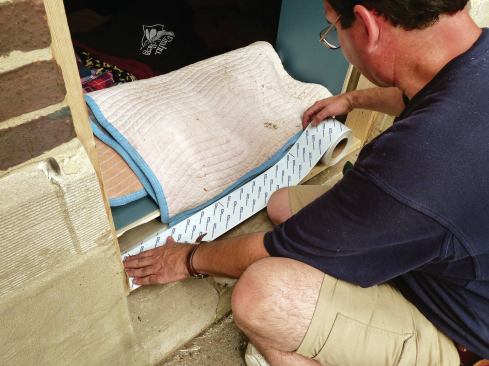
The bottom of the window buck is usually in direct contact with masonry, so we install a piece of peel-and-stick flashing between the two elements to prevent any moisture in the masonry from wicking into the buck, which is untreated lumber. A word of caution here: I avoid using treated lumber for the buck unless it’s required by local ordinance. Treated lumber often has a moisture content in the 20% range and, as it dries, this moisture can migrate to drier material—usually the new window or wood trim. This moisture migration can cause the drier wood to swell, potentially causing problems with the appearance and operation of the window. If treated lumber is required, we use material that’s been kiln dried after treatment. Sourcing KDAT is often problematic, however; few suppliers around here carry it and there’s often a lead time. But if we do use it, we take care to isolate the window from the treated lumber with flashing tape.
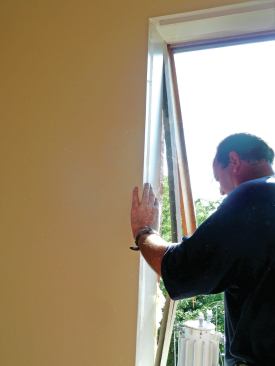
We cut and assemble the buck as a unit, then attach it to the nailers in the opening with galvanized nails. As it goes in, I try to make sure that the sill of the buck is dead level, which eliminates the need to shim the window level during installation. After the buck is nailed in place, we install a separate piece of peel-and-stick flashing on top of the sill portion.