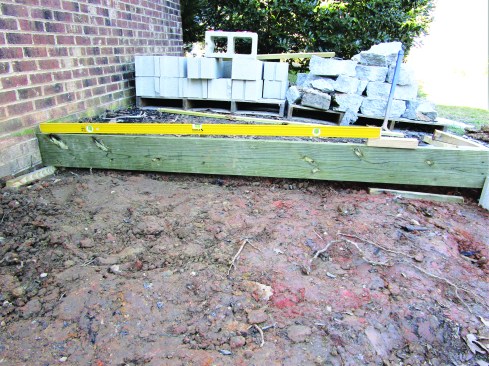
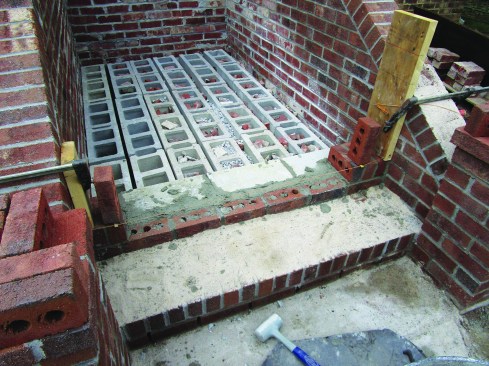
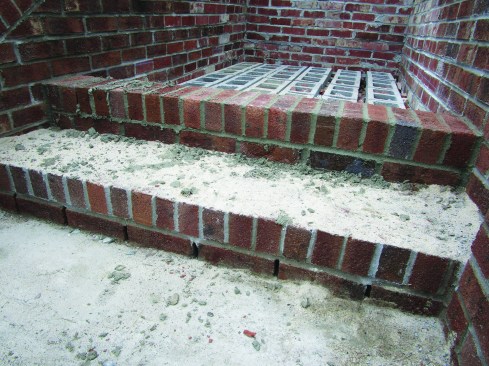
From the porch floor, the crew measured down 66 1/4 inches (6 5/…
From the porch floor, the crew measured down 66 1/4 inches (6 5/8 inches multiplied by 10 risers) and marked a base line for the 6-inch-thick slab. They set the 1/4-inchper- foot slope of the base by placing a 6-foot level on the form board with one end of the level sitting on a 2-by block to create the proper slope.
Matthew Carroll Navey
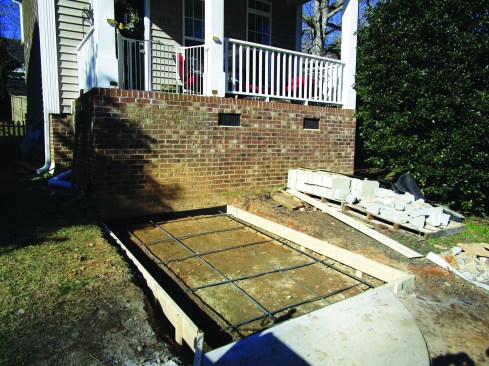
For comfort and layout simplicity, they set the tread depth at 1…
For comfort and layout simplicity, they set the tread depth at 12 inches. For nine 12-inch treads plus a 12-inch column on each side, the forms extended 120 inches from the porch wall to the concrete walkway, which was cut square to the slab.
Matthew Carroll Navey
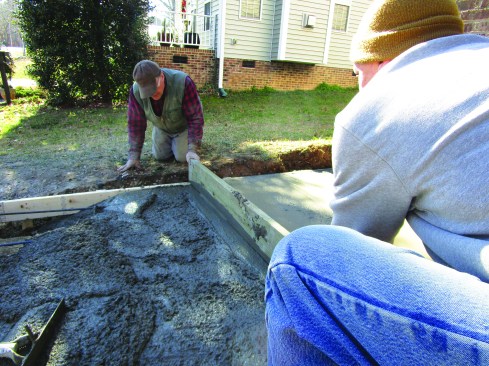
The sidewalk height was close to being right for the slab. The c…
The sidewalk height was close to being right for the slab. The crew used a straight 2-by to screed the concrete even with the sloping forms.
Matthew Carroll Navey
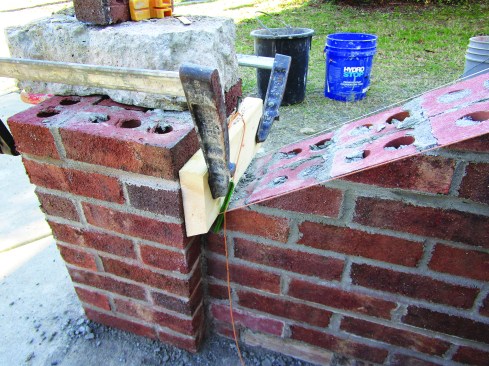
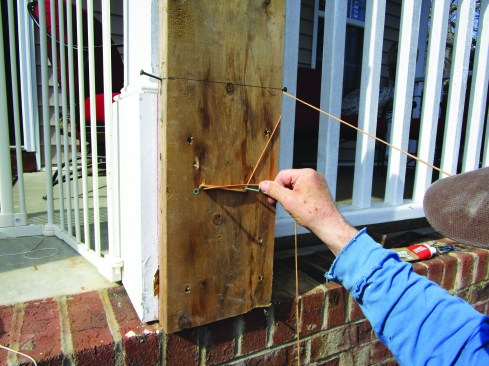
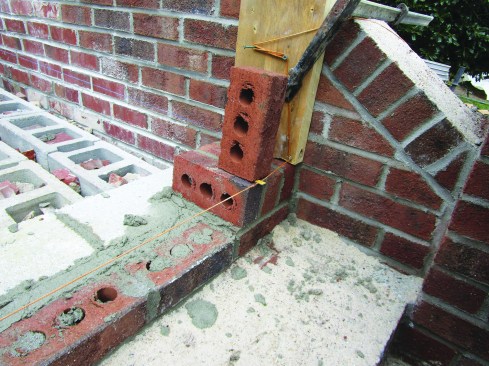
An L-shaped line block hooks over the edge of the column to hold…
An L-shaped line block hooks over the edge of the column to hold one end of the twine while a brick holds it in line with the wall.
Matthew Carroll Navey
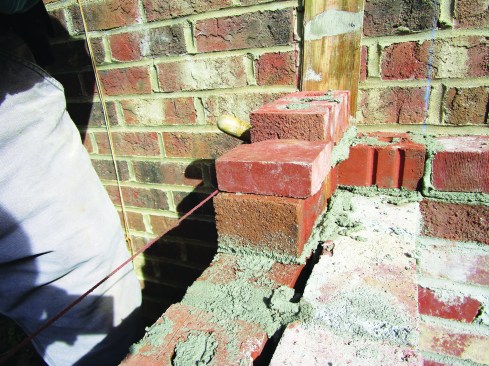
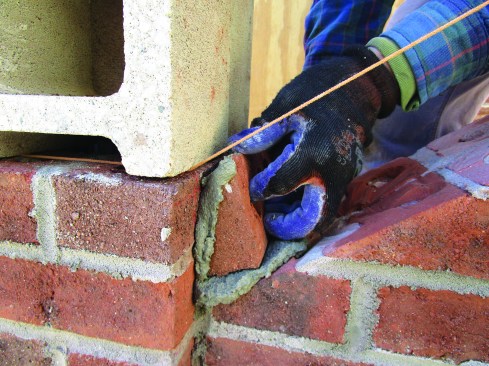
An 8-inch line stretcher hooks over the bricks to hold the other…
An 8-inch line stretcher hooks over the bricks to hold the other end.
Matthew Carroll Navey
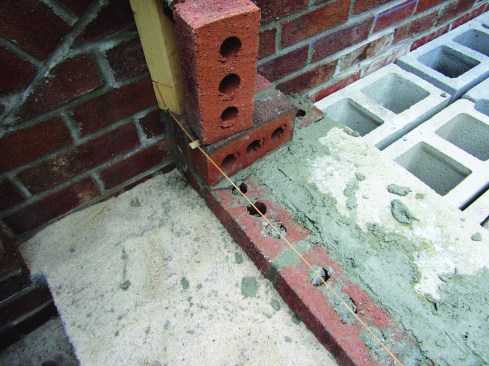
Tension on the twine holds the stretcher in place while the next…
Tension on the twine holds the stretcher in place while the next course is laid.
Matthew Carroll Navey
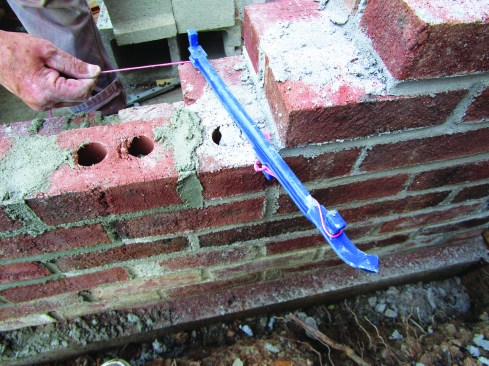
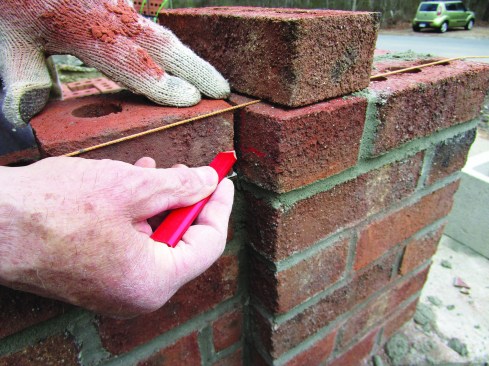
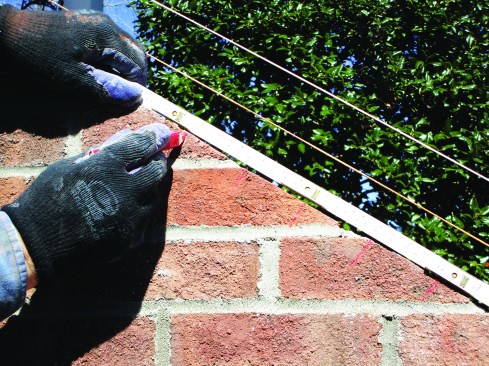
A flat clip, called a twig, is another tool for securing twine.
Matthew Carroll Navey
It slips around the twine, and while the weight of a brick holds…
It slips around the twine, and while the weight of a brick holds it precisely in place.
Matthew Carroll Navey
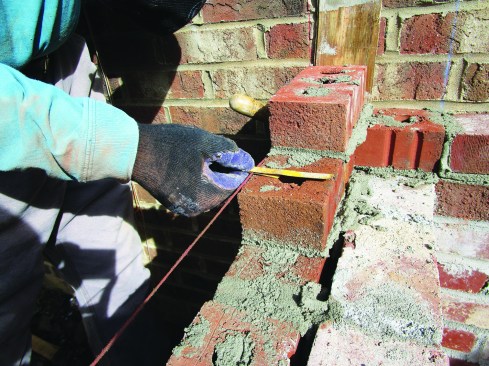
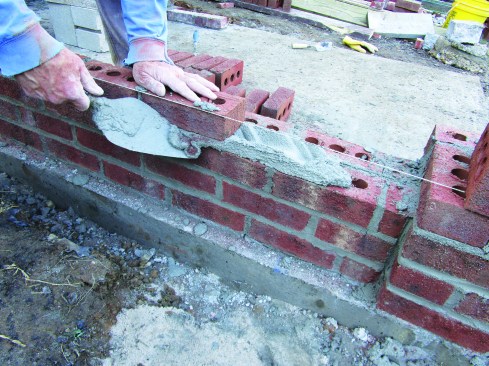
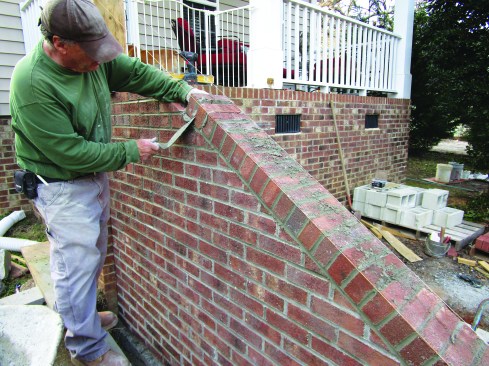
The author lays bricks to the line.
1
of 12
Matthew Carroll Navey
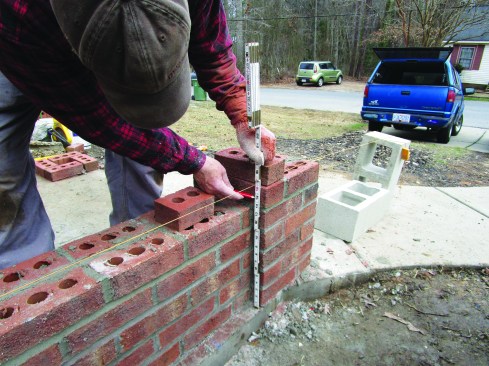
After laying up six courses on the column, the author made a mar…
After laying up six courses on the column, the author made a mark 15 inches above the concrete base.
Matthew Carroll Navey
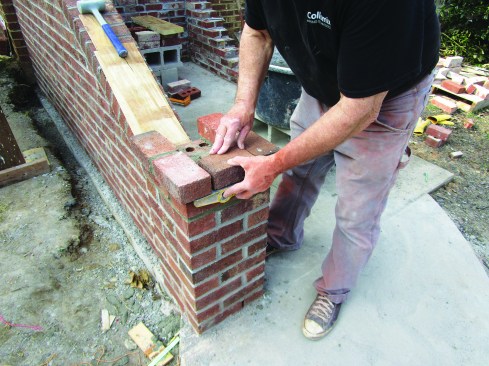
Next, he transferred the 15-inch mark to a brick set on the wall…
Next, he transferred the 15-inch mark to a brick set on the wall with a 3/8-inch plywood spacer to simulate a mortar joint.
Matthew Carroll Navey
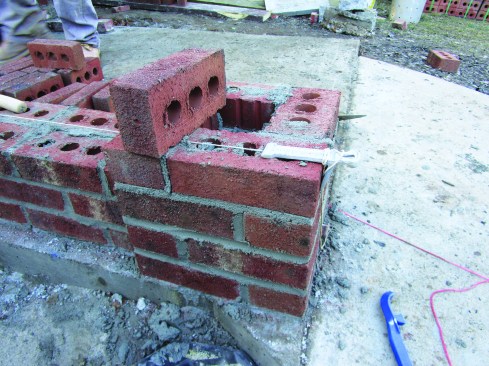
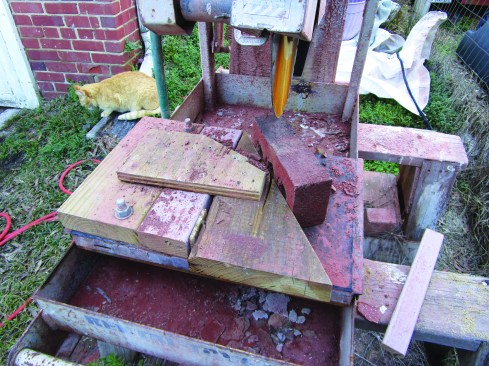
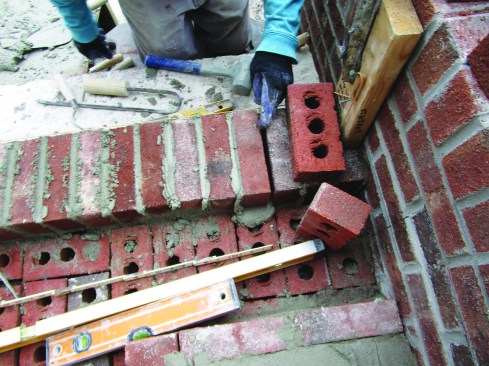
A site-built jig holds the brick at the correct 29-degree angle …
A site-built jig holds the brick at the correct 29-degree angle (based on a rise of 6 5/8 inches and a run of 12 inches) for cutting on the wet saw.
Matthew Carroll Navey
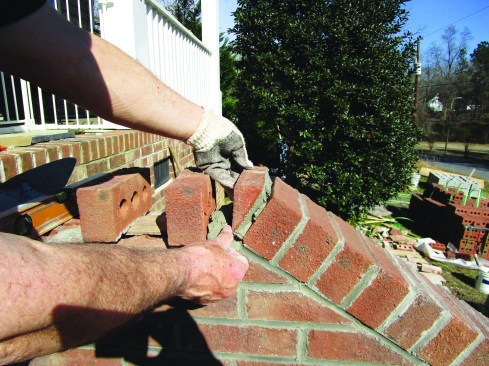
The author set the angled brick in mortar along the stretched co…
The author set the angled brick in mortar along the stretched course line.
Matthew Carroll Navey
With the first angled brick placed, the author set up two lines …
With the first angled brick placed, the author set up two lines to follow as he laid up the sloping side walls of the staircase.
Matthew Carroll Navey
At the bottom, he held the lines with a 2-by block ripped to 29 …
At the bottom, he held the lines with a 2-by block ripped to 29 degrees (the layout pitch).
Matthew Carroll Navey
At the top, he attached the lines to the sides of a board ripped…
At the top, he attached the lines to the sides of a board ripped to 7 5/8 inches (the width of the wall), anchoring them to a makeshift cleat.
Matthew Carroll Navey
After laying the field bricks for the side wall, the author bega…
After laying the field bricks for the side wall, the author began the final course of rowlocks (bricks laid on edge). He ripped the bottom brick at 29 degrees for the pitch of the slope.
Matthew Carroll Navey
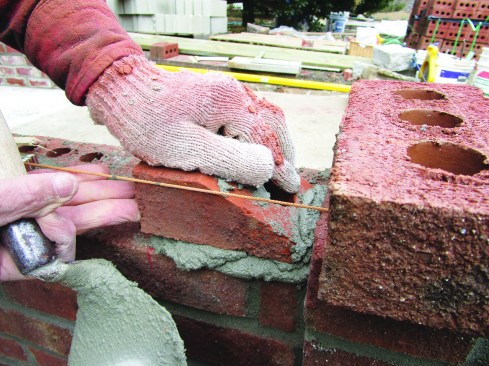
Using a brick-spacing ruler, he laid out even spacing of the row…
Using a brick-spacing ruler, he laid out even spacing of the rowlocks.
Matthew Carroll Navey
Then he set up two lines for laying the rowlocks.
Matthew Carroll Navey
At the top of the slope, the course transitioned to level with a…
At the top of the slope, the course transitioned to level with another 29-degree-angle brick.
Matthew Carroll Navey
A torpedo level kept the overhang of the column cap straight and…
A torpedo level kept the overhang of the column cap straight and consistent.
1
of 12
Matthew Carroll Navey
The author began each step with a 2 5/8-inch-high course of stre…
The author began each step with a 2 5/8-inch-high course of stretchers (bricks laid with their longest edge facing out), then used 2 1/4-inchhigh concrete cap blocks for fill so that the first layer of each step was 13 1/2 inches deep.
Matthew Carroll Navey
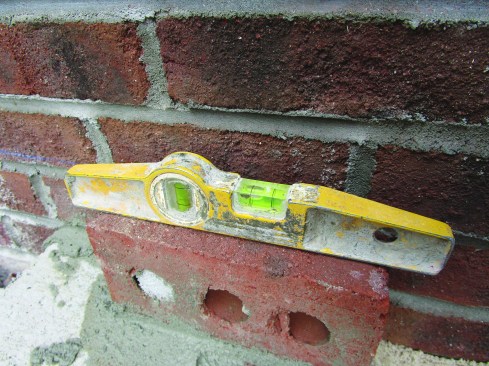
The second layer of each step consisted of rowlocks. Keeping a q…
The second layer of each step consisted of rowlocks. Keeping a quarter of a bubble outside the line on the level ensured that the rowlocks would be pitched to drain surface water properly.
Matthew Carroll Navey
A line guided the installation of the rowlock course. To anchor …
A line guided the installation of the rowlock course. To anchor the line, the author clamped a 2-by block to each side wall, looped the line over nails on the blocks, and secured the line to makeshift cleats on the faces of the blocks.
Matthew Carroll Navey
He clipped twigs over the line at each end and held the twigs in…
He clipped twigs over the line at each end and held the twigs in place with bricks.
Matthew Carroll Navey
The twigs held the line even with the upper corners of the start…
The twigs held the line even with the upper corners of the starter bricks to guide placement of the rest of the rowlock course across the step.
Matthew Carroll Navey
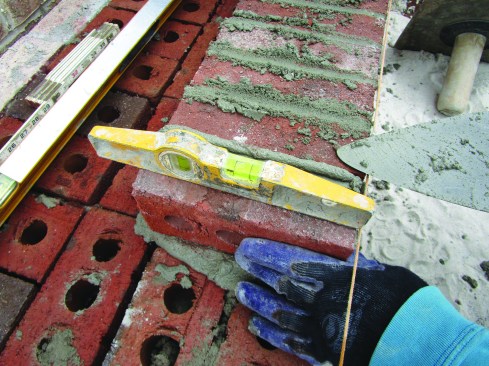
As the author laid each rowlock brick to the line, he set his to…
As the author laid each rowlock brick to the line, he set his torpedo level on top to ensure that it was pitched the same as the end bricks.
Matthew Carroll Navey
Every few bricks, he checked the spacing with a brick-spacing ru…
Every few bricks, he checked the spacing with a brick-spacing ruler. By adjusting the thickness of the joints, he fit the final brick perfectly.
Matthew Carroll Navey
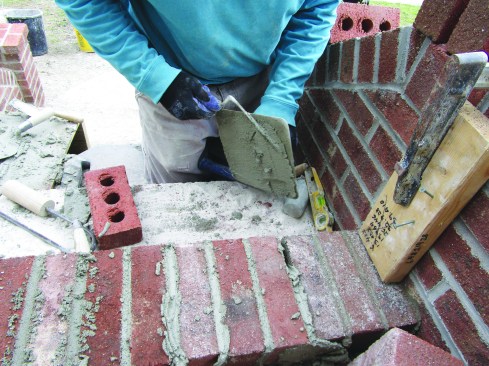
He buttered one side of the last brick with mortar and set it in…
He buttered one side of the last brick with mortar and set it in place, leaving the other joint open. After spreading mortar on a hawk, he used a 3/8-inch tuck pointer to pack the final joint with mortar.
Matthew Carroll Navey
He finished the joints with a sled runner, which packs the morta…
He finished the joints with a sled runner, which packs the mortar tight and leaves a straight joint with a concave profile.
Matthew Carroll Navey
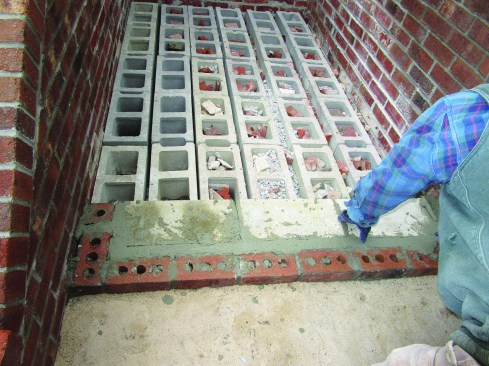
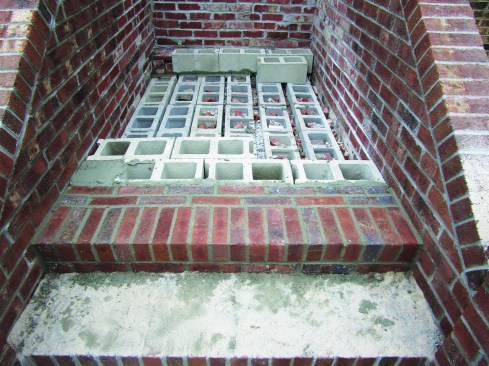
After finishing the rowlock course at the front of each step, he…
After finishing the rowlock course at the front of each step, he laid two courses of rowlock stretchers behind the front row (33). These bricks ran perpendicular to the front row, with the joints between bricks in each of the two rows offset by half of a brick length. Behind the steps, he filled in with blocks cut to 6 1/4 inches high. With the mortar joint, the blocks came up even with the brick step at the front.
Matthew Carroll Navey
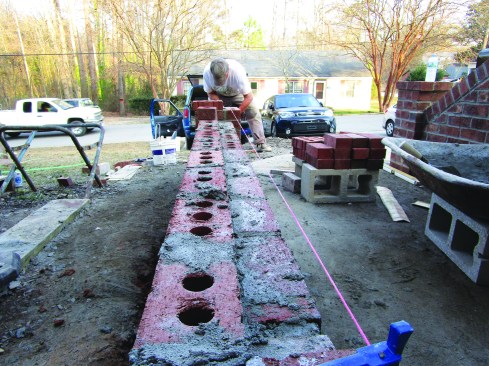
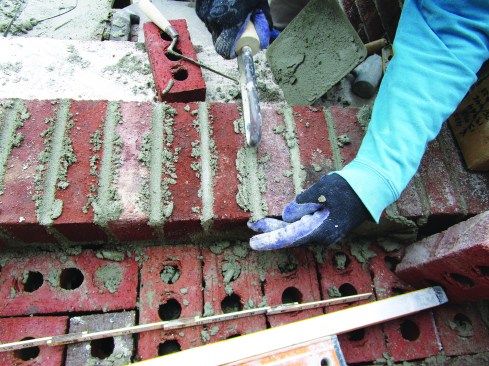
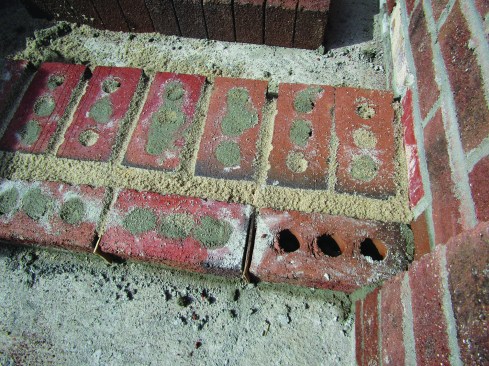
To provide drainage, the author left the head joints in the lowe…
To provide drainage, the author left the head joints in the lowest course of the stairs unmortared, with sand keeping the bricks behind that course clear of mortar droppings.
Matthew Carroll Navey
A rowlock course finished that step, leaving the open weep holes…
A rowlock course finished that step, leaving the open weep holes, and he spread a layer of sand to protect the step from mortar droppings as he worked his way to the top.
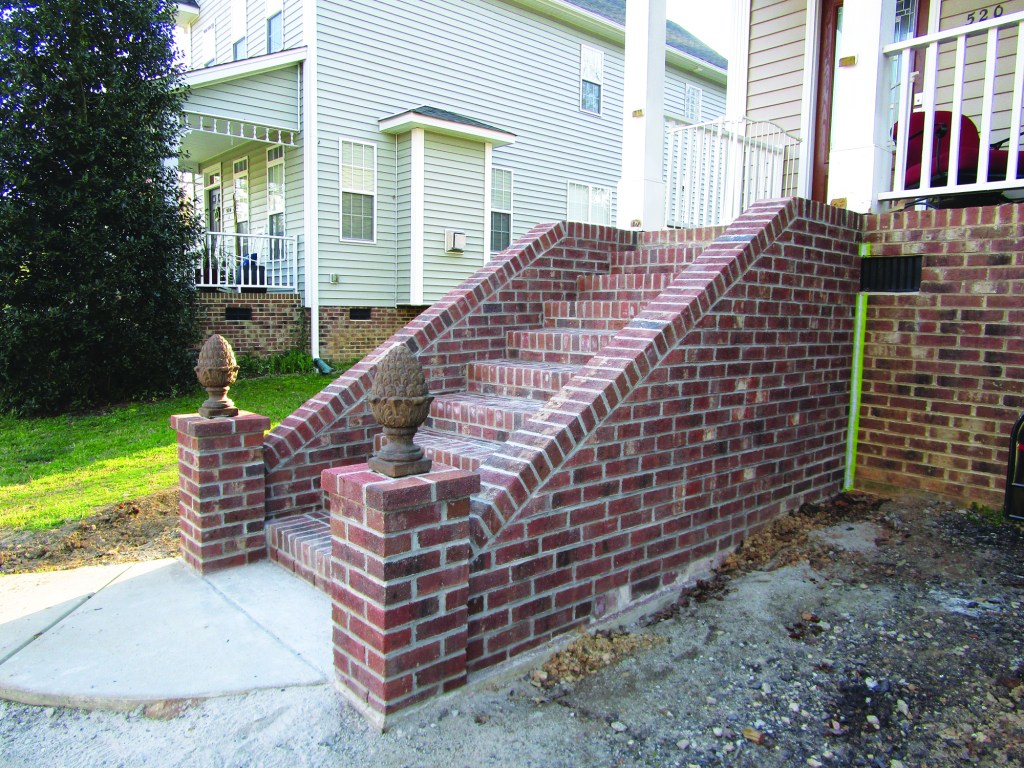
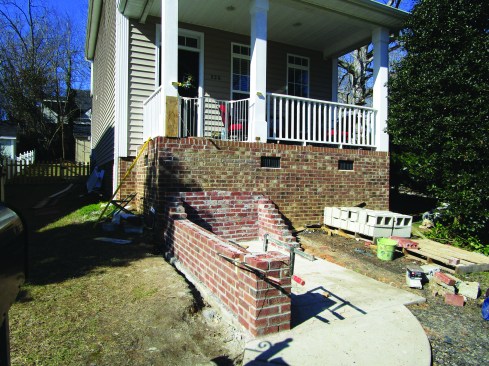
Sometimes, in a building project, the most creative part of the job is figuring out how to stage the scaffolding. After that, the actual work can be pretty routine. With masonry, doing the layout and setting guide lines are often the most creative and challenging—and critical—parts of the job. The actual task of laying the brick can be mundane by comparison. That was the case with a set of freestanding brick stairs that I built recently.
Though the masonry skills (mixing mortar, troweling, and brick laying) required for the stairs were routine, the layout was involved. Executing that layout required setting up the lines in some creative ways, and getting those lines correct and then following them precisely was essential to the success of the stairway.
Trade Comparisons
Although masonry makes up most of the work that I do, I’m lucky to have spent a lot of time as a renovation carpenter. The biggest difference between carpentry layout and masonry layout is that the latter is three-dimensional. Carpenters, roofers, and siders usually work in two dimensions, marking their layouts with chalk lines on flat surfaces.
Masons occasionally snap chalk lines, but most of the time, our lines stretch across open space. We often build a small part of a structure on each end and then set a string across to fill in the space between. Sometimes we set up brackets to hold the lines, as I did in several places on this stair project.
Masonry layout typically starts at the top. For example, when laying out brick veneer on a house, the mason establishes a top line about 4 3/4 inches below the sills of the first-story windows (the thickness of a brick sill sloped to shed water). The mason then measures down from that line to lay out the veneer. For this stair project, the layout started at the porch floor elevation. That height determined the height of the slab base as well as the elevation of each step.
Masonry layout is driven by three-dimensional unit sizes (brick and block), especially the height of the units. For these stairs, the rise of 6 5/8 inches was determined by the height of one course of stretchers (2 5/8 inches) plus one course of rowlocks (4 inches). By adjusting the mortar thickness, I can adjust the rise by 1/8 inch higher or lower, but without ripping bricks lengthwise (which is hugely labor intensive), I was limited by those dimensions. (I also could have used three courses of stretchers for an 8-inch rise, plus or minus 1/8 inch). Contrast this with laying out wood stair stringers, where riser-tread combinations are almost unlimited.
Other Layout Oddities
Prudent carpenters would never lay out studs on a wall plate one at a time with a framing square. If they did so and were off by just a tiny amount on each one, they could gain or lose length over the course of the layout, which would make the plywood or drywall break incorrectly. Masons, on the other hand, use cumulative gain or loss to their advantage. We deliberately adjust the thickness of mortar joints so that the brickwork grows or shrinks to fit a given space or length. I used this cumulative gain with the rowlock course for each step on this staircase. The tool we use to lay out for cumulative gain or loss is a brick-spacing ruler.
The last big difference between masonry and carpentry layout is that exterior masonry must be pitched to shed water. While wood stairs and decks are typically pitched slightly, it’s a more critical detail with masonry. Water drains through the spaces of wood treads and decks, but masonry surfaces are solid and water must flow off of them readily. For this reason, the pitch of a masonry surface (1/4 inch per foot) is steeper than carpentry projects usually require.
This article walks you through each phase of building these stairs, focusing primarily on the layout involved. There is a lot more to masonry work than meets the average eye.