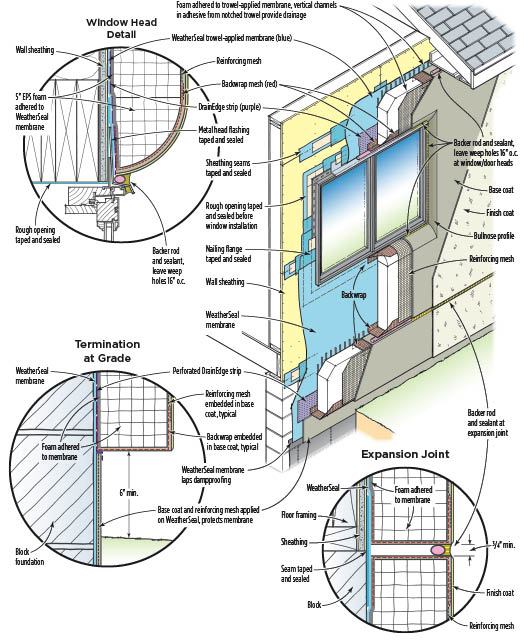

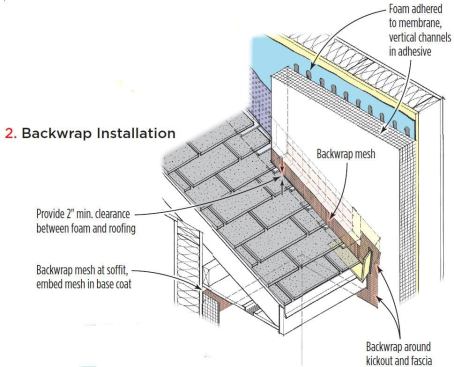


DrainEdge and Backwrapping
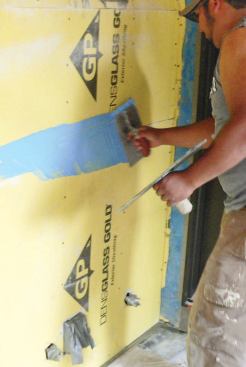
WeatherSeal dries quickly — in less than an hour in most conditions — so we can immediately start stapling up lengths of backwrap reinforcing mesh. Backwrapping is needed wherever there will be penetrations through the foam; the mesh is eventually embedded in the cementitious base coat after the EPS foam is installed. Backwrapping encapsulates the edge of the foam; it’s a fire-stopping measure required by code.
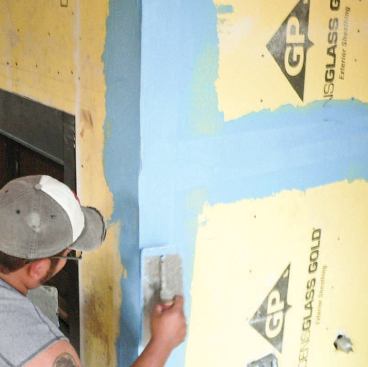
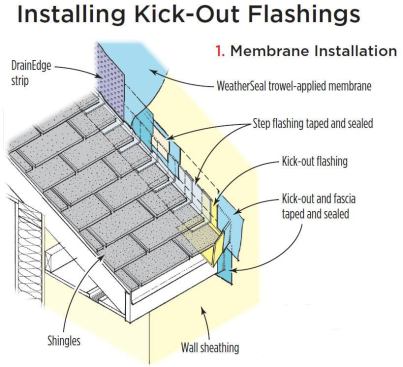
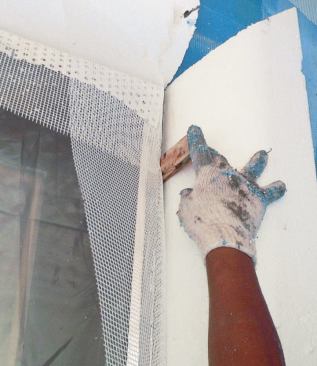
At horizontal terminations where water needs to weep out — above windows and doors and at the bottom edge of the wall — we first staple lengths of Parex’s DrainEdge before installing the backwrap mesh. DrainEdge is basically Tyvek that’s been perforated with 3/16-inch-diameter holes spaced about one inch apart. It comes in 9-inch-wide rolls. Embedded in adhesive, it acts as a bond-breaker between the waterproofing membrane and the adhered foam, creating a capillary break that allows water to drain. We prefer DrainEdge to the vented track used by many EIFS installers because it won’t get clogged by the extremely adhesive base coats we use.
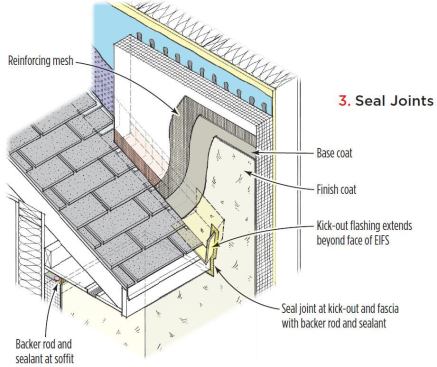
The backwrapping mesh goes on over the DrainEdge. Depending on the thickness of the foam, we leave 2 to 4 inches of the DrainEdge extending out the bottom, and enough mesh to completely wrap around to the front face of the foam. After finishing, we trim the DrainEdge so that it can’t be easily seen. Installing Kick-Out Flashings
EPS Installation
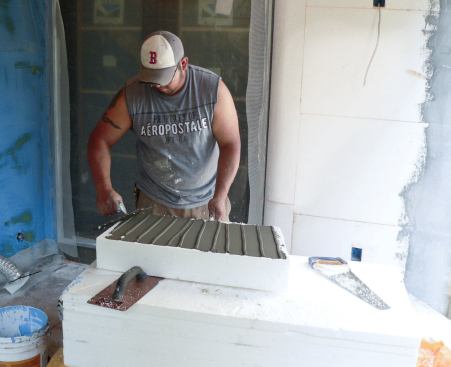
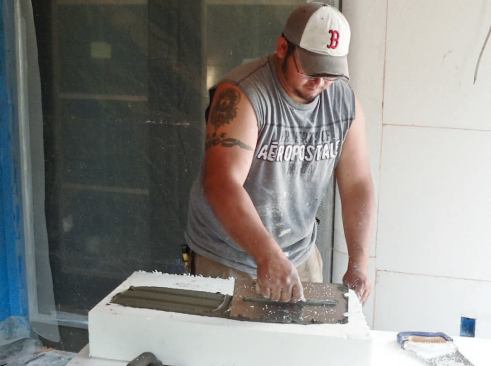
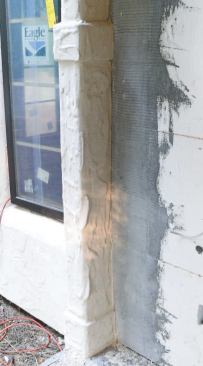
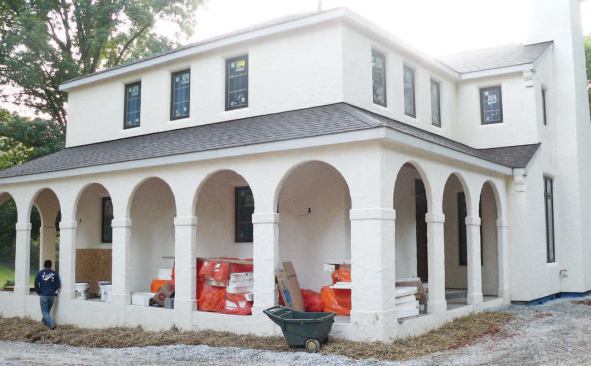
The minimum foam thickness for EIFS installations in our area is 1 1/2 inches (which provides a little more than R-5 to the wall assembly), but 2 inches is more common. On this project, the homeowners wanted at least 4 inches of foam for better R-value, and a bullnose profile around their inset windows and doors, so we used 5-inch- thick panels to get the required radius (see slideshow). Regardless of panel thickness, we always glue the 2-foot-by-4-foot EPS sheets to the wall instead of attaching them with mechanical fasteners.
We typically apply adhesive directly to the foam panels rather than to the wall, using a 3/8-inch-by-1/2-inch-by-1 1/4-inch U-notched trowel. Because we orient the ribbons of adhesive vertically rather than randomly, they provide passive drainage, so that water can move down the wall and out through the DrainEdge termination strips (hence the name of the system, VNT — vertical notched trowel).
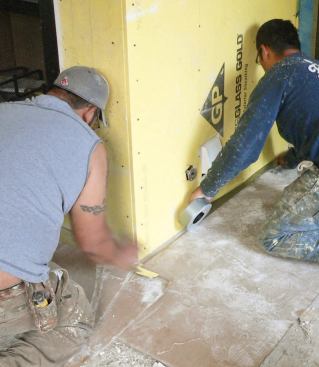
When we install the EPS panels, we run them horizontally in a running bond pattern. This helps us eliminate continuous lines in the foam and joints over vertical and horizontal sheathing seams, which tend to telegraph through the finish. At the corners, we stagger the joints so that the panels interlock. We also try to cut out door and window corners from single sheets of foam, rather than create joints in the foam over the corners of window and door openings. There should be least 6 inches of clearance between the foam and unpaved grade, and 2 inches of clearance at paved areas. Rooflines and balconies require at least one inch of clearance.
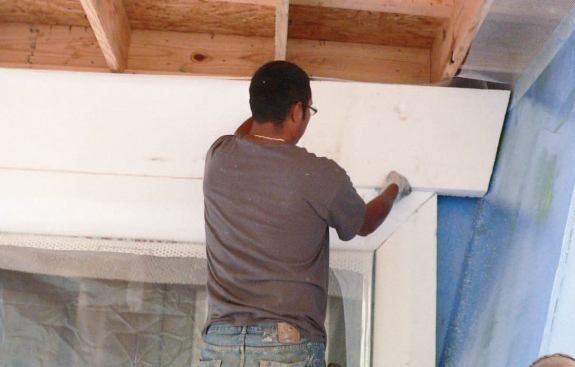
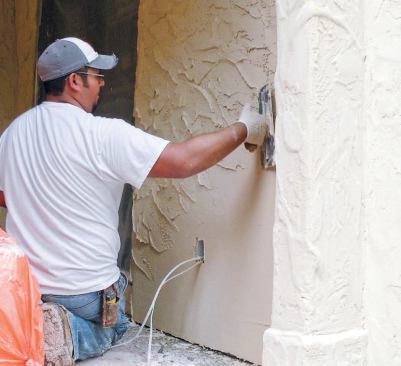
After installing the panels, we stuff slivers of cut foam into large gaps and fill smaller cracks, joints, and seams with canned foam. If there are high spots, we level the foam with a rasping board. Then we abrade the entire surface with a grit-welded 6-inch-by-13-inch float so that the panel pattern won’t telegraph through the stucco finish. To create built-out trim details, we laminate additional decorative layers of EPS foam to the surface. Afterward, we thoroughly clean loose EPS particles from the surface with brooms and brushes.