
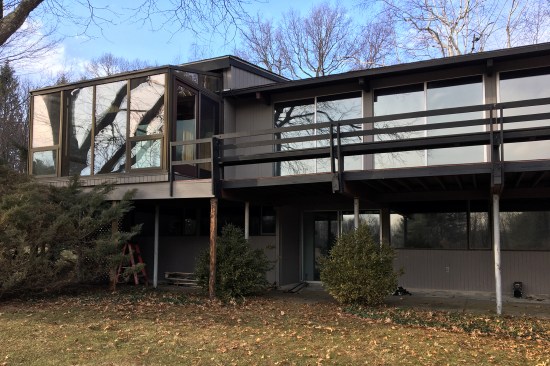
A few years ago, I was contacted by a couple from New York City who wanted to remodel their Midcentury Modern “deck house” in the Hudson Valley. They had recently purchased the home to use as a get-away retreat from the city on weekends.
Built from prefabricated components circa 1970, their kit home had been manufactured by Deck Homes (a precursor to Acorn Deck House Co. out of Acton, Mass.). Typical of a deck house, it featured an exposed post-and-beam structure, a tongue-and-groove ceiling, and vast expanses of glass via sliding doors and casement windows. A large lot with trees in the front and side yards and a large meadow in the back contributed to the signature meld-with-nature aesthetic.
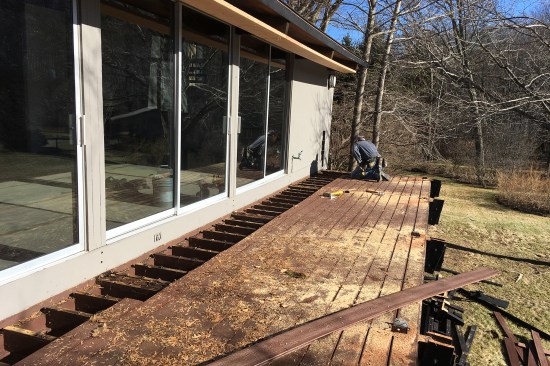
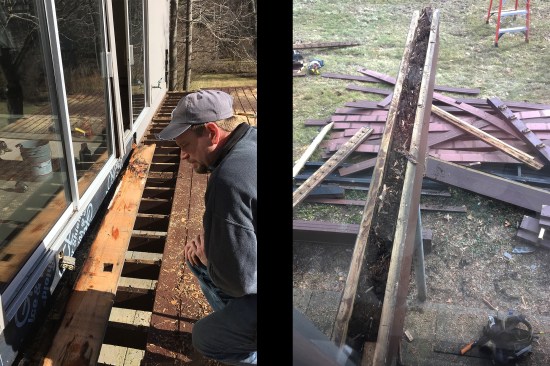
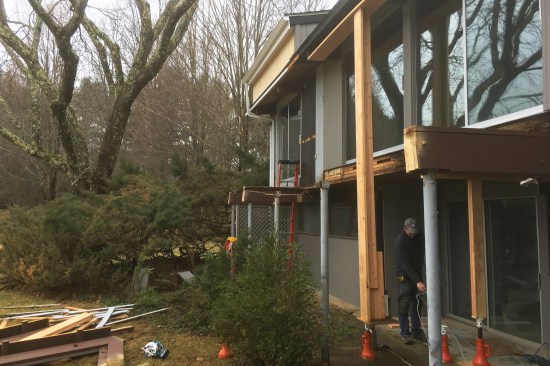
An New Dimension Construction crew member removes the existing ‘deck house’ decking.
Job Scope
The remodeling work mostly centered around the interior. We did a complete kitchen upgrade, installing a new skylight to add more natural light to the room and removing a partition wall with a narrow swinging door between the kitchen and living-dining areas to improve traffic flow (though deck houses are known for open-floor plans, this one had a congested feel to the main-level common areas). Also included was a planned new master bedroom suite added above an attached garage.
Outside, a deck running the length of the house’s rear elevation needed to be replaced. The decking sagged and felt soft in places, while the perimeter guardrail with integral seating was rotted and unsafe. Also, new sliding glass doors leading out to the deck needed to be installed. The slider thresholds showed signs of water damage, and, more pointedly, they were awkwardly high. To walk onto the deck (and vice-versa into the home), you had step up and over an 8-inch-high rise.
We began demolition in early 2019 and after a few fits and starts, we managed to wrap up the deck and kitchen just before COVID heavily hit New York in 2020. The homeowners ended up living in the home through the worst of the pandemic, so we held off work on the new master bedroom suite until the threat had subsided, finally completing our work this year.
In this story, I’m doing to focus on work related to the deck. The goal was to restore the deck with an in-kind replacement, staying true to the home’s Midcentury Modern style.
Deck Restoration
The existing deck was built from pressure-treated stock, so we assumed it had completely replaced the original (PT wood wasn’t commonly used in 1970).
The deck’s 8-foot-wide by 50-foot-long surface was supported by seven 4×12 Douglas fir beams, which spanned the width of the house and extended 14 feet beyond the grade-level wall at the back of the house. Placed 8 feet on-center, these “cantilevered” beams carried the home’s main-level floor (which projected out from the lower, grade-level wall roughly 6 feet), as well as the deck (which projected out another 8 feet from the main level’s exterior wall). They were supported by 3-inch-diameter steel columns set back 4 feet from the deck edge, which helped with the illusion that the deck was cantilevered (see photos, below).
The six joist bays between the beams were framed with 2×6 PT joists running parallel to the beams. They were flush-framed into PT ledger beams at the main-level wall running perpendicular to the built-up beams. At the outer edge of the deck, the joists were hung from rim beams that were also run perpendicular and flush-framed into the main beams.
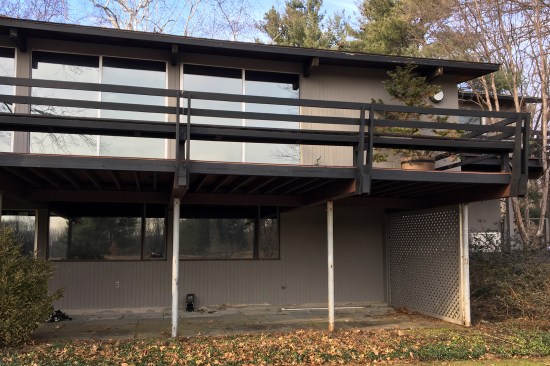
The existing deck ran the length of the home’s rear elevation, its 8-foot-wide by 50-foot-long surface was supported by seven 4×12 Douglas fir beams spaced at 8-foot on-centers. The beams were in turn were supported by 3-inch-diameter steel columns set back 4 feet from the deck edge.
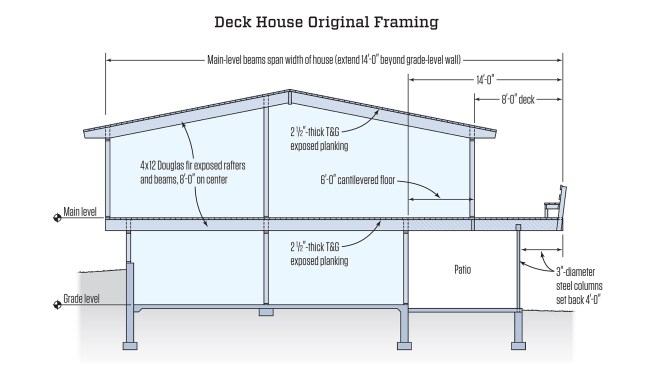
The home’s original framing and 8-foot-wide deck. The main-level beams spanned width of the house and extended 14 feet beyond a grade-level wall below. 2-1/2-inch-thick tongue-and-groove planking in turn spanned over the home’s 8-foot-on-center, exposed-beam layout.
The 4×12 fir beams that span the width of the home look intact, and it was assumed (wrongly) that the 14-foot “cantilevered” lengths of fir (which supported the cantilevered floor and original deck) had been removed when the original deck was replaced sometime in the late 1980s, early 1990s. See “Rotted Douglas Fir Beams” slideshow, below.
New Dimension Construction
An ill-suited sunroom, not in keeping with the home’s style, had been built on the left side of the deck.
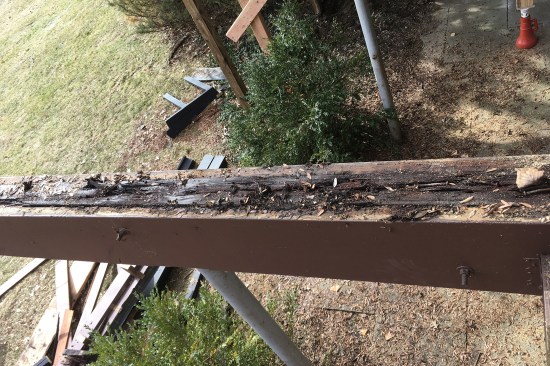
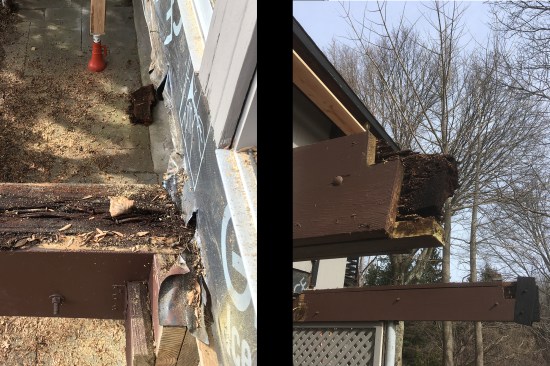
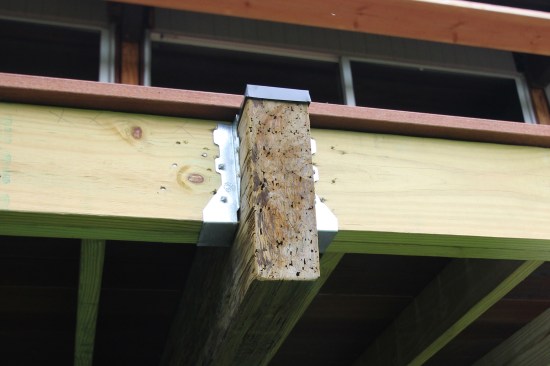
Rotted Douglas Fir Beams
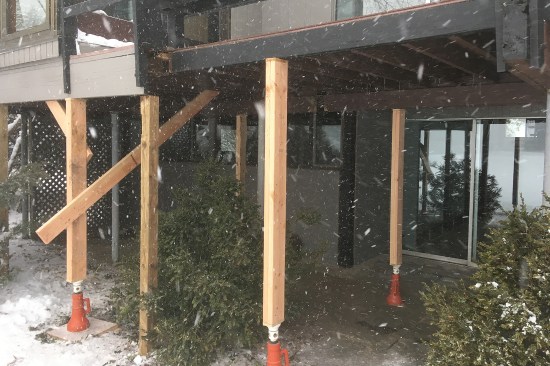
The existing deck and cantilevered floor were posted up prior to…
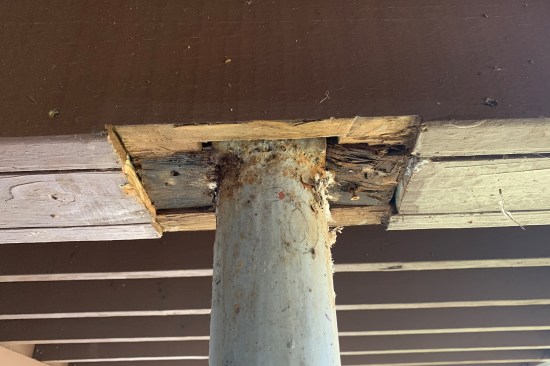
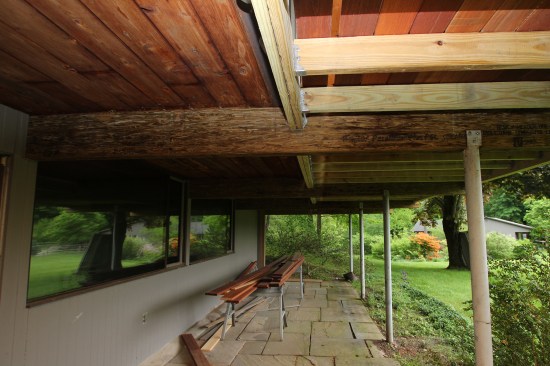
A deck collapse waiting to happen. When we started removing the PT decking, we discovered the exterior portion of the home’s original fir beams had been left in place when work was done on the deck and were severely deteriorated. The previous builder had sandwiched the original 4x12s between two PT 2x12s (through-bolting them together) and ran a PT 2×4 on the bottom, encasing the fir in a pressure-treated “U.” In addition, the builder omitted cap flashing, allowing years of moisture to rot the Doug fir into something verging on compost. This was particularly dangerous because the saddle connections welded to the steel columns were “secured” to the rotted ends of the fir beams. It wasn’t out of the realm of possibility that—loaded with partygoers—the 8-by-50-foot deck could have collapsed.
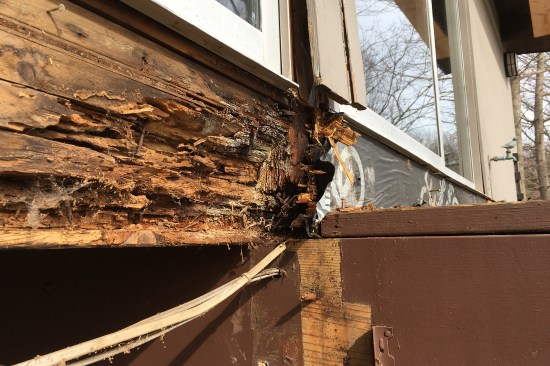
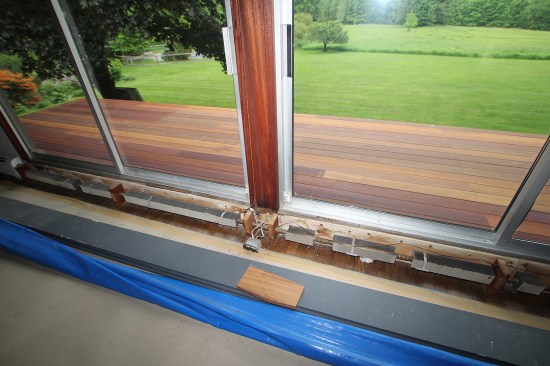
At the other end of the beam supporting the home’s cantilevered main-level floor, the rot hadn’t migrated under the conditioned space and compromised the structural integrity of the home, let alone damaged the floor assembly. Even so, the raised thresholds under the sliders were heavily damaged from years of water infiltration.
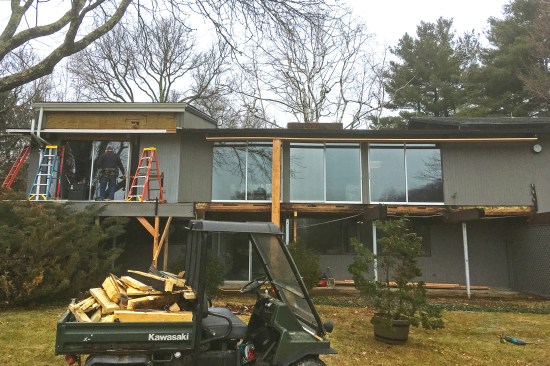
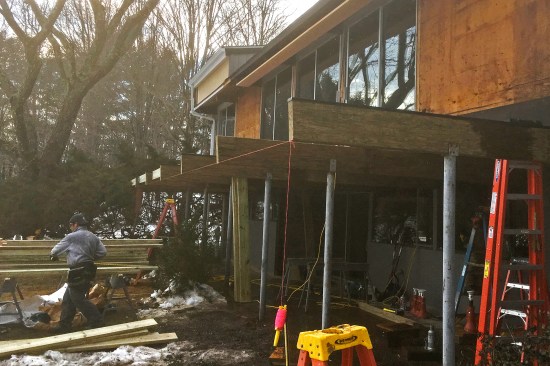
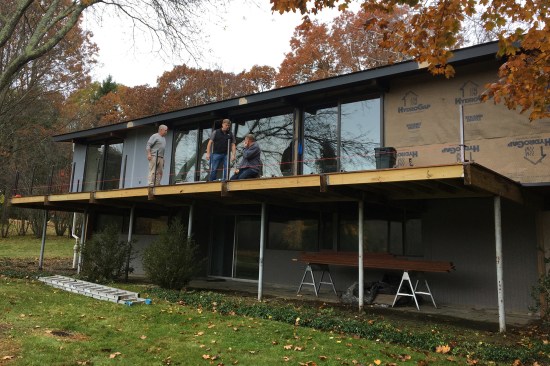
Starting from scratch. We demoed the four easier deck bays (on the right) first, posting up the deck and roof as necessary. An enclosed sunroom had been built on top of two of the joist bays on the left side, and included an ugly pop-up roof on the main house that accommodated the sunroom’s roof slope. We demoed the sunroom and pop-up and began the deck replacement from scratch.
New Framing
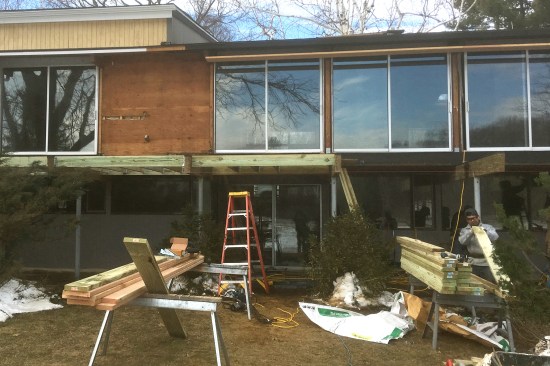
After the sunroom was demoed, the left side portion of the deck …
Starting out, we installed seven 4×12 preservative-treated Parallam Plus PSLs to support the cantilevered 6-foot portion of main-level floor and the 8-foot-wide replacement deck. We inserted the PSLs in the pockets vacated by the demoed fir beams at the grade-level wall at one end and set them in the existing saddles welded to the steel columns at the other. For cap flashing, we installed aluminum coil stock with a brown finish to make it less visible between the new deck boards.
Between the Parallams, we matched the flush-framed layout of the previous deck. We installed double PT 2x8s perpendicular to the 4x12s at the main-level wall and at the deck’s outer edge, then infilled with 2×6 joists 16 inches on-center parallel to the main beams.
To support the edge of the cantilevered floor and the new doors, we installed steel angles between the Parallams, bolting them to the back of the doubled-up 2-by ledger beams and the underside of the exposed tongue-and-groove floor. The floor “system” consisted of just 2 1/2-inch-thick tongue-and-groove planking (which spanned over the home’s 8-foot-on-center, exposed beam layout) and oak strip flooring.
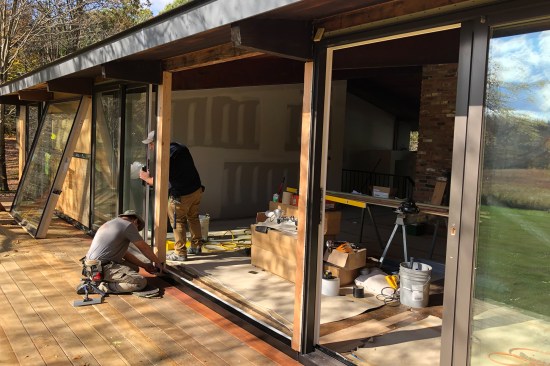

The 5⁄4×6 mahogany decking, installed with hidden fastening cl…
Eliminating the step. Next, we installed the mahogany decking, which gave us a work platform as we replaced the sliders and removed the awkward step at the thresholds. We secured the 5/4×6 mahogany with Tiger Claw hidden fastening clips, being careful to avoid fastening through the cap flashing covering the new Parallam beams.
The 8-inch-high rise had been needed to accommodate hydronic baseboard run under the length of the glazed wall. We removed roughly 20 feet of finned tube baseboard and cut the raised threshold down to the tongue-and-groove deck, then installed a trim piece to infill the remaining void. The hardwood trim lipped onto the existing oak strip flooring and was rabbeted so we could run the hydronic loop underneath. The infilled repair resulted in a threshold slightly higher than normal, but it was a much improved egress experience.
Finishing up. We trimmed off the deck with 3/4-inch mahogany, covering all exposed pressure-treated framing and the ends of the Parallams. In a departure from restoring the deck with an “in-kind” replacement, we installed a stainless steel cable railing system with a 4-inch-wide ipe top rail. Its sleek design was in keeping with home’s modern aesthetic and offered unfettered views of the property’s expansive backyard.
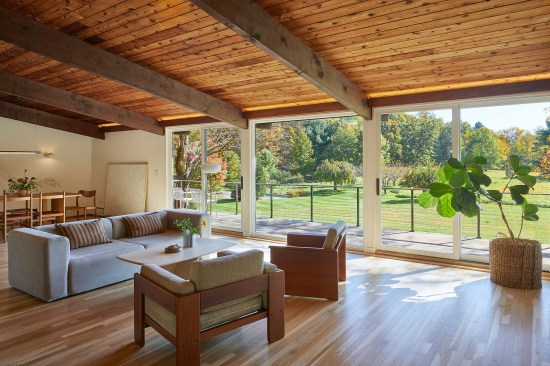
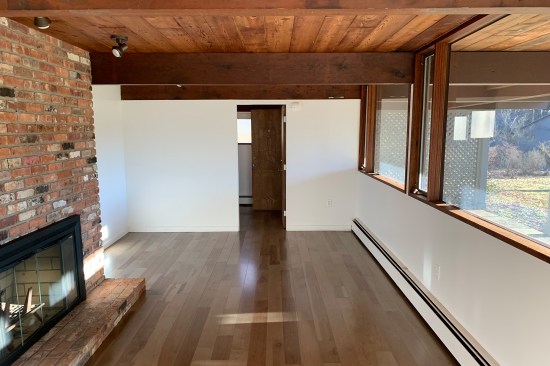
The replacement deck is visible beyond the finished living-dining area.
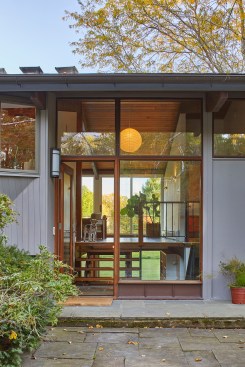
Signature “deck house” features such as exposed beams, a tongue-and-groove ceiling, an open floor plan, and lots of glass help connect the home to its scenic backyard, both from the interior and from outside the home’s front elevation.
Photos by New Dimension Construction