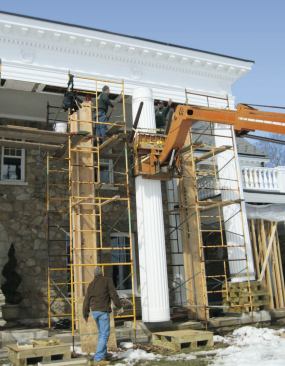
The author's firm had been hired to replace the bases of six 100…
The author's firm had been hired to replace the bases of six 100+-year-old wood columns; engineer's inspections had indicated that the upper portions of the columns were sound, and there were other good reasons not to disconnect them from the roof structure entirely. As it turned out, much more was needed.
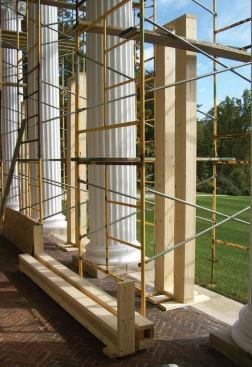
To temporarily support the porch roof while the columns were rep…
To temporarily support the porch roof while the columns were replaced, the carpenters built posts from 10-foot-long 2x4s and 2x6s.
To start, the assemblies were sheathed with 1/2-inch plywood. Fu…
To start, the assemblies were sheathed with 1/2-inch plywood. Full-length 2×4 strongbacks were added to the outside for rigidity.
Double-post assemblies were joined by top and bottom plates stac…
Double-post assemblies were joined by top and bottom plates stacked two high in order to support the roof while work was being performed on the columns.
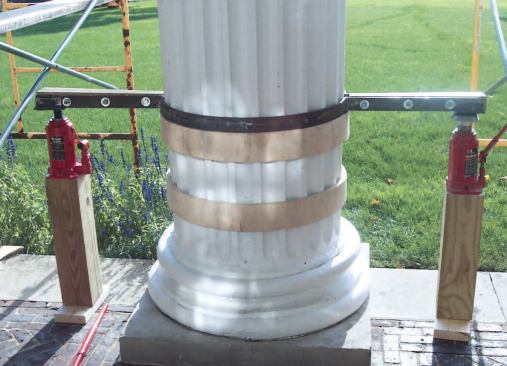
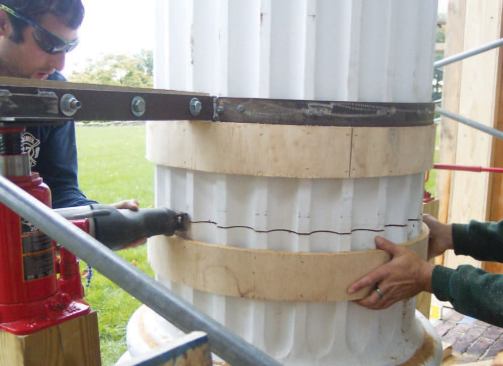
The original plan was to replace only the column bases. Accordin…
The original plan was to replace only the column bases. Accordingly, the crew installed structural steel clamp rings around the shafts and shifted the weight from the pedestals to the concrete porch using 20-ton hydraulic jacks.
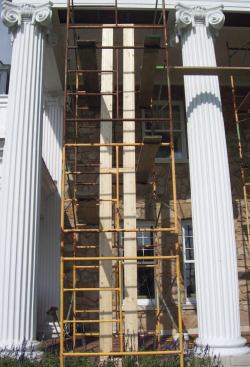
Rings of bending plywood served to guide the cutting of the wood…
Rings of bending plywood served to guide the cutting of the wood columns, which was done with reciprocating saws and circular saws.
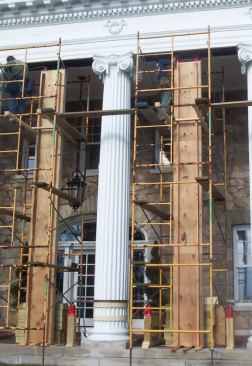
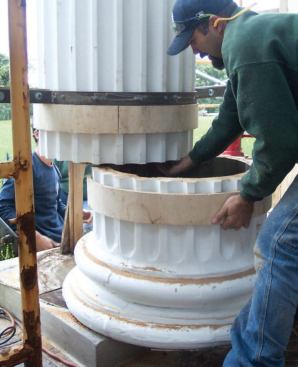
When the bases were removed, it was discovered that the interio…
When the bases were removed, it was discovered that the interiors were delaminating and that the columns would have to be replaced in their entirety.
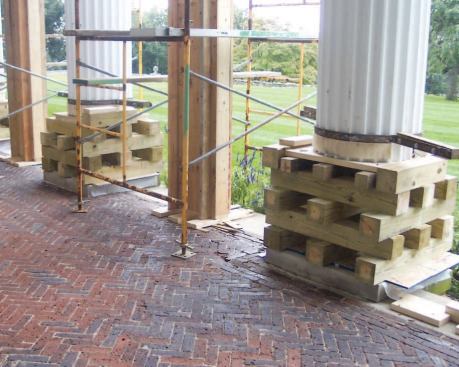
After cutting away the bases, the crew placed cribbing under the…
After cutting away the bases, the crew placed cribbing under the shafts while awaiting the delivery of new columns.
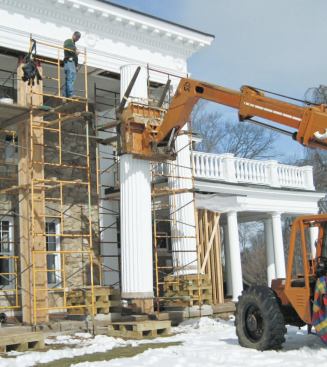
Sheets of 3/4-inch plywood protected the lawn from the lift that…
Sheets of 3/4-inch plywood protected the lawn from the lift that was used to transport and place the new columns..
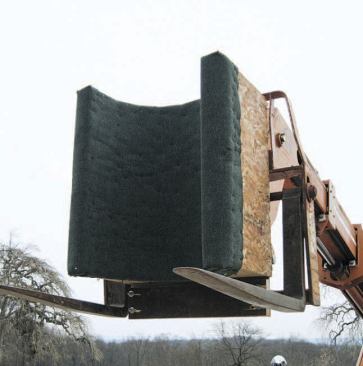
The lift was fitted with a site-made cradle for moving the colum…
The lift was fitted with a site-made cradle for moving the columns.
Moving a column with the lift
After installing the capitals and bases, we moved on to the trim. In some places we had to disassemble and replace the entablature moldings because the new columns had a slightly different profile from the originals (see slideshow). We made some of the new trim components on site and had some of the profiles milled at a local wood shop.
The final step was patching the rubber roofing. The previous roofers had installed a tar-and-copper curb against the column, attempting to follow the radius and patching with cement where necessary. This didn’t seem like the best approach — besides being unattractive, it would be prone to leaks. Instead, at the spot where the roof deck met the column, we ground back the flutes to create a flat area. We primed the bare wood, then adhered rubber roofing to the column and covered it with new copper flashing.
After we finished our work, the painters came in. When they were done and the scaffolding — which had been up for eight months — came down, it looked as if we had never been there.
Cost
The total cost for the columns was $43,500, and the fiberglass bases and associated flexible cove moldings added another $12,240 — for a total, with tax, of about $60,000, or $10,000 apiece. We were on the job for about six months, with two men half of that time and three men (not including the lift operator) the other half.
Noah Woodruff is a lead carpenter for R.J. Doerr Co. in Easton, Pa.