
Ben Kelley
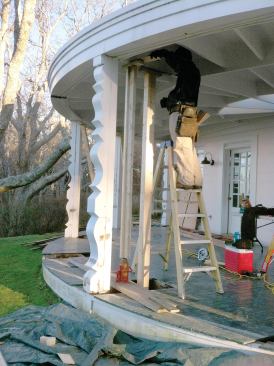
The author and his crew set up temporary supports for the porch …
Deck Repair
Ben Kelley
The author and his crew set up temporary supports for the porch …
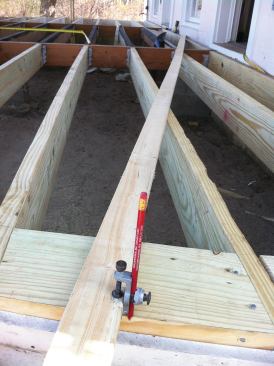
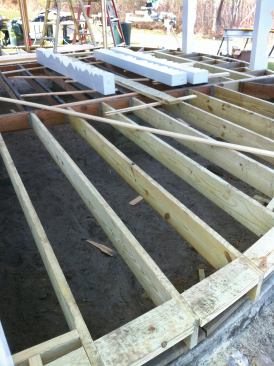
Next, we stripped the remaining decking. The tops of the joists had been flashed with felt paper and many were in reasonable shape, but we ended up replacing the framing around the perimeter of the deck. Because the original framing sagged slightly toward the center, we wanted to pitch the new deck away from the house and provide positive drainage. The deck framing was freestanding, with the ledger beam at the house supported by the stem-wall foundation at the ends and by a pair of block piers midspan. It was a simple matter to raise the ledger by installing blocking on top of the piers, but unfortunately the doors limited the elevation change to about an inch. Still, one inch of pitch per 16 feet of deck is better than none at all.
After doubling the ledger with an additional PT 2×10, we reinforced the connection between the ledger and the pair of beams perpendicular to the ledger with Simpson ZMax right-angle hangers. Each beam also had some rot damage out near the sill, but instead of replacing the beams, we cut off the rotted sections and replaced them with new PT framing. PVC Redi-footings (866/586-6082, redifooting.com) installed underneath the splice joints support the framing.
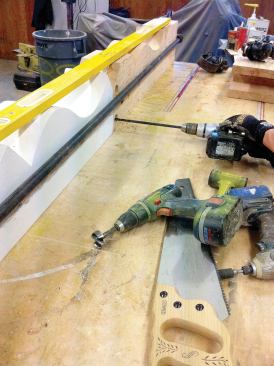
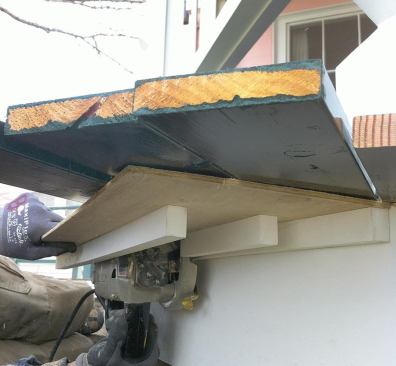
Finally, to make sure the radiused sill and rim joist would provide fair and smooth backing for new fascia trim, we set up a large trammel at the centerpoint of the deck (see slideshow). Then we installed PT blocking on the flat around the perimeter of the deck, and used the trammel to scribe the radius on the blocking. After cutting the curved profile with a circular saw, we padded the framing below this cut to our new radius line.
Reinstalling the Posts
To prevent the column bases from contacting the framing, we reinstalled the columns on top of Simpson CPS6 standoff bases, which we had fastened to the bottoms of the columns with stainless steel screws. We secured the columns to the sill with Simpson angles and 1/2-inch-diameter lag bolts, and secured them to the top plate with TimberLoks.
Afterward, we trimmed the rim joist with 3/4-inch-by-10-inch Azek. PVC is not my first choice of trim material, but for locations like this where the deck is close the ground and prone to rot, PVC makes a lot of sense, and it was easy to bend around the curved rim joist.
Decking
We sent the new vertical-grain fir decking to a local painting contractor, who primed and applied the first coat of Pettit marine paint to all four sides. Even on Martha’s Vineyard, marine paint isn’t typically used on decks, but our client had previous experience with it and this particular brand had the color she was looking for. After the decking was installed, the painting contractor touched up the deck, primed again, and then applied the finish coat.
We installed the decking using the Camo hidden fastener system (800/968-6245, camofasteners.com). One advantage of this system is that it self-spaces the decking to 3/16 inch, which allowed us to eliminate the new foundation vents called for in the original plans (the existing decking had been butted tightly together, and any gaps had long since been sealed up with paint). Another advantage is that the fasteners mostly eliminate predrilling, though we had a few problems with end-grain splitting at the butt joints. We solved this issue by driving stainless steel screws through the face of the boards at butt joints.
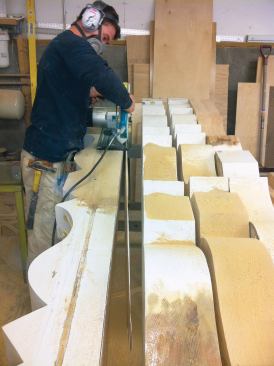
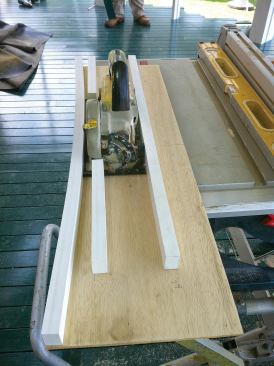
To cleanly cut the decking around the perimeter of the porch, we fashioned a simple jig for our circular saw consisting of a plywood table and a curved fence that matched the radius of the porch. With the saw clamped to the table, the jig was a little heavy but made it easy to safely and smoothly cut the radiused profile in the decking.
Costs
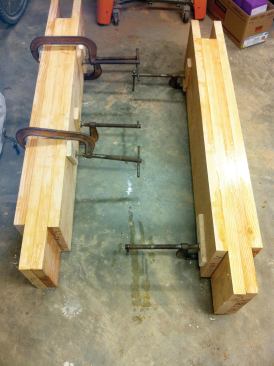
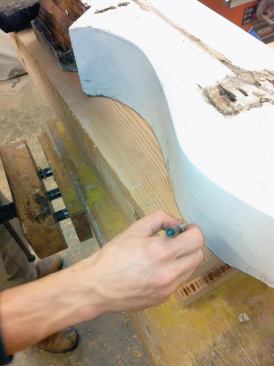
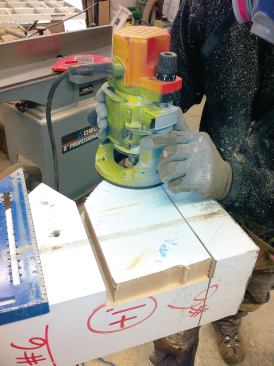
It took about 14-1/2 hours to remove each post and repair it, or 115 hours for eight posts. This included laminating and milling the new extensions, reassembling the posts, and prepping them for paint.
Additional demo and structural work added almost 40 hours to the job. Repairing the deck framing took us almost 60 hours, while installing the decking on the 32-foot-diameter deck with the Camo system took about 66 hours. That included priming the end cuts and custom cutting the decking around the posts.
Ben Kelley owns Building Shelter, a building and remodeling company in Vineyard Haven, Mass.