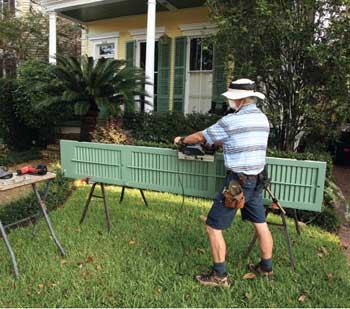
Nothing finishes off an old house like shutters. Not the cheesy plastic versions found on suburban split-levels, but real wood ones that open and close. Unfortunately, wood shutters are often neglected and allowed to deteriorate, so your first inclination might be to replace them. But in fact, new shutters — real ones, that is — typically cost more than the time and materials it takes to restore the originals.
Removing Hardware
I begin a shutter job by assessing the units’ general condition from the ground. Then I take the shutters down and inspect them to get the true scope of the damage.
Assuming restoration makes sense, I remove the hardware. In New Orleans, where I work, this generally includes two Acme hinges per shutter, or three hinges for shutters taller than 7 feet. These two-piece hinges allow the shutter to be lifted off for maintenance and also hold it securely in open position without the use of a shutter dog, an S-shaped restraint hook common on shutters hung with strap hinges.
Acme hinges come in seven sizes, but I mostly see #2s; they’re 2 13/16 inches high and throw the shutter about 23/4 inches from the face of the casing. I also see larger #1 1/2s, which work better with very tall shutters.
Most shutters also have a bottom catch with a strike plate and an escutcheon, and some also have slide bolts — typically 6 inches long — for latching the two panels together when they’re closed.
Many shutters have some kind of pull — D-rings are common — but I rarely replace it unless the shutter gets a lot of use; it’s just something else to rust and foster rot.
I reuse the hardware as long as it still works. Usually I have it sandblasted or chemically stripped, and then I paint it with Rustoleum. If the client wants something more durable, I’ll have it powder-coated at a local shop. When needed, I buy replacement hardware from Van Dyke’s Restorers (800/787-3355, vandykes.com). I always reinstall hardware with stainless steel screws.
Stripping the Shutters
After dealing with the hardware, I usually have the shutters chemically stripped; at $25 to $30 per panel, it’s well worth it. When I get the shutters back, I use a garden sprayer to apply a 10-to-1 solution of muriatic acid (or vinegar) and water to neutralize the stripper. Standing the shutters on simple racks made from 4×4 posts and 3/8-inch steel pins makes this and the eventual repainting process a lot easier.
After giving the wood a good soaking with the neutralizer, I let it dry to 14 percent — the equilibrium moisture content for cypress in my climate — then start digging out the rot with my “dental picks” and 5-in-1 painter’s tool.
For larger areas, I use either a rotary rasp chucked into a die grinder or a drill with a 3/8-inch bit.
Rot Repair
I try to get back to fairly sound wood before making rot repairs, then soak the damaged areas with Wood Care Systems’ Bora-Care (800/827-3480, ewoodcare.com) mixed 1-to-1 with water and applied with a brush or syringe.
Once that solution dries, I treat any remaining spongy areas with LiquidWood epoxy from Abatron (800/445-1754, abatron.com). With the LiquidWood still wet, I fill the rot cavities with WoodEpox putty, another Abatron product.
For large holes, I use West System epoxy (866/937-8797, westsystem.com), adding one of the company’s fillers or even sawdust to the mix when needed. (An excellent online user’s manual explains the system.) West is so hard when it dries it can be a bear to sand, so I cap off repairs with one of the Abatron epoxies before the West System is fully cured.
