Repairing Slats
I replace broken or missing slats with new ones that I make from Spanish cedar, a species known for rot resistance. Getting them into place can be tricky. Sometimes I can use a bar clamp to spread the stiles far enough to get the pins into the holes. Or I may trim one or both pins and use a hammer and flat-head screwdriver to persuade the slat into place.
Another trick, when all else fails, is to replace the pin with a #8 stainless steel pan-head screw, which I screw in just enough to get the slat in the hole, then back out with needle-nose pliers once the slat is lined up.
Control Rods
I put off working on control rods until last, so that any staples that are going to break or come out while I’m handling the shutter will have done so. If a control rod is fractured, I’ll fix it with epoxy.
I’ll sometimes even fix a rod that is broken in two, inserting a 3-inch stainless steel trim-head screw in one broken end and drilling a hole in the other end large enough to accept the screw head. I fill the hole with epoxy and slowly insert the screw, catching the squeeze-out as I go. I stop just short of “home,” mix some filler into the excess epoxy to thicken it, then push the pieces together and reinforce the repair with splints and tape while the epoxy dries.
When I have to, I make new rods from Spanish cedar, clamping the blank into a bench vise so I can mark and drill 1/16-inch pilot holes for the staples. I use galvanized staples — because I haven’t been able to find any stainless ones — and glue them into place with epoxy.
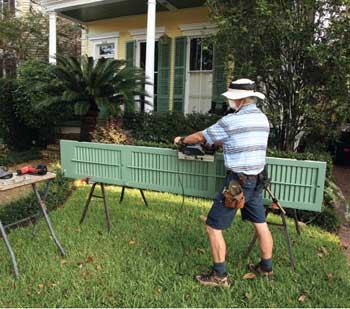
Fitting to the Opening
After the shutters are again structurally sound, I test-fit them in the openings, then cut a 5-degree bevel on the tops and bottoms to shed water and a 2- or 3-degree bevel on the inside stiles to eliminate binding.
When everything fits well, I put a 3/16-inch radius on all the perimeter edges with a laminate trimmer.
Paint Prep
Before priming, I wipe the wood with a nonoily solvent like DuPont Prep-Sol 3919S. For new shutters, I use Mill Glaze Away (Napier Environmental Technologies, 800/663-9274, biowash.com).
Paint stripping raises the grain, so I hit the worst of the resulting “fuzz” with an orbital sander — but I don’t go too crazy because the first coat of primer makes sanding much more effective.
If I ever do a set of shutters for my own home, I’ll do a full schedule of high-performance two-part coatings. Until that day, I have to deal with compromises, which I have distilled down to two options.
The first is to spray Abatron’s Primkote 8006-1 epoxy, a thin-viscosity, clear sealer-primer that soaks deeply into wood and dries almost instantly. Primkote is so thin it leaves plenty of mechanical “keying” for an alkyd primer to follow. I like Pratt & Lambert Suprime S1008 (800/289-7728, prattandlambert.com).
The other option is a lot trickier, but provides better protection: spraying DuPont’s two-part Corlar 2.8 HG epoxy (800/ 438-3876, performancecoatings.dupont .com), then spraying alkyd primer over it before it’s completely cured. The trick is getting the alkyd on at just the right time: If the Corlar has not dried enough, the alkyd will react to the solvents and ripple. But if the Corlar has completely cured, the alkyd won’t stick as well.
Doing this correctly takes practice and experience — and cool weather. Do it wrong and you’ll have a big mess.
Spraying
I use a Binks HVLP sprayer to apply the Corlar and alkyd primer. It applies a fine finish with little overspray, and the 2-gallon pressure pot and 25 feet of hose give me plenty of reach and capacity.
If the shutters haven’t been completely stripped of paint, I hit them with a deglosser right before spraying the Corlar.
I spray the slats first. I open them all the way so I can get the end grain, and then I do the rest of them, working up and down and spraying from both sides until I have full coverage. Next I do the frame, saving the top and bottom until the shutters are off the rack. I check for runs after every shutter is complete. Once the primer has had two days to dry, I go over everything lightly with 80-grit sandpaper to remove any remaining fuzz.
Before hanging, I use a paintbrush to apply two coats of the Corlar epoxy to the shutter tops and bottoms. After the shutters are fit to their openings, they’re removed once again and sprayed with a second coat of Corlar and a second coat of alkyd primer. I usually let a painter handle the top coats. I tell clients to insist on an oil-based paint because it holds up better than latex in our climate.
Despite the considerable expenditure of time and money, it’s often hard to tell the difference between a real shutter restoration and the lick and a promise I generally see. But when the next hurricane or wind storm is approaching and your customers can effortlessly close and secure their sturdy shutters, they’ll appreciate your effort and they’ll feel good about spending the money.
Michael Davis is a restoration carpenter in New Orleans.