
Brickwork
Before continuing the demolition of the brick beneath the beam, Danny wanted to finish all of the masonry work above the beam, given the fragile condition of that part of the wall. As mentioned earlier, this house had three wythes of structural brick. Most of the field bricks, or “stretchers,” were set in the familiar American bond, with a header course every seven courses. Header courses, in which the bricks are set with the short end exposed, hold the wall together across its width. In the case of a three-wythe wall, header courses alternate inside and outside every four courses, tying the inner and outer wythes to the center wythe (see “Flitch Beam for a Three-Wythe Structural Brick Wall”).
We started rebricking with the course immediately above the steel, which turned out to be a header course. We temporarily supported one section with scrap 2-by blocking while we pieced in others until all of the missing brick above the beam was replaced. Then we toothed in the brick under the beam at the kitchen window jamb.
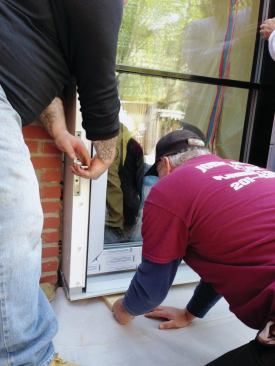
We wanted to finish the lintel with a soldier course, but first we had to finish defining the rough opening for the new door so we could tie the brick together at the corners. We removed the kitchen window and the surrounding brick, leaving the outer wythe intact; this would define one side of the opening. The face brick extended past the inner wythe by about 3 inches, leaving just enough room to install a double 2×8 rough jamb stock fastened with Tapcons. At the other end, after removing the door, we reset the temporary Lally column just inside the new opening and rebricked the jamb, preserving the American bond and header courses. We left the old granite window sill in place because we didn’t want to risk compromising the structure by removing and replacing more brick directly under the bearing point of the steel.

Rob Corbo
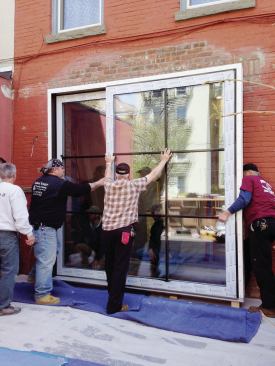
The larger fixed panel was roughly aligned with the opening and …
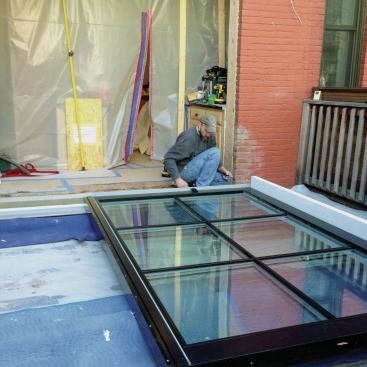
To provide a flat, level surface at the door sill, we built a shallow form over the brick and placed a stiff pea gravel concrete mix about 2 inches deep and reinforced with steel mesh. The plan called for the door jambs to be set flush with the new drywall, so we aligned the concrete flush with the brick wall on the inside, which would leave the door set back one wythe. After the door was in, we mortared a piece of bluestone underneath the sill to complete the threshold.
With the rough door opening complete and the beam still temporarily supported, we removed the remaining blocks from under the beam ends, added brick where necessary, and mortared all the joints. The final bit of brickwork was to install the soldier course at the lintel, resting the bricks on a shelf welded to the bottoms of the two steel channels. Now it was time to turn our attention once again to the door.
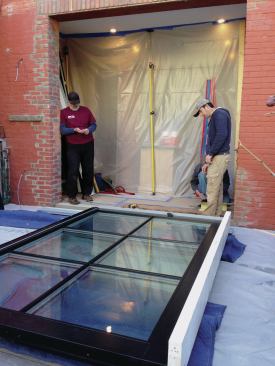
Assembling the Door
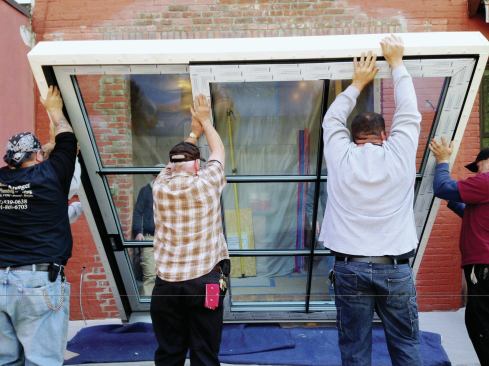
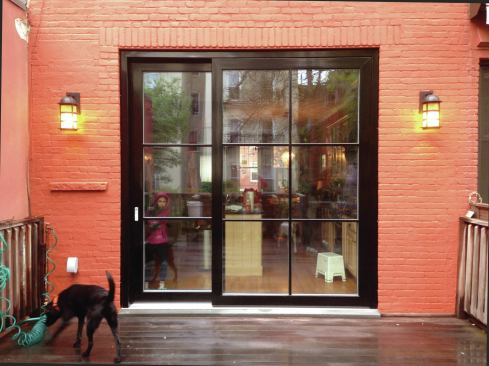
Because we needed to carry the door through two doorways with limited height clearance, Zola shipped it knocked down, but the unit had been assembled and tested at the factory. This is standard practice, because it would be impractical to lift a really large door into place fully assembled—the lift-slide model we were installing can be fabricated up to 26 feet long. Although the jamb can be installed first and panels set in place, we thought it would be easier to put the heavy panels together working flat on the deck. At about 9 feet square and 900 pounds, the door was still within the limits of what we believed we could lift into place.
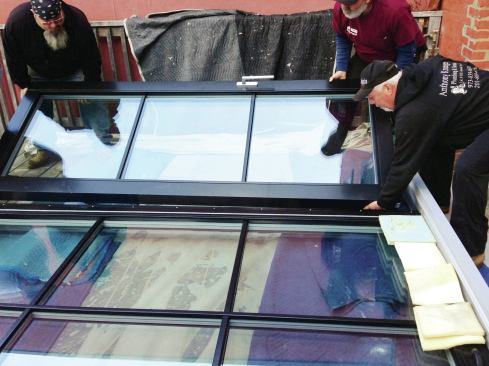
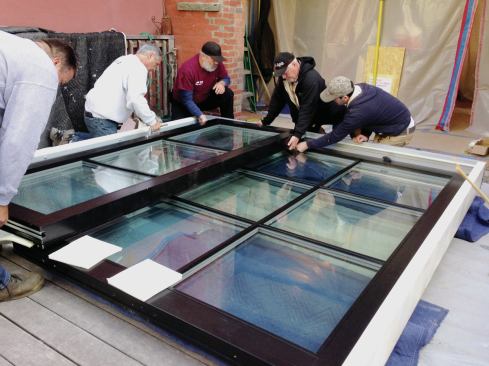
The first step was to put the frame together. This time I hired four boiler technicians to help with the assembly. We laid two rows of doubled 2-bys on the deck parallel to the brick wall and more or less centered in front of the opening. Even though the door was shipped with protective tape covering the aluminum cladding, for extra protection we covered the lumber with thick movers blankets, then laid the larger fixed panel down, roughly aligning it with the opening. This panel had been shipped with the jamb still attached, so the next step was to add the other jamb and attach the sill to the jambs through the bottom using screws provided by Zola.
That was the easy part. Placing the active panel was a little trickier, partly because it weighed about 300 pounds and we had to carefully lower it straight down over the frame while standing awkwardly around the frame, and partly because the concealed wheels and seals had to be properly aligned with the track in the sill and also with the stile of the fixed panel. After we shimmed the frame to ensure that it was as flat as possible, it was a five-man job to get the panel into its proper position. We used a couple of pieces of foam to cushion the doors, and prepared for the worst. It took some coordination (and maybe a bit of luck), but the door found the track easily. We locked it into position, then aligned the headpiece with the wheels and seals of the active panel and fastened it through the top into the jambs.