Building a Reinforced Concrete Block Wall, continued
On this job, the walls rose three stories and measured 37 feet long by 49 feet high at the ridge (plus another 12 feet to the chimney tops), with an 8-inch-thick core and a final thickness (including the stone veneer) of about 16 inches. In addition to several window and door openings, oversized fireplaces and flues interrupted each gable to one side of center.
Placing the Rebar
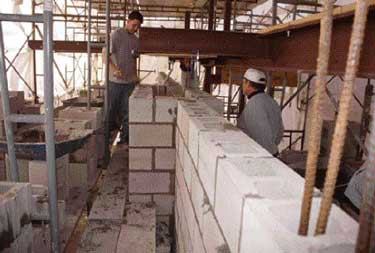
Just prior to grouting a lift, we set the vertical rebar, allowing it to stand 18 to 24 inches higher than the last course of block. This short projection provided sufficient overlap between lifts while still allowing us to lower the block over the rod without too much difficulty. Tie-wire has no reinforcing effect in unifying separate bars; a good overlap is all that’s needed.
The vertical rebar schedule called for #5 bars set 16 inches o.c., with four #6 bars set two per cell at the wall ends and at either side of every window and door jamb. Additionally, we used #3 stirrups at every other course, 16 inches apart vertically, to reinforce the sides of all openings. Stirrups cause individual rods to work together, increasing their reinforcing effect.
To consolidate the grout in the cells, we used an Oztec rebar shaker. This tool (800/533-9055; www.oztec.com) has interchangeable heads for various rebar sizes — #6 and #5 rebar, in our case — and works extremely well. We found that it takes two to run the shaker: one person to hold and operate the vibrator, and another to control the head on the rebar. It’s a great tool: You can watch the grout puddle right into place. No more hand-shaking rebar for this crew.
At each floor level and at the sloping rooflines, we incorporated a bond beam, using KO block to create a continuous horizontal form. The bond beam contained two #5 horizontal bars embedded in grout, one to each side of the vertical rod. We carried the bond beam around the chimneys, front and back, thus ringing them with rebar.
