Building Brick Stairs – Continued
The kind of precision required for trim carpentry was not necessary here; the wonderful thing about masonry is that small imperfections can simply be filled with mortar. Still, clean cuts that are close — within 1/8 inch or so — really make the job look good.
Building Steps That Drain
To accommodate an external drainage system designed to minimize hydrostatic pressure on the steps, I had made the excavation 6 inches wider than the structure. I lined that 6-inch space with filter fabric, placed a piece of standard plastic drain tile at the bottom, and filled the space up to within a few inches of the top with pea gravel. Then, after folding the filter fabric over the gravel, I back-filled the last few inches with dirt. Left over from prior jobs, the filter fabric, drain scraps, and pea gravel cost about $15 (the total expense of the external drain system, not including my labor).
I also wanted to provide an outlet for any water that managed to penetrate the steps. To do this, I used CMUs for fill as I built the steps; clean channels between the CMUs lead to weep holes at the bottom of the first two steps. As I laid the 2 1/4-inch blocks that backed the stretcher courses and the 3 5/8-inch blocks that backed the rowlock courses, I used a tuck-pointer to keep the channels between the blocks free of mortar, leaving an unobstructed path for water to run to the weeps. I swept fine gravel into the joints to prevent mortar from succeeding courses from blocking the channels.
Although there were slight differences between the wing walls, I used a straightedge to get each step straight and neat. To minimize water intrusion, I laid the bricks with full, compressed joints, using a tuck-pointer to fill the joints and a sled jointer to pack them tight.
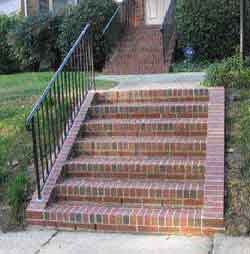
While building the wing walls, I’d intentionally left openings in the rowlock course to accept the original stair’s wrought-iron railing (though I could have made these openings with a hammer drill). By the time I completed laying all the steps, the brickwork in the wing walls was completely cured, so I was able to install the railing using Quikrete’s Anchoring Cement (800/282-5828, www.quikrete.com), a portland cement product that expands slightly as it cures. I inserted the railing into the holes, braced it plumb, and then poured the anchoring cement into the space around its legs. A day later, the railing-to-wing wall joint had a pull-out strength of more than 12,500 psi.
Even though none of the steps are the same width at both ends and none are precisely level, the overall staircase is strong, comfortable to use, and pleasing to the eye. It should last for generations.