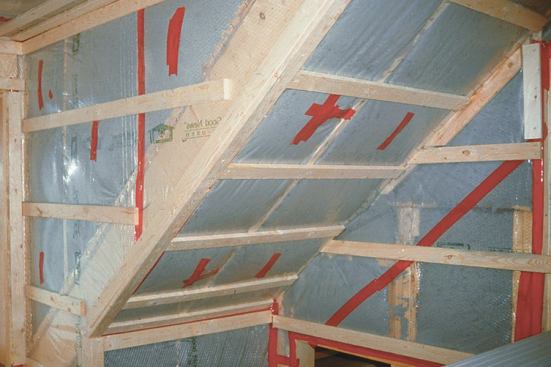
For a tight, energy-efficient house, plan your air-sealing strat…
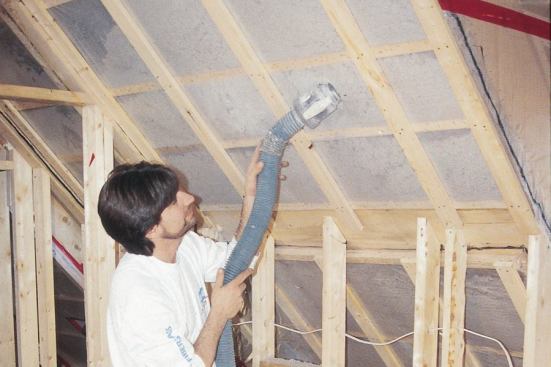
Insulating Rafter Heels
In many houses, the insulation is thin at the rafter heels, where adequate space for insulation is lacking. This thin insulation can contribute to melting snow and ice dams. On the interior, thin insulation leaves the drywall cold at the corner, encouraging condensation and mildew.
One way to increase the R-value at the rafter heels is to install rigid foam insulation between the rafters. This is fussy work — first, installing 3/4-inch strips of plywood against the top of the rafter faces to maintain a ventilation channel, then cutting each piece of foam for a snug fit.
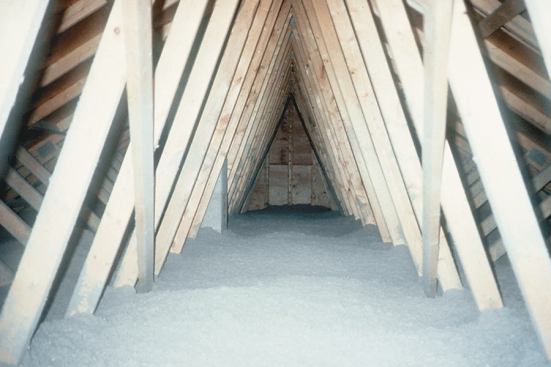
If the roof is being framed with rafters, an easier solution is to install a band joist and raise the rafters (see Practical Engineering, 7/96). Raising the rafters leaves plenty of room for insulation. If the roof is framed with trusses, use raised-heel trusses, which don’t cost much more than regular trusses.
Windows and Doors
We build insulated door and window headers out of two 2x10s, a piece of 1/2-inch plywood, and 2 inches of rigid foam. The gap between a window and the rough opening should be sealed using a urethane foam gun or with backer rod and caulk, not fiberglass insulation. (Fiberglass insulation is not an air barrier.) We plan our rough openings for a 3/8-inch gap all around the window or door — just the right gap for a foam gun nozzle. We use Pur-Fil low-expansion foam, which won’t distort the frame and pinch the sash.
Attic hatches. Since an attic access hatch is just an exterior door located in a ceiling, it needs to be carefully insulated and weatherstripped. A piece of drywall dropped into the opening is obviously inadequate. In winter, hatches without weatherstripping are often ringed with ice and deteriorated attic insulation.
We build our attic hatches from plywood and glue 4 inches of rigid foam insulation on top. Around the perimeter of the plywood hatch, we screw steel connector strapping. Along the top of the stop, we install magnetic door gasketing, which sucks that hatch down and seals it. When these magnetically sealed hatches are tested with a blower door, they are virtually leak-free.
Think Ahead
We’ve learned to recognize several areas that can be tricky to seal: walls behind tubs; interior soffits; recessed can lights; attic ductwork; zero-clearance fireplaces; chimney chases; dryer vents; and electrical boxes. If you plan the air-sealing details at the framing stage, sealing these areas will be much easier.
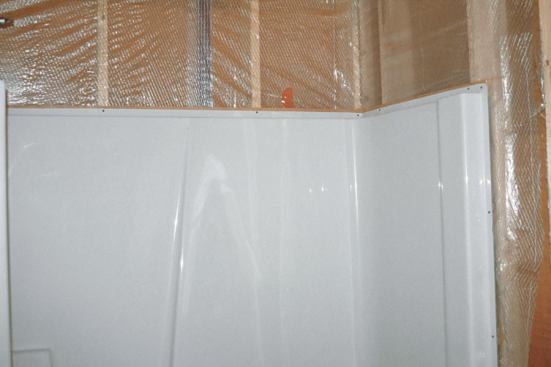
Tubs and showers. If a tub is located on an exterior wall, we install the poly air barrier, taped to the bottom plate, before the tub goes in. Then the area behind the tub is sheathed with plywood, which protects the poly and prevents the cellulose insulation from pillowing out. After the tub is installed, the stud bays can easily be filled with blown-in cellulose from the top.
Interior soffits. If the house has a second-floor soffit, don’t forget to install the poly air barrier before the soffit is framed. The poly should be large enough to allow it to be taped later to the rest of the poly air barrier.
Recessed cans
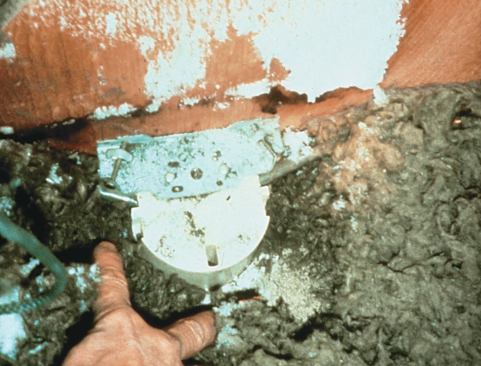
In many houses, recessed can lights act like little chimneys, constantly leaking interior air into the attic. If we have to install a recessed can light in an insulated ceiling, we make sure it is an airtight unit rated for insulation contact. We mount the can fixture on a piece of plywood that spans two joists; the plywood provides a surface for taping the poly air barrier. Wherever possible, especially in bathrooms, we install recessed cans in soffits or dropped ceilings. Because the poly air barrier is installed at the bottom of the joists before the soffit is built, above the electrical fixtures, it remains intact.
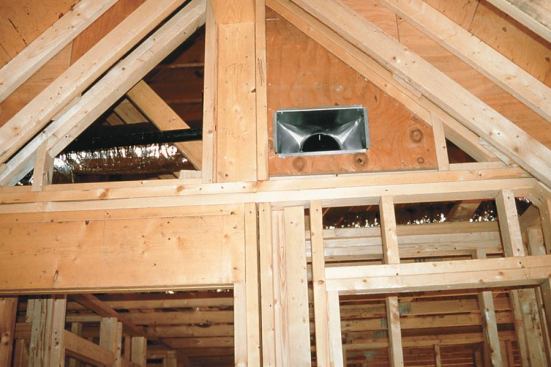
Attic ducts. Most of our houses have some ductwork in the attic. At each ceiling register, and wherever a duct penetrates the ceiling poly, we install a section of 3/4-inch plywood spanning two joists. We usually provide the hvac sub with a stack of 24-inch-wide pieces of 3/4-inch plywood for this purpose, and the sub installs the plywood. The gap between the plywood and the duct or the flange on the register boot is sealed with a liberal amount of silicone caulk. The ceiling poly gets taped to the plywood.
All of the attic ducts are sealed with mastic or aluminum tape. After the hvac sub has installed the ducts, we always go into the attic to inspect the work, to be sure all penetrations of the ceiling air barrier are well-sealed. New subs usually take some training before they get it right.
Fireplaces. Zero-clearance fireplaces provide many opportunities for air leaks. Usually, we stop the air barrier one stud short of the fireplace, to keep the poly away from high temperatures. We tape the poly to that stud, and then install 1/2-inch cementitious backerboard between the stud and the fireplace. To maintain the air barrier, the backerboard is caulked in place with high-temperature silicone caulk, which we purchase at an auto supply store. The backerboard eventually gets covered with marble or brick.
Chimney chases. Most chimney chases allow interior air to rise to the attic through the 2-inch gap between the chimney and the ceiling joists. In many parts of the country, inspectors are being more stringent about enforcing the requirement for chimney firestops. That’s good, because firestops improve energy efficiency.
For masonry chimneys, we make our firestops out of 8-inch-wide aluminum flashing, bent on a brake. Our mason cuts a 1/2-inch kerf into the masonry to insert the firestop, which doubles as an air barrier. Each chimney gets four pieces of flashing. We nail the flashing onto the framing, with a continuous bead of high-temperature silicone caulk under the flashing. We also install caulk at all of the flashing seams.
Metal chimneys require firestop kits provided by the chimney manufacturer. All of the gaps and cracks in these firestops need to be caulked with high-temperature silicone.
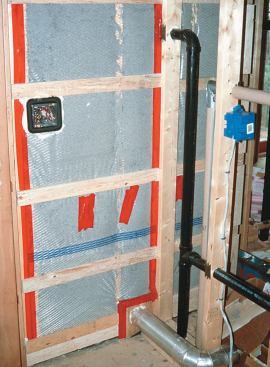
Dryer vents. Where a dryer vent goes through an exterior wall, we usually install a plywood block between the studs, so that the vent duct has something to rest on. The plywood is attached to small 1×1 nailers and is mounted flush with the edge of the studs. We apply urethane foam between the dryer vent and the plywood and tape the poly air barrier to the plywood.
Electrical boxes. We use Enviroseal airtight electrical boxes, which don’t cost much more than regular electrical receptacles). These boxes have a removable wide flange with a foam gasket designed to seal against the drywall. When we install the poly air barrier, we cut an X at each box and stretch the poly over the box. We tape the poly to the box, and then fit the flange on the box, locking the poly in place.
Enviroseal boxes are available only as one- or two-gang boxes. When we need three- or four-gang boxes, we buy airtight electrical boxes made by LESSCO.
Foam the gaps. After the framing is complete and the rough mechanicals are in — but before the insulation and poly — we inspect the house for gaps that need to be filled using the urethane foam gun. Places to check include between the foundation wall and the mudsill; where wires go through partitions that intersect exterior walls; and where wires and pipes penetrate the top plate into the attic.