For a tight, energy-efficient house, plan your air-sealing strat…
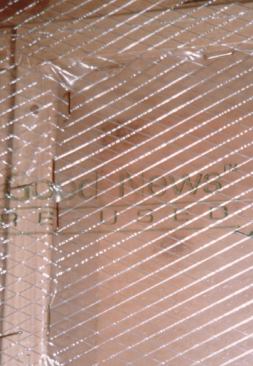
Polyethylene Air Barrier
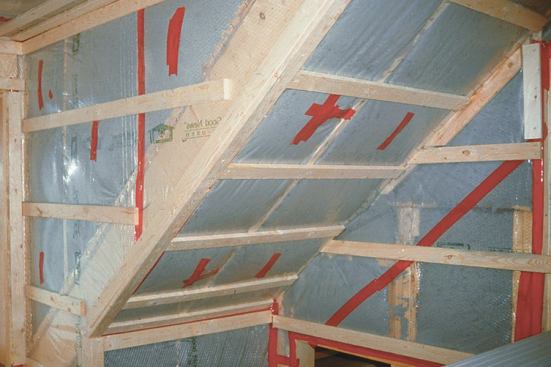
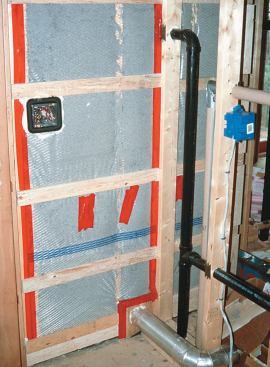
Some builders of energy-efficient homes advocate the Airtight Drywall Approach (ADA), creating their air barriers with gaskets installed under the drywall rather than with polyethylene. But since drywall contractors in our area are not familiar with ADA techniques, and since a poly barrier typically accompanies the installation of our preferred insulation, dense-pack cellulose, we don’t use the ADA method. Our insulation sub installs the reinforced poly air barrier according to our requirements. The poly gets stapled with 3/4-inch staples using an electric staple gun. For walls that won’t receive interior horizontal strapping, the staples are driven into the face (side) of the stud, about 1/4 or 1/2 inch back from the interior edge.
Although a vapor barrier with a 2% gap is still 98% effective, the same is not true for an air barrier. An air barrier needs to be continuous, since small gaps can lead to big problems. All seams and gaps in a poly air barrier must be taped or caulked. For a typical building, we’ll use about 12 rolls of 3M red tape, which costs about $12 a roll. Where the air barrier is being sealed to a top plate or bottom plate, or at the rough opening for a window or door, the poly can be sealed with either 3M tape or Tremco acoustical sealant. We have experimented with installing the poly air barrier on the entire second-floor ceiling before we put up the interior partitions. But since that makes it more difficult for our mechanical subs to access the attic, we don’t do it anymore. Usually, our ceiling poly is installed room by room and is carefully taped to the top plates of the walls. At the exterior walls, the ceiling poly gets taped to the wall poly.
Ceiling strapping. We usually strap our ceilings with 1x3s. In most cases, we install the poly air barrier on the bottom of the joists, before the strapping goes up.
Time to Insulate
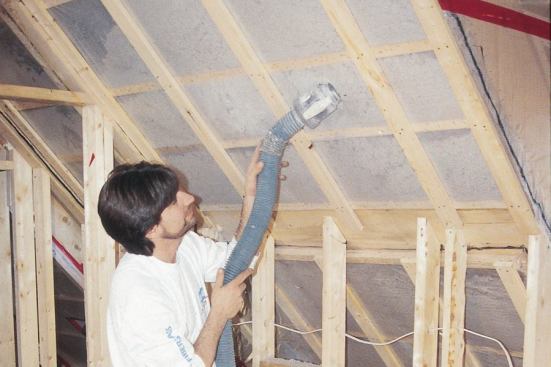
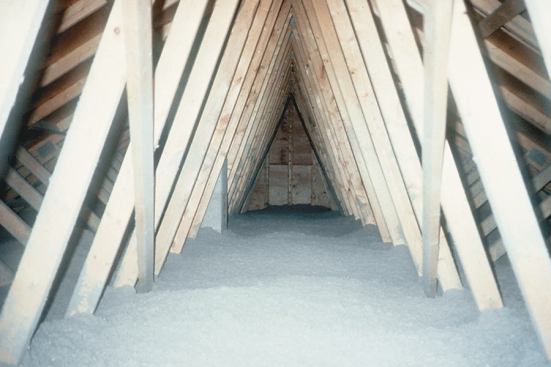
Any insulation material can work well, as long as it is installed carefully. But if you expect fiberglass batts to match the performance of a blown-in insulation like dense-pack cellulose, you need to install the batts meticulously, without voids. How many fiberglass installers actually take the time to split the batts at every pipe and wire in the walls, much less the attic? Our preferred insulation is dense-pack cellulose, installed at a density of 2 1/2 pounds per cubic foot. Dense-pack cellulose helps reduce air infiltration and fills in especially well around mechanicals, wires, plumbing, and odd-shaped or tight spaces.
Because blowing cellulose in an attic is relatively inexpensive, you can pile it deep. Before insulating an attic, we install sections of fiberglass batt insulation against the ventilation baffles, to prevent the cellulose from blowing into the soffits. When using blown-in cellulose in a cathedral ceiling, we install extra-rigid ventilation baffles (Durovent from ADO Products), since the cellulose pressure can cause standard baffles to collapse. Our insulation sub slits the poly air barrier at each stud bay to insert the 2-inch blowing hose. It is the sub’s responsibility to patch each hole with 3M tape. When the insulation job is complete, I check that the slits have all been taped. I also check the insulation density by feel, especially near the top of the stud bays. Well-installed cellulose should feel as firm as a car seat, not soft like a down pillow. The poly air barrier should be taut.
Build Tight and Ventilate Right
A tight house, which can’t depend on random air leaks for ventilation and combustion makeup air, needs mechanical ventilation and sealed-combustion appliances. We ventilate many of our houses with Panasonic bathroom exhaust fans, which are quiet fans designed for continuous operation (see “Simple Whole-House Ventilation,” 8/95). We follow the guidelines of ASHRAE 62-1989, which requires 15 cfm per person. Depending on the size of the house, this requirement is easily met with one or two Panasonic bathroom exhaust fans, each controlled by an Airetrak timer/fan-speed controller.
Multiple Benefits
The package of air-sealing details we provide adds between 2% and 2 1/2% to the cost of our homes — about $4,000 to $5,000 in construction costs on a $200,000 house. However, these details also result in savings. The houses require smaller heating and air-conditioning units, as well as less radiation or ductwork. Because we use sealed-combustion appliances, there is no need for a chimney. In many cases, these savings pay for the cost of the air-sealing measures. Besides lowering the customer’s heating bills, an energy-efficient house is less drafty and therefore more comfortable than a conventional house. During the winter, the indoor air will not be as dry as the air in a leaky house, so residents will have fewer bouts of respiratory infections, asthma, and allergic rhinitus. With fewer air leaks, there is less chance that warm, moist indoor air will leak into cold walls or the attic, where moisture can condense. Because of this, a tight house will be especially durable. So if you build energy-efficient houses, your customers will be healthier. And they’ll be pleased to know that their durable, comfortable, energy- efficient house will have a higher than average resale value.
Paul Bourke is a builder based in Leverett, Mass. He is a former instructor in the Energy Crafted Homes program and a member of the New England Sustainable Energy Association.