We use solid lumber splines only where we need a doubled stud to carry a point load.
Building With Structural Insulated Panels – Continued
Solid nailers. Any vertical edge that is not joined to another edge with a spline must be filled with a piece of solid lumber. This provides nailing where there otherwise would be nothing to nail into.
Wall corners are made by butting the edge of one panel into the face of another and then screwing back through into the nailer. The exposed foam edge of the overlapping panel is filled with lumber to provide nailing for the wall finish.
Once the walls are up, we insert top plates. This stiffens the walls and provides solid nailing for the second floor or roof.
Sealing the Seams
There are a number of ways to seal the seams between panels. We run beads of panel mastic on mating surfaces, but you can also use polyurethane foam from a can.
As an added measure, some panel manufacturers require you to surface-seal the interior joints by covering them with SIP tape, a type of peel-and-stick membrane. This is primarily a concern with SIP roofs in very cold, wet climates, because warm interior air will carry moisture through the gaps and can cause the outer layer of OSB to rot.
In some locales, the building code may require that you install a continuous vapor barrier inside the building.
And to the extent that it reduces air leakage, a vapor barrier can be an improvement.
But the real issue with SIPs is not moisture diffusion through the panels — it’s air leakage at the seams. In most climates, if you properly seal the seams you should not have problems, even without a vapor barrier.
Because SIP buildings are so tight, it is necessary to mechanically ventilate them to remove excess humidity and provide fresh air. The best way to do this is to install a heat-recovery ventilator (HRV).
The Roof
If the budget allows, a project might have a SIP roof. A truss roof is cheaper and, if the roof is complicated, easier to install. But a SIP roof is tighter and better insulated.
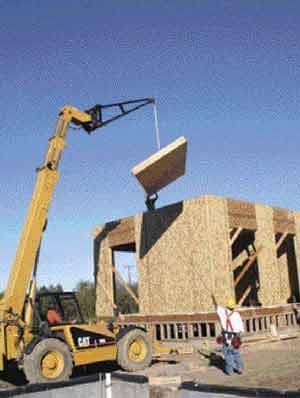
With a SIP roof, beams are required, except where the panels span from wall to wall. There is typically a bearing ridge and beams at hips and valleys. Roof panels are joined edge-to-edge in the same manner as wall panels, then screwed to the beam or wall below.
Many of the photos in this article are from a house with a flat — or, more accurately, very low-slope — SIP roof surrounded by a short parapet (Figure 7). The panels are supported by interior beams and ledgers screwed to the inside faces of the walls. The ledgers are sloped to drain the rubber membrane roof toward scuppers in the parapet; inside the house, we dropped the ceilings to make them flat, leaving space for ductwork and wiring above.
Door and Window Openings
Door and window openings are often cut right through the panel. Headers are not usually necessary unless the opening is more than 5 feet wide and or very close to the top. If the opening’s large enough, you can save on material by piecing in around it. In such a case, the edges of the flanking panels should contain full-height studs plus jacks to support a panel or a header and panel above.
Cutting in the field. Occasionally the owner will want to add a window or make slight design changes after the panels are delivered. As long as the changes are minor, we can accommodate them by cutting the panels on site.
After cutting, we use a hot knife to remove foam from the edge so there’s room for a spline or nailer.
Because SIP buildings are engineered, we have to get changes okayed.
Effect on Subs
As with any alternative method, using SIPs affects the subtrades.
Drywallers and finish carpenters love SIPs because they are flat and straight and they don’t shrink or bow. Also, finding nailing is easy because the panels are continuously sheathed on both sides.
Roofing over SIPs is no different from roofing over any other sheathed roof.
Mechanical trades. Since partition walls in SIP houses are normally stick-framed, the hvac installer can easily run ducts in them. The only time there’s a problem is when there’s no attic and both the floor and roof are SIPs. Then we have to provide chases.
The plumber is in the same boat as the hvac contractor — most of the pipes go in partition walls. If the kitchen sink is on an outside wall, we either run plumbing through the toe space or bring it up through the bottom of the cabinet.
We typically build an interior chase for the vent pipe; when necessary, we leave an open space between two panels for pipes, then fill the space later with EPS and spray foam.
Electrical. The electrician faces the greatest challenge because it’s hard to avoid putting switches and receptacles in exterior walls.
We order panels with one vertical and two horizontal wire “chases” — 11/4-inch holes that run edge-to-edge through the foam.
The first horizontal chase is at outlet height, and the second is at switch height. Since they’re marked on the OSB, their location is obvious.
The electrician accesses the chase by cutting a hole through the face of the panel and digging out some of the foam. He is then free to fish wires vertically and horizontally and install remodeling boxes as needed.
When the wiring is done, we seal everything with spray foam.
With a little planning, you can run most of the wire through interior walls and minimize the amount that runs through panels.
Cost
Panels cost more than conventional framing material, but they require less labor.
In my business, building a house with SIPs costs somewhere between 1 percent less to 5 percent more than stick-framing the same plan.
Because a SIP house is tighter and better insulated, we can downsize the hvac system — but we have to install an HRV.
We don’t have to hire an insulation contractor, and our dumping fees are lower because there is much less waste.
Gary Pugh owns Alternative Building Concepts, a green building company in Santa Rosa, Calif.