

With the help of my son, Kyle, I laid out a group of five 2x6s for the jacks (one group includes enough material to frame one corner of the hip roof). To minimize any bow in the rafters, we faced the crowns of the stock towards the middle 2×6, the center rafter being the straightest one.
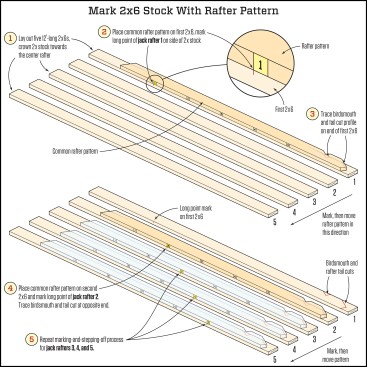
The illustration above shows the stepped-off process of marking the 2-by stock with the common rafter pattern. This process is also shown in the photos below.
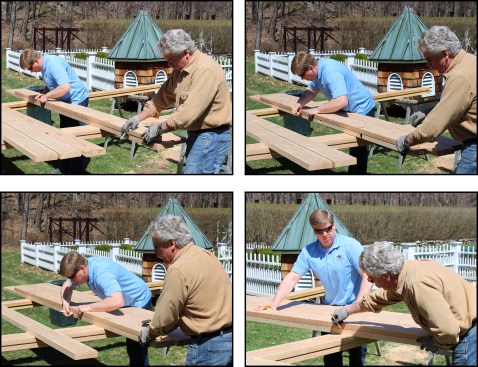
Using the rafter pattern on the first piece of 2×6 stock, Kyle marked the long point for the first jack rafter, while I traced the birdsmouth and tail cut. Moving down the line, we marked the remaining rafters. Kyle marked long point “2” on the second 2×6 (photo, top left); long point “3” on the third (top right), and so on (bottom left). I marked long point “5”, birdsmouth and tail cuts on the fifth 2×6 (bottom right).
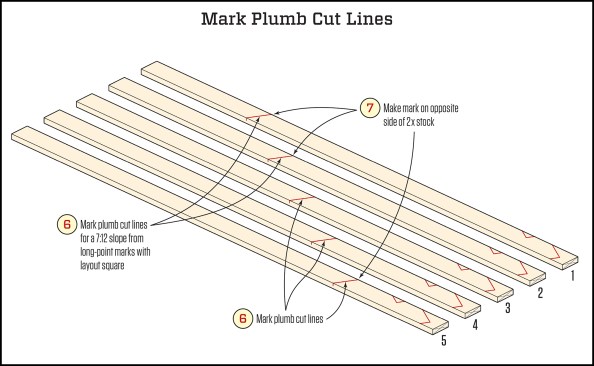
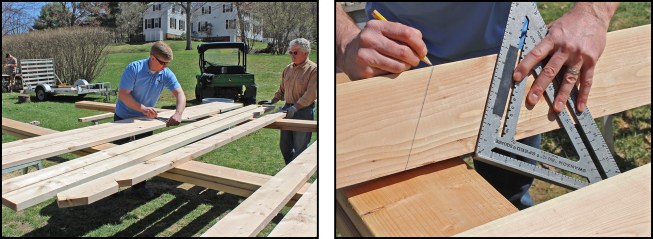
With the long points and rafter tails marked, we marked the plumb cut lines (see illustration, above). Holding a layout square at a 7:12 angle, Kyle drew lines representing the long-point plumb cuts where the jacks will meet the hip (photo, above left). He then carried those lines onto the opposite edge of the rafter stock (photo, above right), where he marked the opposite sides of the rafter so we'd be able to line them up with the short points on the rafter pattern during the next step of the layout process.