Raising the Ceilings in a Whole-House Remodel – Continued
We would be lifting the entire second floor — walls, roof, and all — a total of 15 inches. We settled on this height because the existing stair risers were a comfortable 7 1/2 inches each. We decided that one riser wasn’t enough and three would be disproportionate to the house. With a 15-inch rise, the new first-floor ceiling height would become about 8 feet 9 inches. Because the stair was more or less centrally located in the house, we had room on the first-floor level to elongate the flight by two treads. The stairwell remained unaltered, but we determined that it was best to build an entirely new staircase rather than supplement the existing one.
Due to the greater load we’d be lifting this time — I allowed for a dead load of 15 psf, multiplied by the second floor and the roof square footage combined, for a total of about 19 tons — and the increased height of the lift, we took some additional preparatory steps and precautions.
First, instead of using 2×4 retainers to prevent the building from moving out of alignment as it rose, we fabricated 7-foot lengths of 4-inch steel angle for that purpose. We drilled holes for 1/2-inch through-bolts to pass through the wall, where they would be captured in the same way that sidewall staging brackets are mounted, with the capture blocks spanning pairs of wall studs on the interior side. Instead of costly 10-inch or 12-inch carriage bolts, we bought much more economical 1/2-inch threaded rod and cut it to the lengths we needed.
As yet another precaution, we tied the middle front and middle rear of the building’s second-floor joists to the first-floor joists with heavy chains in two places. This backup system would help hold the top and bottom portions of the house together if a sudden wind came up.
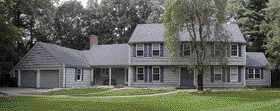
New Front Wall
Part of the original remodel design included the elimination of the 1-foot overhang of the second floor at the front of the house. In effect, we were changing the house from a garrison colonial to a more traditional center-entrance colonial. This change actually simplified the task of raising the first-floor ceiling, because we could precut and build a new, full-height wall to support the joists along the front wall. Elsewhere, at the middle and rear bearing partitions, we’d have to tackle more elaborate, piecemeal framing measures. Stacking short cripple studs or a solid beam on the existing plate would create a potential “hinge” in the wall framing that could buckle during a wind or seismic event, so we chose to sister longer studs alongside the existing ones, instead.
At the front of the house, we poured a new foundation alongside the old one, filling the gap between the old and new walls with 2-inch rigid foam insulation to save on concrete, which we had to place by hand in wheelbarrows in order to protect the existing landscaping.
To further cut down on concrete, we formed the foundation as an 18-inch-high grade beam on top of concrete piers placed every 4 to 5 feet. We reinforced the piers vertically with rerod bent at right angles to join the horizontal rerod we placed in the grade beam.
With the second floor raised, we were able to put the new front wall in place quickly and focus on the rest of the house.
To secure the rear wall and middle bearing partition, we worked piecemeal. We sistered the existing studs with longer ones cut to the new height and toenailed them to a new, double top plate. Above the interior, nonbearing partitions, we simply added small knee walls to extend the tops.
Since the increased height of the first-floor lift exceeded the 10-inch reach of the screw jacks, we purchased a quantity of 16-foot 4x4s and cut them into 4-foot lengths. We used these as cribbing underneath the pyramid jacking stands. This provided a stable, strong method that could be quickly placed as needed.
To set the cribbing, we used a screw jack on a nearby pyramid to temporarily transfer the load. A pair of crossed 4x4s added 7 inches to the jack-stand height, slightly more than needed to finish the job.
Stitching It All Back Together
The original wall sheathing was in good condition, but it was only 3/8 inch thick, once a basic sheathing standard. After patching the new gaps with same-thickness material, we ran a new, secondary layer of 1/2-inch CDX plywood over the entire structure. This allowed us to bridge the existing and new framing with a unifying skin. In all, the structural revisions, including labor and materials, added about $120,000 to the cost of the original contract.
David Morganowns DRM Design Build in Southborough, Mass.