
Squeaks can damage a builder’s reputation, and one of the most common places for squeaks are stairs.
Over the years, I’ve tried different methods to speed up stair building without increasing the likelihood of squeaks. We now have a good method for site-built stairs that is easy to follow and doesn’t add a lot of expense. In this article, I won’t go into too much detail about layout and code, which JLC has covered in the past, but will focus instead on the actual construction of squeak-free, durable stairs.
Selecting Materials
I use #2 or better 2×12 Doug fir for the stringers. I’ve tried both Louisiana Pacific’s 1 1/4-inch LSL and Weyerhaeuser 1 1/4-inch Timberstrand LSL stringers, and while I love both products for their consistency, I prefer to use 2×12. The reason is that both LSL products are so dense that when I nail risers, the nail will often curl and blow-out. That has happened often enough that I now stick to a higher-grade 2×12.
I was taught to use 1×8 pine for risers and while that works well, I now frame stairs out of 2×8 Doug fir risers and Norbord SteadiTred 1-inch OSB bullnose 11 1/2-inch-deep treads. The reason for the 2×8 risers is that they allow me to nail through the tread into the riser for a good connection without splitting out.
Many people rip down subfloor material for their risers. This doesn’t allow fastening from the tread, so I avoid doing this. It also takes more time to rip them down, even using a track saw.
Fasteners. I like to use 2 1/2-by-.131-inch ring-shank coil nails to nail down the treads and 3-by-.131-inch hot-dipped (HD) galvanized nails for the risers. The HD nails hold well for the risers and the larger-shank 8s hold well for the treads.
Glue. One of the “make-it-or-break-it” details in stair building is the glue. This is not an area to try to lower expenses.
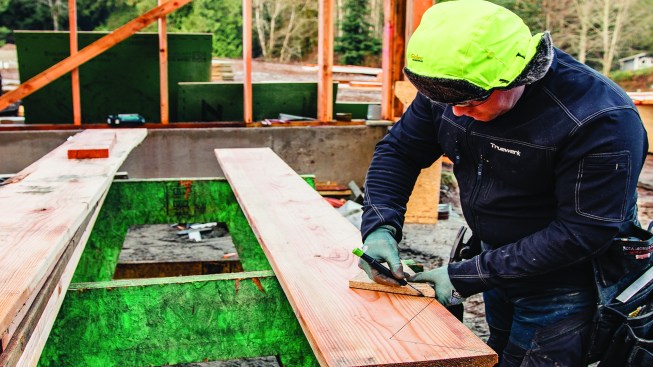
The most important thing to remember is that all the stringers must be identical. The author lays out the first stringer with a rise and run block.

Then he cuts each step with a circular saw.
He is careful not to overcut, finishing each step with a jigsaw.
To keep stringers consistent, he uses the first stringer to lay out the second … and (not shown) the third.
I use, and love, PL Premium polyurethane. When it is cold outside, I keep the tubes in a Caulk Warmer (arcticwarmers.com) bag. What makes PL such a great glue is that it sticks extremely well. I have needed to tear up subfloor or tread material before, and the material came apart before the glue joint did. It can cost twice what a standard subfloor adhesive costs but is well worth the extra expense.
Over the last six months or so, we’ve been using Advantech Subfloor Adhesive. This is a foam-to-gel product that dispenses from a standard foam gun. I became a believer in this glue after an accident. Some spilled on a piece of sheathing, and then a block of wood landed on the glue and stayed there overnight. It wasn’t clamped or nailed in any way. When we tried to pull them apart the next morning, the sheathing pulled apart instead of the glue. The result is similar to the PL; Advantech may even be a little more aggressive.
One note on both of these glues: They will stain your skin, so I recommend wearing gloves. Despite my best efforts, though, it seems that some always ends up on my hands.
Building Process
If the stairway has a landing, I build that first, always using 2x12s. A stair landing sees a lot of traffic and it should feel stiff. My preference is to bring the edge of the landing to the heel of the stair stringer, so I will cut one stringer for this, but I wait until the landing is framed and sheathed before cutting the rest of the stringers.
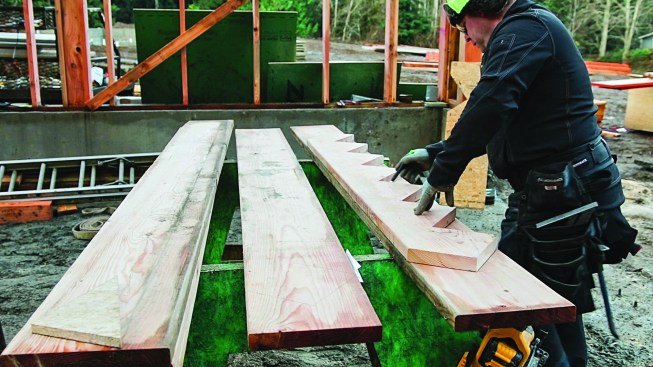
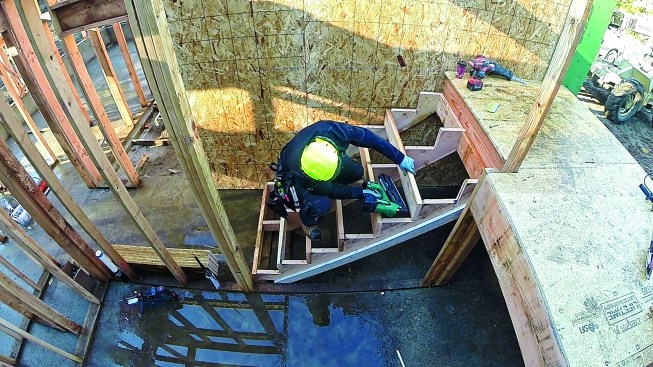
He nails on a riser at the bottom and midspan.
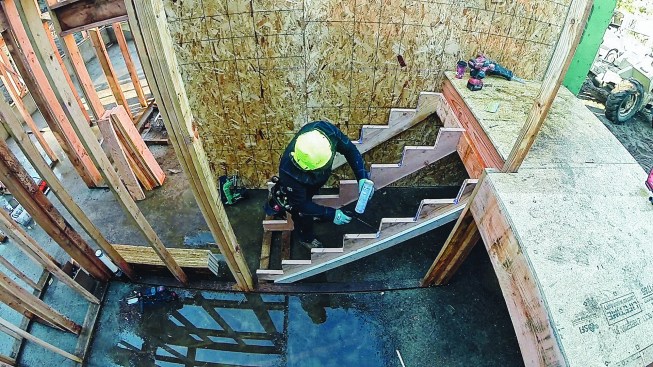
Then he nails on the remaining risers.
Attachment at the head. Instead of using joist hangers, I like to use full-height pressure blocks between the stringers. They provide more area for glue and for nailing for the top tread and for drywall on the underside. Pressure blocks allow me to use up all my scrap and are faster to install than joist hangers. This method also helps us minimize the number of tools we have out, since we have gotten in the habit of installing hangers with a positive-placement gun.
Two-by risers provide nailing for each tread. The author starts by applying adhesive to the stringer edges.
Stringers. If the width of the stairway is 48 inches or less, I cut three stringers. Even at 24 inches on-center, the stringers feel strong because each 2×8 riser, glued and nailed in place, acts like a joist.
If the stairs have skirting, I nail a 2×4 to the stringer to space it off the wall. This allows the drywall crew to apply their board, and then the finish carpenter to slip a finish skirt between the stringer and the wall framing. If no skirt is planned, a 1-by is sufficient to allow space for drywall to slip beside the stringers.
Two-by risers provide nailing for each tread. The author starts by applying adhesive to the stringer edges.
He nails on a riser at the bottom and midspan.
To prevent squeaks, it is important to view a set of stairs as one solid unit. I use the first stringer I cut as a pattern for the other two in that flight. Any discrepancy in size or angle will cause each stringer to act on its own and slowly loosen the parts over time. To keep the stringers as strong as possible, don’t over-notch the material. Cut right to the lines and finish the cut with a jigsaw. Cut all treads and risers and have them stacked nearby before assembling the stair.
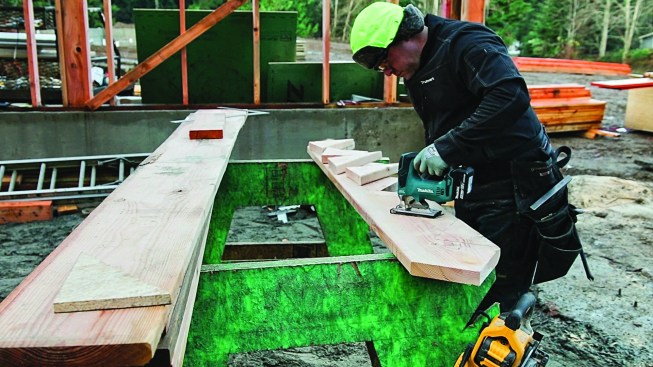
For tread stock, the author uses Norbord’s SteadiTred OSB for consistency and durability. Here, he begins with a foamto-gel adhesive on the stringers.
He also applies adhesive to the edge of the tread that butts the riser above it.
Assembly. Fasten the stringers to any walls with LedgerLok screws. This will keep them from pulling away from the wall when the wood shrinks, as it inevitably will. I don’t notch in a cleat at the bottom of the stringers, because I’ve bolted them to the walls with LedgerLok structural screws. Pressure-block the stringers at the top to keep them locked in place and to provide nailing for the last tread.

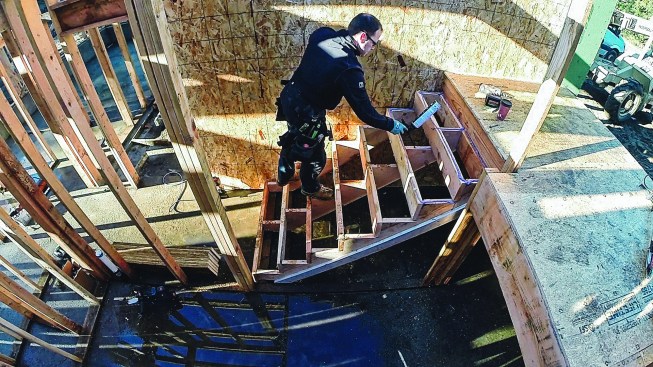
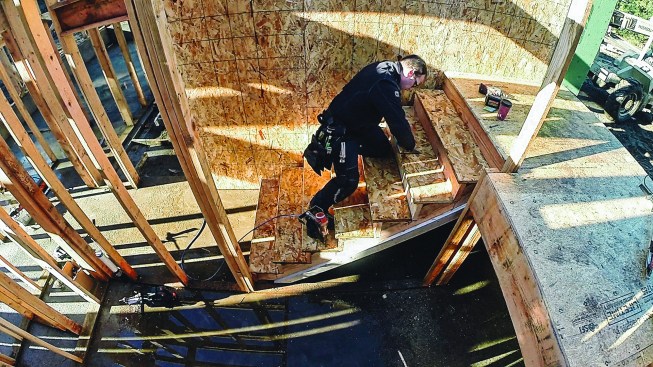
Then he nails the tread off to the stringers.
He beginns at the bottom and works his way up.
Order of assembly. I first apply glue to all the riser cuts on the stringers. I install the bottom riser, and then install a middle riser to lock in the stringers’ spacing before installing the rest. For treads, I first apply glue to all the tread cuts on the stringers and then to the back of all tread material, as shown in the sequence above.
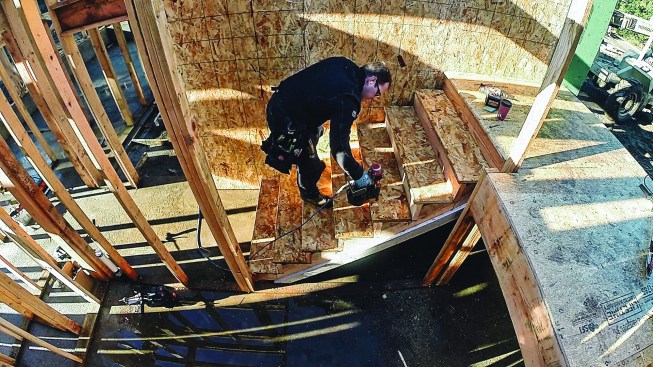
Starting at the bottom of the stair, I nail all the treads to the stringers, working my way up. Then I mark the overhang on the tread and work my way down, nailing the tread to the riser. This spot is where we’ve most commonly had squeaks over the years; as a result, I stopped using 1-by riser material and began using 2-by. Often, the 1-by would crack over time. The 2-by riser stock allows for a better connection, and because it is stronger, it’s less likely to crack.
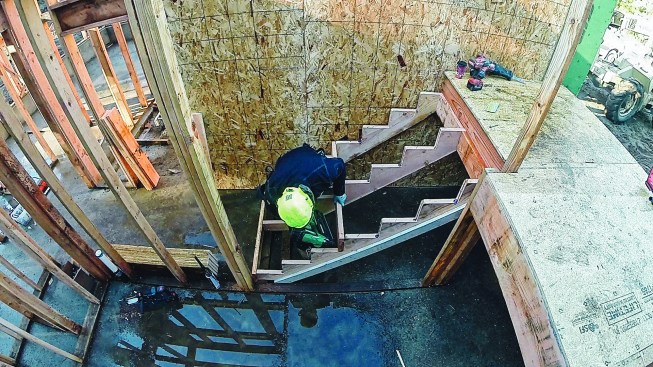
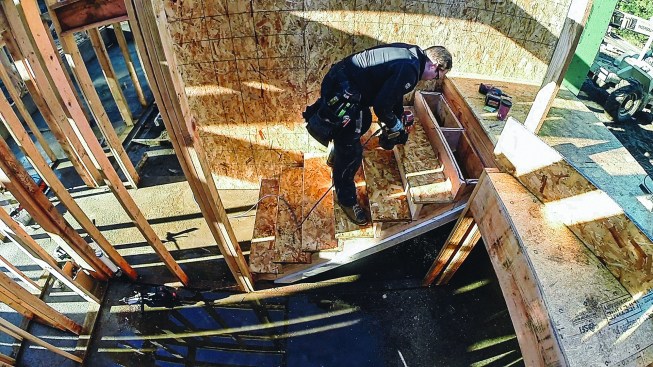
The riser-to-tread connection needs to be precise and strong, as it is the most likely place for a stair to squeak. After securing the treads in place, he is careful to mark the overhang.
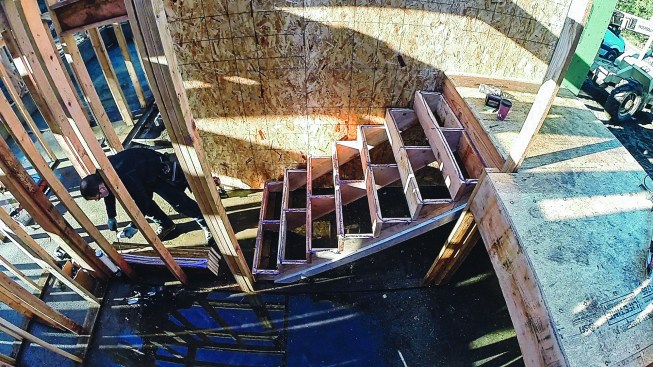
He works his way back down the stairs, nailing off each tread to each riser.
If I have to rip down the tread material, I use a track saw to make it perfect. The glue on the back of the tread where it meets the riser material provides a tight connection, and when the glue dries, it forms a squeak-free connection.
For a typical 16-riser stairway (common to 9-foot-1-inch ceiling heights in my area) with a landing platform, I can lay out and frame a rough stair in less than three hours, but I always estimate for three.
All photos by Tim Uhler