Prepping the Roof for the Collectors
A vertical ripple in the shingles was caused by a slight displac…
Because the Velux solar thermal system we were using was still new to the U.S. market, I first contacted the manufacturer to make sure we would receive on-site technical support. I also called the manufacturer of the SIPs to discuss the installation.
The collectors mount directly to the roof deck without any additional mounting hardware like stand-off brackets or racks. Because the SIPs were attached to timber-frame rafters spaced several feet apart, I was concerned about not having solid anchoring points for the collectors. There was another issue as well: In the two decades since the home was built, some structural settling had taken place, resulting in an uneven roof deck. Although settling is normal in any wood structure as the framing dries and gravity sets in, timber frames are somewhat more prone to it because the heavy beams may be green when they’re installed and can have a higher moisture content than dry framing lumber. So even though the SIPs were dry and stable when installed, over time they settled as the timbers shrank and settled, causing some of the 12-inch-long panel spikes securing them to the rafters to loosen. The result was a noticeable uplift along several panel joints, which telegraphed through the asphalt shingles and even caused a leak in one spot.
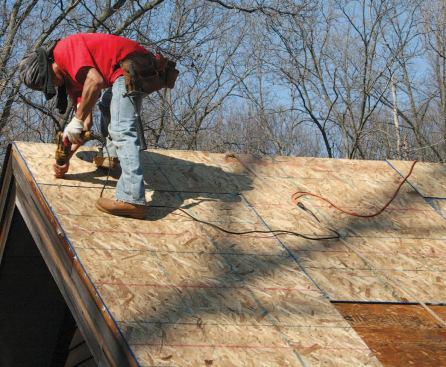
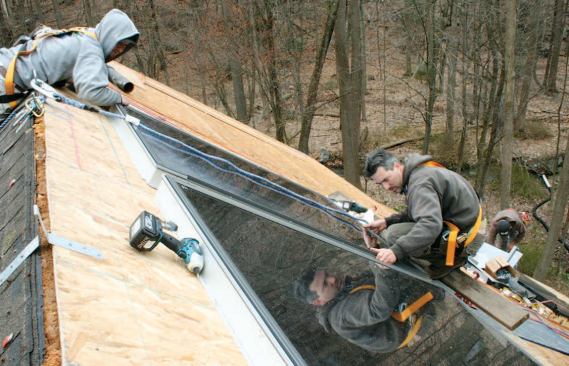
Prompted by my concerns, the panel manufacturer at first suggested adding cleats on the underside of the roof deck as anchoring reinforcement, but Velux assured me that its system did not require fastening to roof framing. The 4 1/2-foot-by- 6-foot collectors, which have a very low profile and weigh just 130 pounds apiece, are designed to lie flat against the roof, directly on the sheathing. An integral perimeter flange, like the nailing flange on windows, attaches directly to the roof sheathing. The flashing process is similar to that for skylights. As for flattening the roof, the parties agreed that I should strip the entire roof deck, refasten the SIPs as needed, then add a second layer of 1/2-inch sheathing before installing the collectors and new shingles. For securing the panels, we used 12-inch hardened T-30 Torx-drive panel screws with 2-inch fender washers. The screws did a good job of pulling each of the uplifted edges flat. Between this and the new sheathing that overlapped the existing seams, we now had a uniform, double-thick roof deck that we could attach the collectors to.
Installing the Collectors
With the various preliminary complications behind us, we turned to the job of installing the collectors. Here too, dealing with a SIPs roof required some innovation and adaptation on our part.
In order to put the collectors in the optimum location, we would have to route the supply and return fluid lines — flexible stainless steel coil tubes with 2-inch-thick insulating jackets — through the roof directly above the interior cathedral ceilings. With no rafter bays to work in — but with a small storage loft reasonably close to where both lines would come through the roof deck — our best option was to tunnel through the SIPs’ foam and pull the lines into the loft. From there, we had easy access to a double-stud-width plumbing wall and closet below, and a straight run from that point to the basement water tank.
The three collectors were mounted in series across the top of the roof, about a foot below the ridge. The inlet plumbing line would be attached at the bottom left corner of the first collector, and the outlet line at the bottom right corner of the third collector. Short prefabricated tube connectors linked each panel to its neighbor at adjacent bottom corners.
We first cut a 6-inch-by-6-inch pocket in the roof deck below the inlet attachment point and scooped out some of the foam to create a cavity. Then, on the inside, we cut a similar pocket several feet away in the ceiling of the storage loft, where it wouldn’t be seen. This gave us an access point from which we could use a 5-foot 1 1/4-inch flexible auger bit to tunnel directly to the roof opening. By measuring carefully, we were able to quickly drill a channel into the roof pocket several feet below and a few feet to the left of our loft access hole.
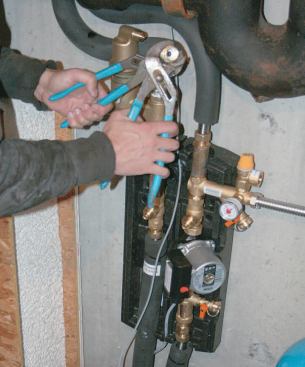
Encouraged by our success, we repeated the process for the outlet attachment point. This time, however, we found the route partially blocked by rows of spikes and panel screws fastening two of the roof SIPs to a timber rafter. Adding to the difficulty, the distance was considerably longer — more than 8 feet from hole to hole — so we had to add a 4-foot extension to the 5-foot auger bit. It took numerous attempts to guide the now-wobbly flexible bit through a forest of obstructions to a target we couldn’t see. We eventually succeeded, but not before removing considerable amounts of EPS. Once we had access from both collector ports to the attic, the solar installation part of the job was fairly routine. The Velux installation guidelines recommend using unbroken runs of tubing from the collectors to the hot-water tank, so, after measuring carefully, the installers fished the collector lines all the way to the utility room. We filled all the roof pockets with canned spray foam, patched the sheathing, and installed a self-sticking membrane on the deck around the collectors before the Velux flashing kits were installed.
Working around the structural insulated panels added about two days to the solar collector installation. It’s also possible we created some cold spots in the roof where the foam was removed for the fluid lines, since we couldn’t repack the areas that were out of reach. I’m generally satisfied with the job, and glad to have added the panel screws, which are better than panel spikes at resisting uplift. The Velux solar thermal system itself seems well-designed and simple to install. Michael Morris, a former builder and remodeling contractor, now writes about construction from his home in Ossining, N.Y.


