Jerry Sutherland
Heat pumps are refrigeration- cycle devices that use electricity…
Installing the Units
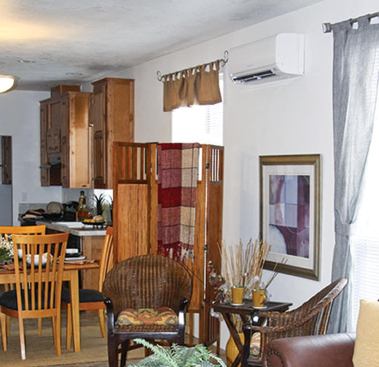
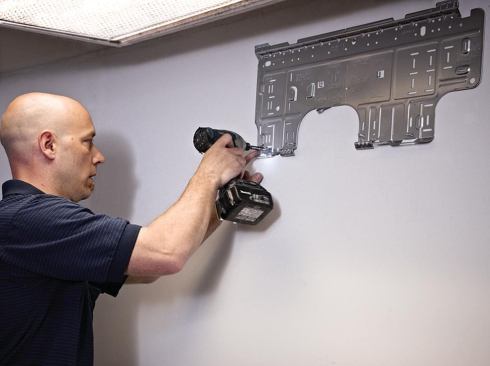
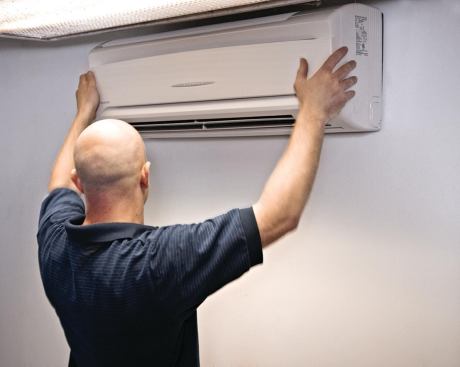
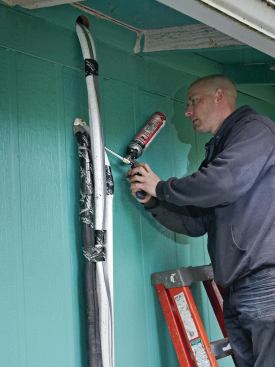
It ordinarily takes two technicians half a day to complete a single-zone installation. After confirming the system design with the homeowner, the installers unpack and install the indoor fan coil while the electrician roughs in the power supply for the outdoor unit. The indoor unit is secured to a mounting bracket that’s screwed to the wall studs; an opening in the sheet metal provides a template for the hole that allows the line set to pass through the wall. After drilling the required 29/16-inch hole, the installers unfold the short lengths of wiring, refrigerant tubing, and condensate line that come attached to the unit, push them through the wall, and secure the unit to the wall bracket. The hole is later filled with closed-cell spray foam and weatherproofed on the outside with caulk (Figure 5, previous page).
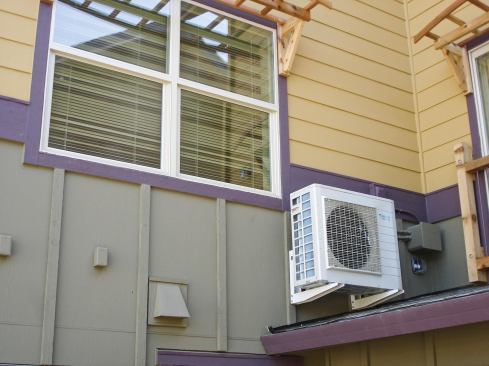
For the sake of appearance, we try not to put the outdoor unit on the front of the house. If the indoor unit is mounted on a back or side wall, it’s often possible to locate the outdoor unit directly below the wall penetration, which keeps the line set as short as possible. The maximum allowable length varies from 33 to 100 feet, depending on model and manufacturer, so the site layout often has some bearing on the product we’ll specify for a particular installation.
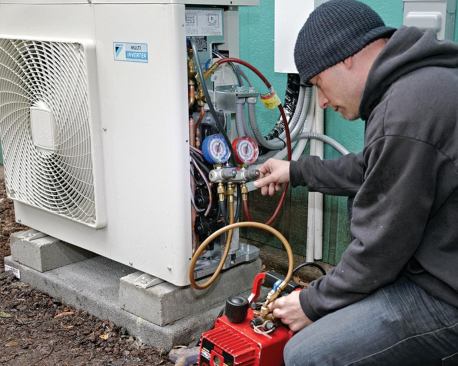
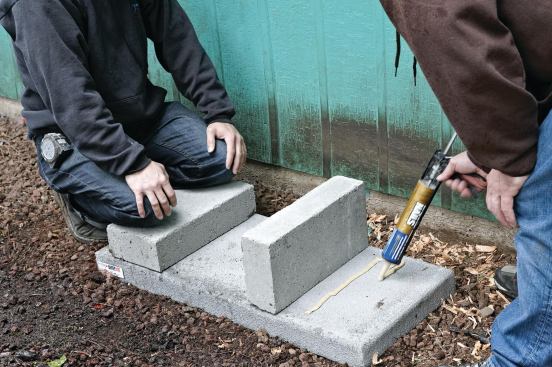
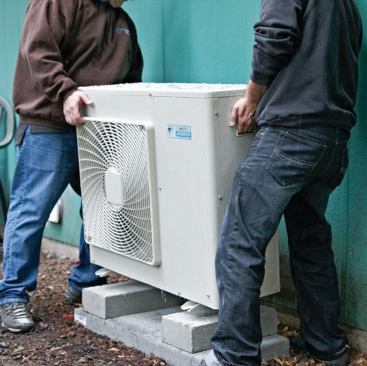
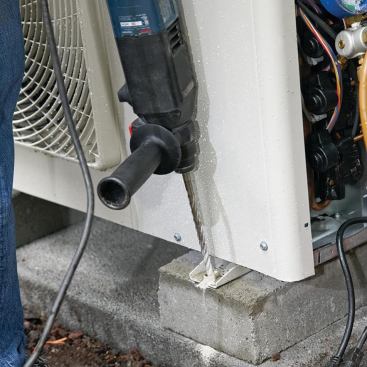
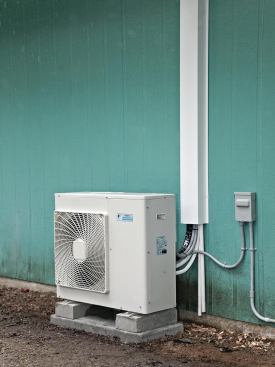
In most cases, we place the outdoor unit on a lightweight 16-by-36-inch mounting pad that looks like concrete but is actually made from polyurethane foam wrapped in fiberglass (diversatech.com). To make sure defrost water won’t refreeze in the drain pan and back up into the unit — which could damage the fan — we provide extra drainage space by attaching two concrete riser blocks to the pad with construction adhesive. Then we place the outdoor unit on the blocks and secure its mounting feet to the blocks with Tapcon screws (Figure 6, page 44).
If there’s no suitable flat ground available, we install the outdoor unit on a manufactured wall-hung mounting bracket that keeps it well off the ground and a suitable distance from the wall (Figure 7). We’ve learned from experience not to put brackets over an outdoor deck, though, because it really bothers customers to see its surface wetted by defrost water, even though the entire deck may be soaked with rain for much of the year. We also avoid putting an outdoor unit directly on a deck, both because of the drainage issue and because we’re concerned that vibration of the deck structure could lead to cracking of welds or other unforeseen long-term problems.
Refrozen defrost water is a potential hazard, too, if an outdoor unit is mounted above a sidewalk or hard-surfaced patio (or — again — a deck). The only time we’ll place it in that type of location is if there’s no better option available, there’s no regular foot traffic in the area, and the customers sign off on the contract saying that they’ve approved it.
Line Set and Cover
Once both units are in place, they’re connected with copper refrigerant line. If an exposed horizontal run is necessary, we ordinarily route it low along the wall, where it will be relatively inconspicuous. The paired refrigerant lines — which come wrapped along their length with insulation — are secured to the siding with two-hole pipe straps. Once the line set is secure, the electrician runs the cable from the outdoor unit to the indoor fan coil, zip-tying it to the line set. This is required under our state code — elsewhere it may be possible to use line sets that come with the required cable bundled with the refrigerant lines.
After the refrigerant lines have been pressurized with nitrogen and tested for leaks, we install a protective cover over the line set, which helps prevent physical damage and deterioration from the UV in sunlight. Depending on the situation and the customer’s preference, we’ll use either manufactured vinyl “line hide” covers or 26-gauge aluminum covers that we make up as needed in our own sheet-metal shop (Figure 8). These are reversible and prepainted white on one side and brown on the other, allowing us to use whichever side looks best with the siding. The owner can then paint over it for a more exact match later, if desired.
Jerry Sutherland is an estimator and hvac system designer with MetFab Heating in Vancouver, Wash.