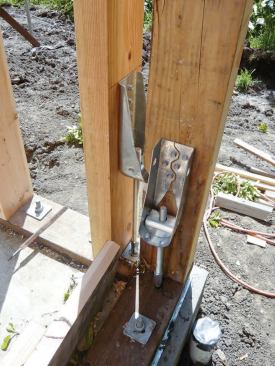

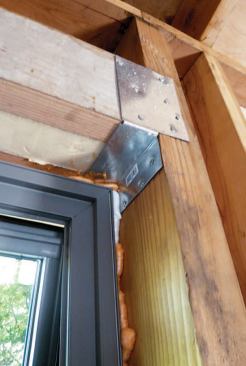
Insulated headers supported by metal connectors are a hallmark o…
Framing
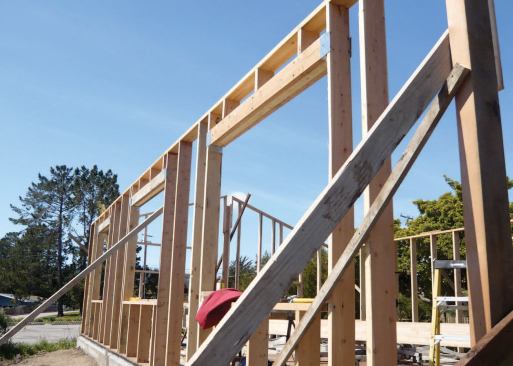
We used OVE (optimum value engineered) framing, sometimes known as advanced framing. With this approach, studs are on 2-foot centers; you use header hangers instead of trimmers and cripples; and the headers are sized for the actual load, not for convenience, and are usually omitted on rake walls and non-load-bearing openings. Rafters are centered over the studs, eliminating the need for double top plates, and 1-bys are used in place of 2-bys for nailing corners and wherever possible.
The payoff is a strong frame – engineered to meet our local seismic codes – that contains less wood and more insulation. This minimizes thermal bridging through the framing, increasing the thermal resistance of the shell by about 8 percent. With 15 percent to 25 percent less lumber to cut and move around, OVE framing also offers major savings in both material and labor.
Training the crew. The concept was new to most of our workers, and it took some getting use to at first. On several occasions, I had to remind the framing crew to use the 3-inch strips I’d ripped from 1/2-inch plywood as drywall backing at corners and top plates, rather than the 2-by material they were used to. Before long, however, they were coming up with better ways to use less wood and decrease thermal bridging.
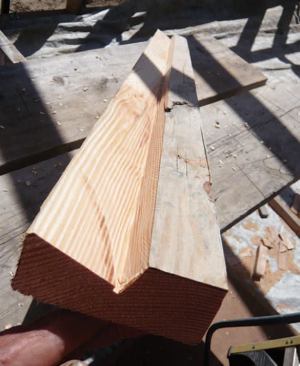
Sealing the structural ridge. To create the open plan that would give the small house a roomier feel, the design called for a substantial glulam beam at the ridge, which would be left exposed as part of the interior finish. This was a tricky area, because it would be impossible to get a reliable air seal by simply butting the drywall against the face of the beam. Instead, we ripped some 2×6 blocking to sit flat on the top of the beam flush with the bottom edges of the rafters, making it possible to caulk the drywall to both the rafters and the blocking. We sealed the blocking to the rafters and the beam with spray foam.
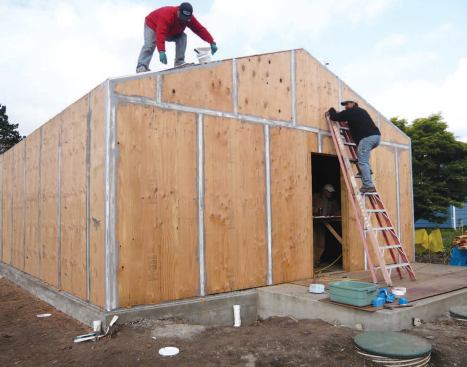
The rafter tails were cut off flush with the plane of the outside walls, so both the roof and the walls could be sheathed without the usual break at the eaves – ordinarily a major source of air infiltration.
Sheathing and Air-Sealing
A Passive House can have air leakage of no more than 0.6 ACH50. For a project to hit that number, it’s essential that all of the workers involved know where the air-seal boundary is, when they have punctured it, and how to reliably seal the punctures that inevitably occur from time to time.
Because the whole process was somewhat new to us and we wanted to be sure to meet or exceed the airtightness standard, we decided to double down in this area and provide an air seal at both the sheathing plane and the drywall plane, reasoning that this would also help the structure remain tight even if one layer was somehow compromised years down the road.
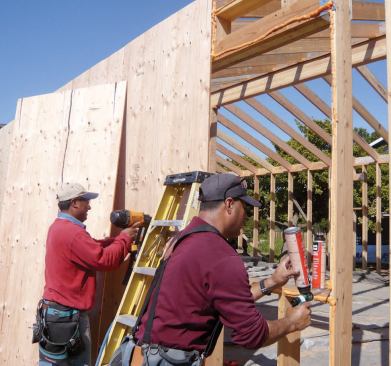
Taped plywood and two blower-door tests. We sheathed the structure with 1/2-inch FSC-certified plywood, sealing to the framing as we went with the same spray foam we’d used in the foundation. The joints between sheets were sealed with paper wallboard tape and duct mastic. That approach worked well, but was relatively slow and messy. I have since switched to a high-performance sticky tape called Wigluv 60 (siga.ch).
To ensure that the building would never become infested with powderpost beetles or termites – both of which are common out here – I sprayed all the interior and exterior framing and plywood with a water-based borate solution called Bora-Care (800/264-0870, boracaretermitecontrol.com), using a hand-pumped garden sprayer.
I bought my own blower door a couple of years ago. It’s proven to be a great investment, because it makes it easier to nail down the source of air leaks while they’re easy to fix. We performed a first blower-door test before cutting the rough openings, because we wanted to be able to compare it to another one performed later, after the windows had been installed – a sequence that would make it possible to differentiate air leakage through the sheathing from leakage through or around the windows themselves. The initial test, using the E-ring on the blower door, put the air leakage of the shell at 17 cfm, or about 1.5 ACH.
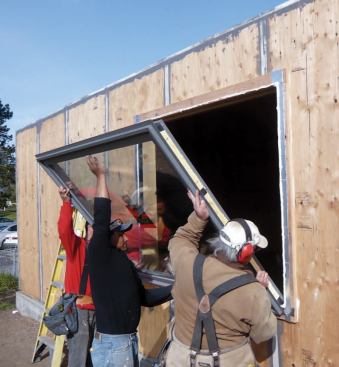
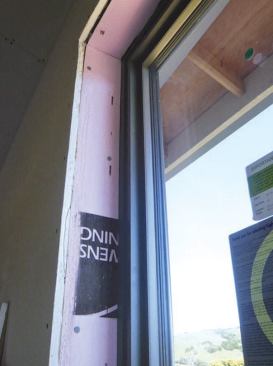
Windows. The windows were Serious Energy 725 series fiberglass casements and fixed units – high-quality double-glazed windows with a suspended film that helps them approach the performance of triple glazing without the weight and bulk (800/797-8159, seriousenergy.com). Before installing them, we furred out the rough openings by an inch to allow for the layer of rigid foam that would later go on over the sheathing.
Like most window manufacturers, Serious Energy doesn’t provide air-leakage figures for its products, but the second blower-door test seemed to confirm that they’re extremely tight: The number we got was nearly identical to the one from the first test, and exploring the area around the windows with a smoke pencil didn’t reveal any visible air movement.