To provide added insulation with minimal thermal bridging, 2×4 s…
Outer Roof and Exterior Foam
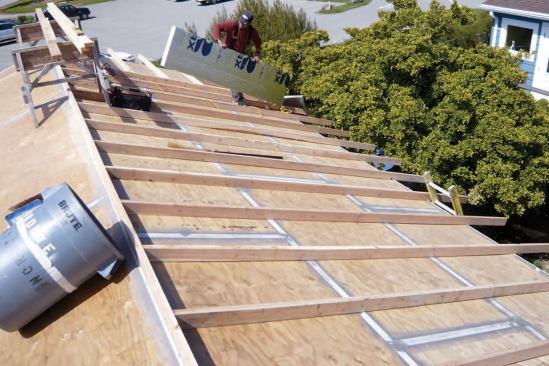
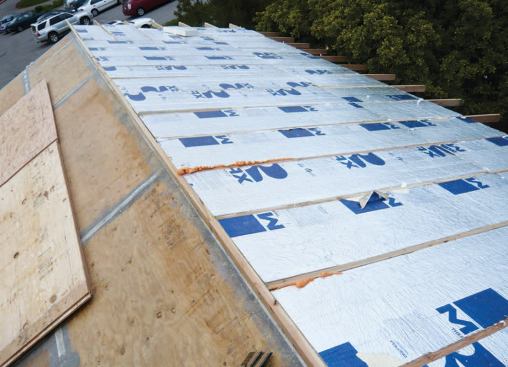
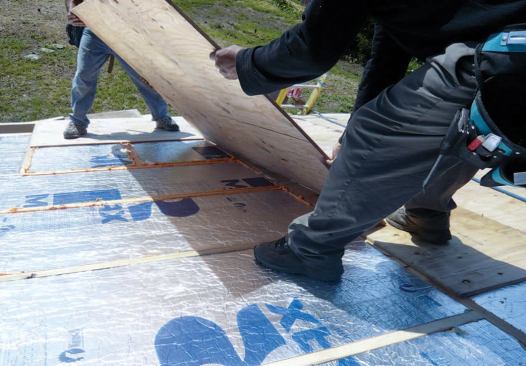
To reduce thermal bridging through the 2×8 rafters, the plan called for framing and insulating what amounted to a second, outer roof over the first. We started by laying 2×4 sleepers on edge over the plywood roof sheathing – staggered between the rafters below – and nailing them in place from beneath. These “outer rafters” extended beyond the wall to create a 2-foot overhang at the eaves. The spaces between the sleepers were filled with 3.5 inches of polyiso board, which was allowed to overhang the wall sheathing by an inch.
Finally, the assembly was sheathed with more 1/2-inch plywood – which, like the sleepers and the rest of the framing and sheathing, was also treated with Bora-Care. Combined with the dense-pack cellulose that would later be blown into the framing of the lower roof, the assembly had a nominal R-value around R-49.
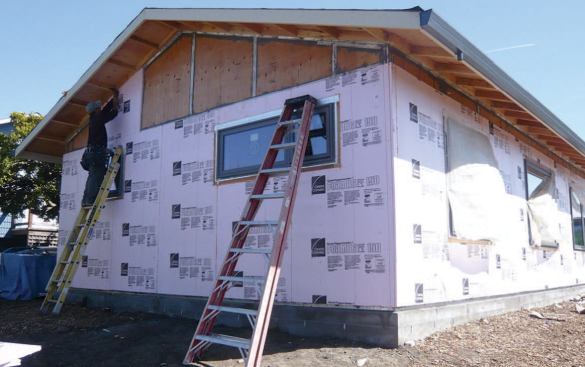
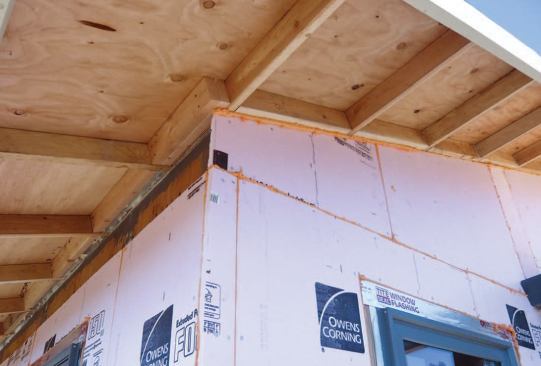
To create a continuous blanket of foam around the air-sealed shell, a layer of 1-inch XPS was then applied over the wall sheathing. At its upper edge, the foam on the walls was beveled to match the overhanging lip of polyiso foam exposed at the edge of the roof , and was sealed to it with more spray foam.
Plumbing and Wiring
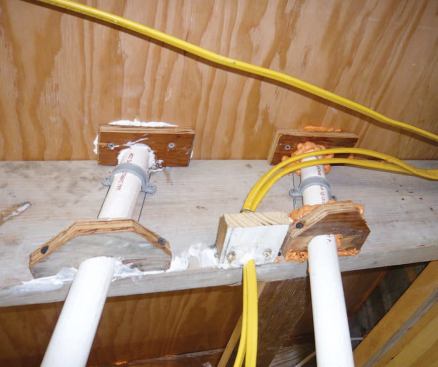
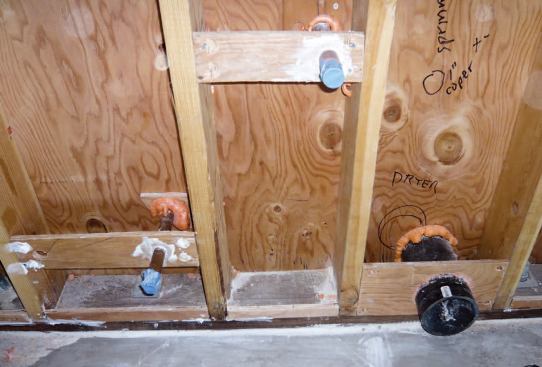
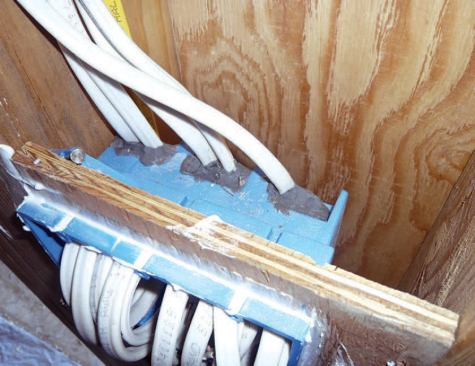
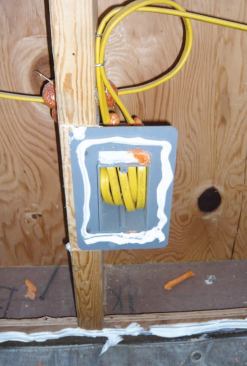
All pipes and wires that penetrated the sheathing were carefully sealed with SIGA tape, caulk, spray foam, or some combination of the three. We also screwed flat plywood backing plates to the framing so the drywall could be caulked around them.
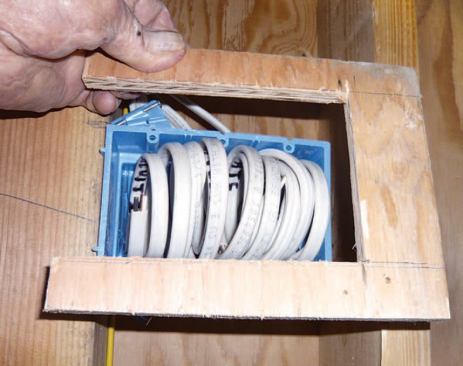
Electrical boxes. We used airtight electrical boxes from Airfoil (612/280-8331, airfoilinc.com) wherever possible. Because Airfoil doesn’t make a sealable three-gang box, we made our own by fastening and caulking plywood “horseshoes” in place around them, and sealing the wire penetration with nonhardening duct sealer.
Drywall and Cellulose
Our plan called for drywalling the frame first, then insulating the cavities with dense-pack cellulose. The local building department wasn’t happy with that choice, because it’s difficult to inspect visually. Damp-spray cellulose can be applied to open wall cavities, but this would have meant waiting for things to dry out before the drywall could go on – potentially a long time, given the cold, damp winter weather. We also wanted to avoid blowing the cellulose behind netting, because any bulging of the netting could interfere with a good seal between the drywall and framing.
Fortunately, the department agreed to meet us halfway: We could do it our way, with the stipulation that we would have to hire a certified thermographer to check our work and confirm that no cavities had been missed.
Caulked drywall. Before the rockers hung each sheet of 5/8-inch wallboard on the outside walls, they ran a bead of Dap painter’s caulk along the top and bottom plates, at corner framing, around window and door openings, and at the flanged plumbing and electrical penetrations. They applied enough caulk so that a little excess squeezed out at the edges, confirming the presence of a good air seal.
We used one tube of caulk for each 50 square feet of wallboard, or about two cases of caulk in all. This was new to the drywall crew, and they complained at first. But they quickly got the hang of it, and with a little supervision did a very good job.
Blowing the cellulose. Our insulator is very accomplished at blowing cellulose into closed cavities. He paid a preliminary visit to the site before the drywall was on and took a series of photographs of the exposed framing, allowing him to pinpoint the locations of all the cavities later. Thanks to the OVE framing, there were fewer small spaces and areas obstructed by blocking to worry about than there would have been in a conventional frame.
The rafter cavities were filled with cellulose through holes bored in the rafter blocks, to a density of 3.5 pounds per cubic foot. Because the insulation puts considerable pressure on the drywall, it’s vital to check it with a moisture meter before packing the cavities – a moisture content of 20 percent or more will likely cause the drywall to bulge, or even tear away from the screws. The wall cavities were filled from inside the building, through holes bored in the drywall. The thermographer who inspected the work said it was the first job he’d seen that didn’t need any additional work to deal with missed spots or problem areas.