New Tile Backer
We’ve used Wedi building panels (wedicorp.com) on several projects now, and they’ve become our tile backer of choice. They consist of a waterproof cement-coated fiberglass mesh facing over an extruded polystyrene core, which makes them very light – a 1/2-inch-thick 3-foot-by-5-foot panel weighs less than 10 pounds – with an R-value of about 4.3 per inch. They’re sold in several sizes and in thicknesses ranging from 1/8 inch to 2 inches.
Curbless shower. We also used one of Wedi’s prefabricated shower bases, the Fundo Riolito, which is designed to work with a matching linear drain system. There are no membranes or clamping ring drains – you just insert the gasketed drain assembly in the base, tighten it, then glue the 21/2-inch-thick base to the subfloor with modified thinset.
Floor. We used 2-inch-thick Wedi panels on the floor. These can be installed directly over 3/4-inch subflooring, but to raise the panels flush with the thicker shower base we added a layer of 1/2-inch plywood over the subfloor. The edge of the shower base has a shiplap profile, so we rabbeted the edges of the abutting panels to match and installed them with a generous bead of Wedi’s elastomeric joint sealant in the rabbets. We then sealed the surface joints with another bead of sealant tooled with a putty knife.
After all the floor panels were installed, we had to make channels every 6 inches on-center for 1/2-inch radiant tubing. Following our Wedi rep’s recommendations, we used a 1-inch-diameter router bit to cut the channels, tacking a straightedge to the floor to guide the router in the straight sections and a radiused plywood jig for the curves. Our heating subcontractor thought the channels were too small for effective heat transfer to the tile flooring, so we made a second pass to expand the slots, which were eventually filled with the PEX and thinset.
Walls. We completed the tile substrate by installing 1/2-inch-thick Wedi panels on the walls. These panels cut easily with a utility knife and get fastened directly to the framing with washer-head fasteners about every 12 inches. A waterproof sealant is used at the butt joints between panels. In the wet shower area, we also taped the seams with fiberglass mesh tape bedded in thinset mortar, per the manufacturer’s instructions.


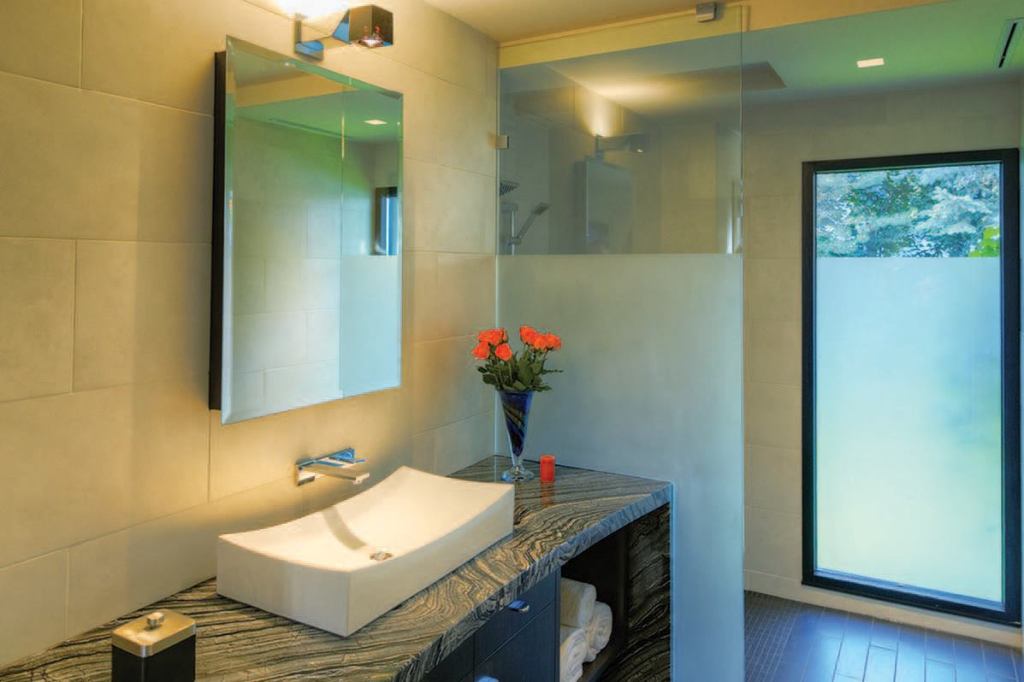
The stained maple vanity cabinet supports an 11-foot-long Kenyan…
Wall-Hung Cabinets
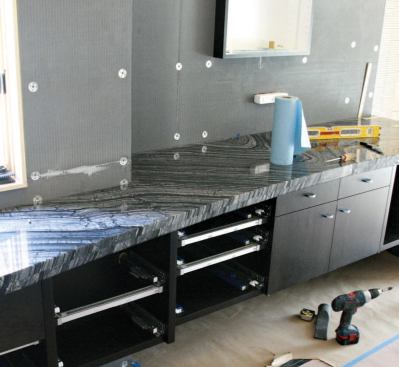
We have a fully equipped shop where we make all our own cabinets. When we know that they will be hung from the wall and will have to support a lot of weight, we build the carcases like box beams. Even though the vanity in this bathroom was over 10 feet long, we assembled it in our shop as a single unit, using 3/4-inch plywood throughout. For additional strength, the interior partitions are double layers that fit into dadoes in the cabinet back. All of the joints are screwed and glued together.
We left the framing exposed where the cabinet would be mounted so that we could fasten it directly to the LSLs with 3 5/8-inch-long LedgerLok screws. These fasteners have oversized washer heads and a lateral design value of 255 pounds in structural composite lumber. We used three fasteners per stud – plenty to support the 400-pound Kenyan marble countertop and heavy cabinet. We’ve used these construction details and screws in a number of similar installations in the past and have never had a problem with any of our cabinets coming loose or sagging.
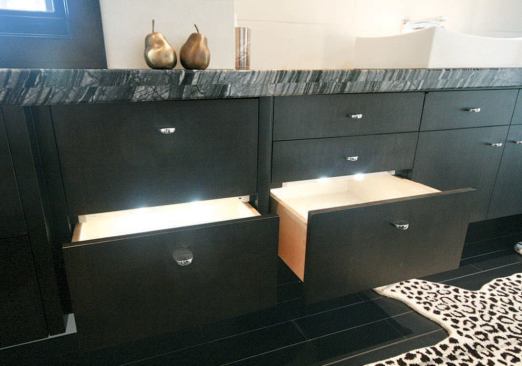
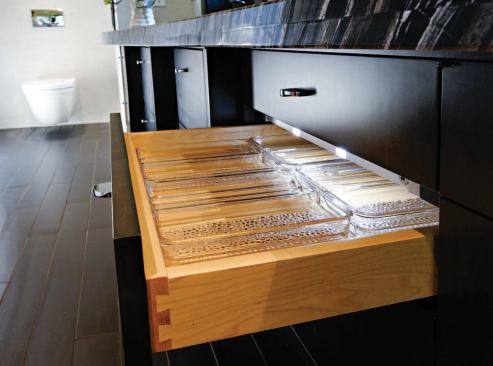
The stained maple cabinet has a conversion varnish finish and is fitted with inset doors and drawers. We mounted the drawers on Accuride Eclipse 3132EC soft-closing undermount slides ( accuride.com), which are easily adjustable – a nice feature when working with inset drawers. When the drawers are open, the slides remain concealed, while the interiors are illuminated by automatically switched low-voltage LED lighting.
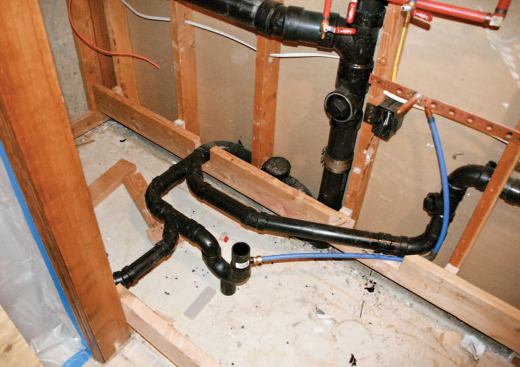
Mini Mechanical Room
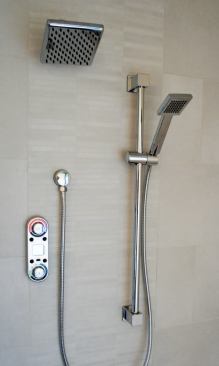
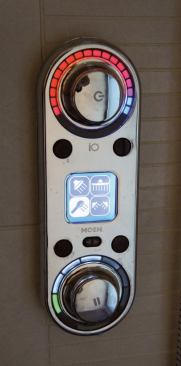
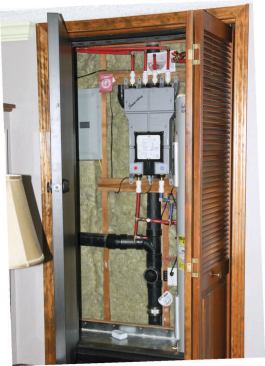
The bathroom shower has multiple showerheads controlled by a remote Moen multi-outlet shower valve. To meet the added demand for hot water, we installed an additional 50-gallon water heater connected in series to the home’s original hot-water tank. Since the bathroom is heated hydronically, while the rest of the house is heated with a furnace, we also installed a small Electro EMB-2 2.5 kw electric boiler (electromn.com). We found room for the new mechanical equipment in a spare bedroom closet located in the basement.
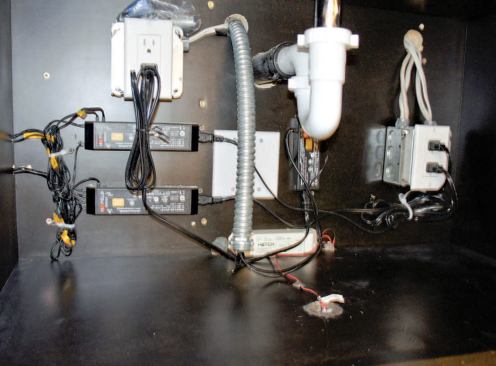
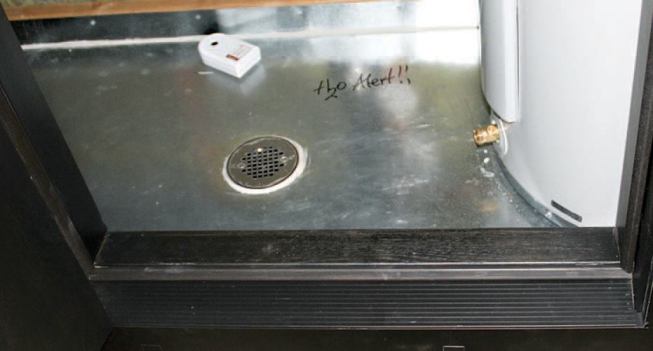
To block noise, we insulated the walls of the new mechanical room with rock wool and hung a separate solid-core door behind the closet’s original louvered bifold door. Inside the closet, we framed a new floor over the existing slab to create clearance for a drain system. We fabricated a galvanized pan for the new floor, equipped the pan with a drain and a trap primer, and tied the floor drain into the existing plumbing. In the event of a leak, water can drain harmlessly out of the closet, but there’s also a floor-mounted water sensor that will sound an alarm to alert the homeowners to a problem
Cost
The total cost for the 110-square-foot project was about $120,000, which includes all the new mechanicals for the master bath and the labor and materials to convert the basement closet into a mechanical room. It also includes new flooring in the master bedroom. Hydronic radiant heat accounted for about $10,000 of the budget.
Photos of finished project by Jon Pece.