
Ten years ago, my brother Rick was diagnosed with Parkinson’s disease. One of the strongest and hardest-working men I’ve ever known, he is now unsteady on his feet and uses a walker to get around. These days, he shows a different kind of strength as he stoically confronts the daily challenges of this debilitating disease.
He doesn’t ask for much, but his fondest desire is to continue living in his house. His seven siblings, three children, a niece, and a nephew have all pitched in to help him do just that. With the help of my son Matt, my contribution was to make his bathroom safer and easier to use.
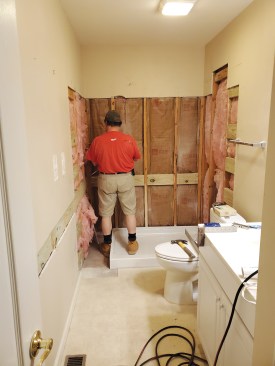
Budget limits the scope of work. We had a limited budget, which meant we couldn’t rearrange or expand the bathroom. Our main focus was removing the tub and installing a shower without changing the sink, vanity, toilet, or floor covering. Our other focus was providing secure grab bars throughout the bathroom.
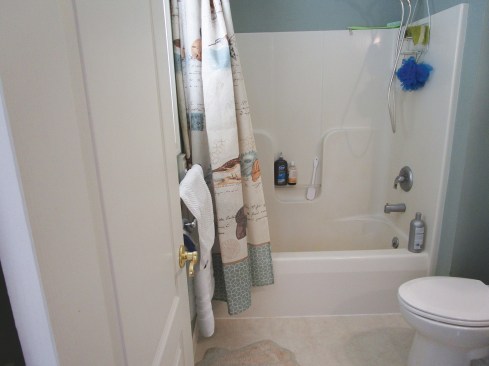
The existing fiberglass combo shower/tub was serviceable, but difficult for a person with mobility challenges using a walker to access.
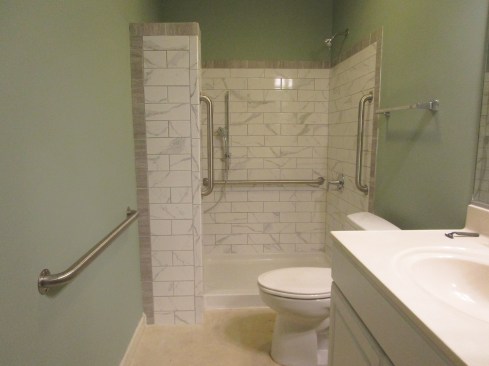
The author replaced the combo unit with a tile shower with a low curb that makes entry and exit easier and plenty of grab bars to provide solid support. There's a bench seat behind the short wall to the left.
Because we limited the scope of the job, we were able to upgrade from the basic builder-grade fiberglass tub to a tile shower. In addition to improving the look of the shower, using tile allowed us to build in the accessible features that we wanted.
After removing the plumbing fixtures, I cut the tub into manageable pieces using a 4 1/2-inch angle grinder fitted with a diamond blade, and hauled the fiberglass scraps out of the house. Then, to gain access to the framing for blocking, I cut the drywall back one stud beyond the space we planned for the shower.
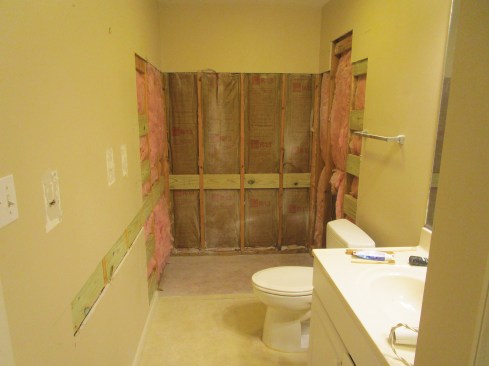
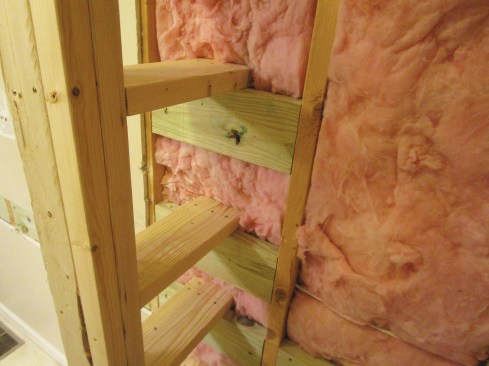
After cutting up and removing the existing fiberglass tub, the author cut back drywall and installed blocking for new grab bars.
With the framing exposed, I began to install blocking. This blocking would provide not only anchorage for the edges of drywall and tile backer boards but also solid attachment points for mounting grab bars and plumbing fittings. I also added blocking where we planned to attach a short wall and a bench at the end of the shower.
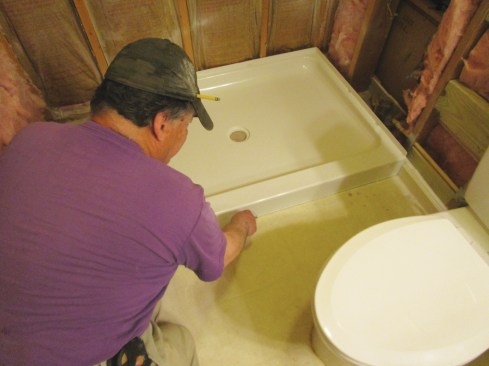
Shower base. For the shower floor, we chose Sterling’s Guard+ 34-inch-by-48-inch Vikrell base (sterlingplumbing.com), which was much faster and easier to install than a tile floor. The installation of the drain, in particular, was greatly simplified; in this case, the house was built on a crawlspace foundation rather than a slab, which allowed us to easily move the drain line. We also routed the supply line for the handheld shower from the shower valve diverter to the opposite wall (i.e., the wall behind the bench) under the floor. This was a better option than running it through the exterior wall, where—though it was insulated—there would be a greater risk of freezing. Also, any problems in the line would be much easier to fix under the floor than they would be in a wall covered in tile.
Using the new shower base as a pattern, the author marked the drain location and where the flooring and underlayment needed to be cut back.
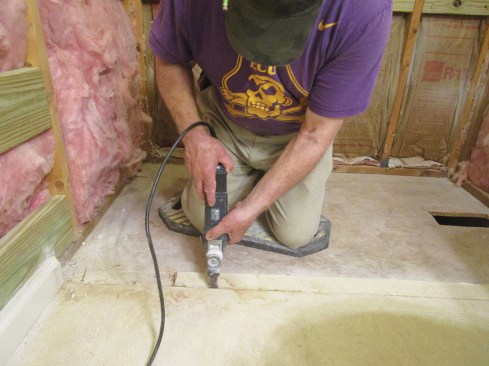
The author used a multi-tool to make the cut in the vinyl flooring and through the underlayment to expose the subfloor.
I used the base itself to lay out the cuts for the drain and the vinyl flooring and underlayment, since the tub was 30 inches wide and the shower base was 34 inches wide. I also had to cut an additional 7 inches or so where I would build the short wall at the end of the shower. After I cut the floor covering and the hole for the drain, I checked the wall framing with a level to make sure the studs were straight. Before installing the shower base, I planed off the bow from a few studs, then used roofing nails to attach the clips that held the base in place.

The new Vikrell shower base features a center drain. Here, the author is using a hole saw to make the cut for the drain line in the subfloor.
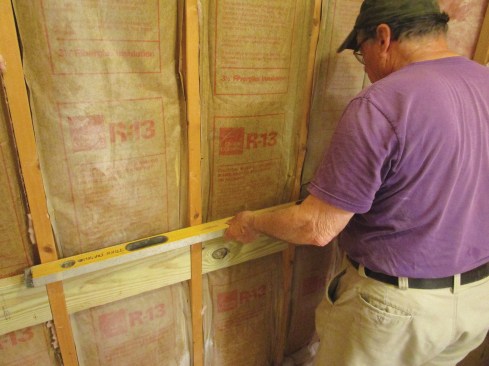
A good tile installation requires a very flat substrate, so before installing backer board, the author checked the wall framing with a level to see if the studs were in plane.
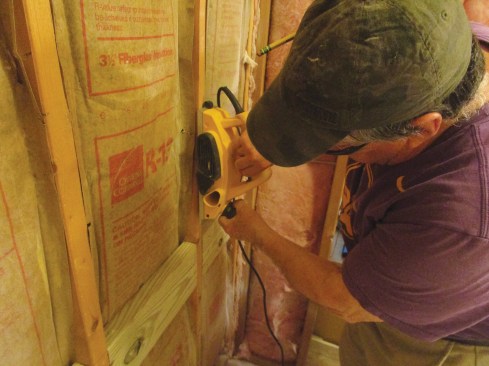
Some of the studs were bowed, which the author fixed with a few passes with a power planer.
Framing the wall and bench. Like bathrooms in many middle-class houses, this one was 60 inches wide, while the Vikrell shower base was 48 inches long, which left 12 inches between the shower base and the wall. In this area, I framed a short wall and a bench, both of which I later covered with tile. The 16-inch-long wall runs a few inches past the end of the base.
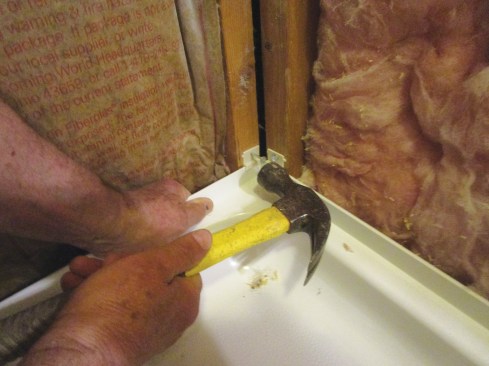
Next, the author installed the prefabricated shower base, using clips to hold it in place (above). The gap between the shower base and the wall will be filled with a custom bench seat (right).
I made the bench 12 inches deep and ended it at the edge of the shower base. In use, the 4-inch overlap of the new wall allows the shower curtain to run 4 inches behind the wall, which helps keep water inside the shower enclosure.
I built the wall the same height, 75 inches, as the rest of the tile enclosure because we wanted steam from the shower to flow over it. Since it would be covered in tile, this wall had to be rigid. Rather than extending a post to the ceiling, which we thought would look odd, I used some unconventional framing to hold the wall rigidly in place. After screwing 2×6 blocks 12 inches on-center in the adjoining wall, I attached 2×6 pieces horizontally. Next, I screwed a pair of vertical 2x6s to the ends of these blocks and then covered both sides of the wall with 5/8-inch plywood. Tying in the bench, which itself was built like a tank, made this little wall rock solid.
The short, 3/4-height wall that partially encloses the shower bench was framed with 2x6s tied with plenty of blocking to the existing framing.
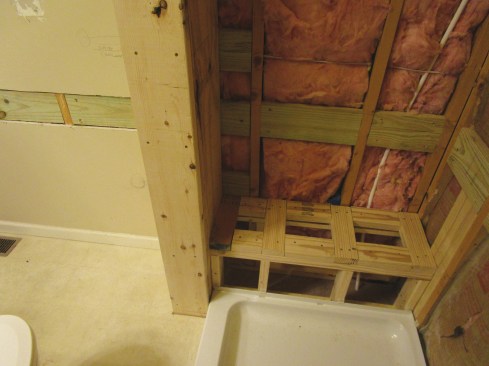
To stiffen the wall, the author covered both sides with 5/8-inch plywood. The wall is also reinforced by the bench framing.
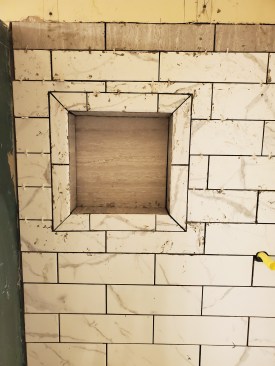
On the wall above the bench, I framed a niche, which consisted of two 2x4s screwed horizontally in the bay between two of the studs and one 2×4 installed vertically to make it 12 inches square. As a result, the niche is not perfectly centered on the wall, but centering it would have involved reframing the entire wall and considerable drywall repair.
Plumbing. For the water supply, we used a diverter valve (Kohler K-11 748-K) that allows the bather to switch from the standard overhead shower to a handheld shower mounted beside the bench. The maximum temperature of the water that flows through this valve can be adjusted, a great feature for people like my brother, whose hands don’t work as well as they used to, because it prevents them from being scalded. We adjusted the maximum temperature to 120°F.
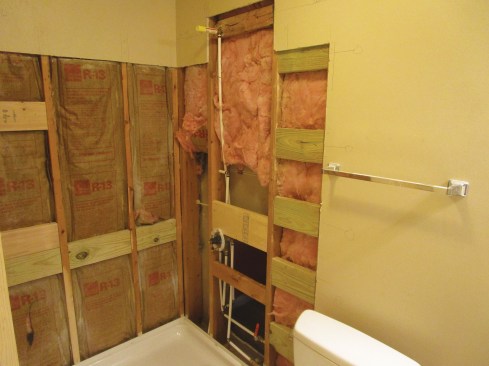
The author installed a diverter valve that can supply water to either the showerhead or to a handheld shower over the bench seat.
Tile backer board. After testing the plumbing lines for leaks, I installed Permabase, a cement-based tile backer board, on the walls and the bench. Then, following the manufacturer’s directions, I covered the seams using modified thinset and 2-inch alkali-resistant mesh tape. I also covered the screws with the thinset. This process is similar to taping drywall, and I used my 6-inch taping knife to apply the thinset and embed the tape.
When I framed the niche, I laid it out so that the back could be covered by a single piece of the 12-inch-wide gray tile that we planned to use on the project. When I installed the backer board, I used construction adhesive to attach a piece to the back of the drywall for the bedroom that adjoined the bathroom. After installing the back piece, I installed pieces on the top, bottom, and two sides of the niche. Then, I taped the niche with thinset and mesh tape while I was taping the rest of the shower.
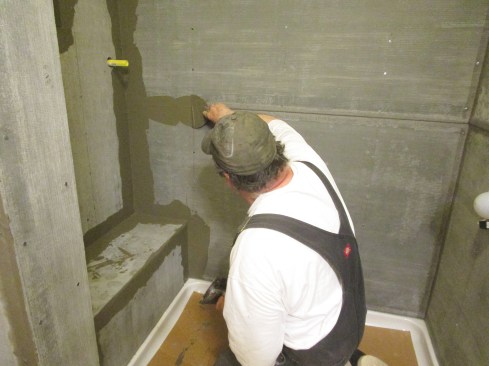
The author covered the wall and bench framing with Permabase cement-based backerboard, then taped the joints with fiberglass mesh tape bedded in modified thinset mortar.
Waterproofing membrane. We chose Mapei Mapelastic AquaDefense liquid-applied membrane to waterproof the shower. This membrane is easy to install; you just paint it on with a roller or brush. The key thing to remember is that it’s water-soluble, so it’s essential to apply it to a dry surface. I let the thinset dry overnight before applying the first coat of Aqua Defense, then let that coat dry overnight before I applied the second coat.

To waterproof the shower, the author coated the tile backer board with Mapei Mapelastic AquaDefense liquid-applied waterproofing membrane.
Tile. We chose a fairly inexpensive 4-inch-by-12-inch tile and ran it in an offset, subway-tile pattern. The tile was white with gray streaks, which made it look like marble. For the border, we used gray tile, which brought out the gray streaks in the field tile, and we used a matching gray grout. We chose the same gray tile for the bench and the niche at the end of the shower. Although we certainly wanted my brother’s shower to look nice, our decision to use these colors was also driven by a desire to maximize visibility. The largely white tile reflects light well and the gray grab bars and bench stand out visually, making getting into and using the shower easier and safer.
To simplify things, I stayed in the Mapei system, using its polymer-enriched thinset mortar to install the tile. I spread a fairly thick coat of the thinset on the wall before combing it with a 1/4-inch-by-1/4-inch notched trowel. Then I back-buttered each tile before setting it in place.
The author finished the walls with 4-inch-by-12-inch tile installed in a subway pattern. Tile colors were chosen for high visibility.
I also used Mapei’s Keracolor unsanded grout to fill the joints. Finally, I used matching Mapesil acetic silicone sealant, which color-matched the grout perfectly, at the inside corners and the joint between the tile and the shower base.
Grab bars. When I installed the blocking, I was careful to note its locations on the walls before hanging the drywall. I also made crude, dimensioned sketches of those locations in a notebook. When I installed the grab bars at the end of the job, I was glad to have these records, especially for the walls covered with tile.
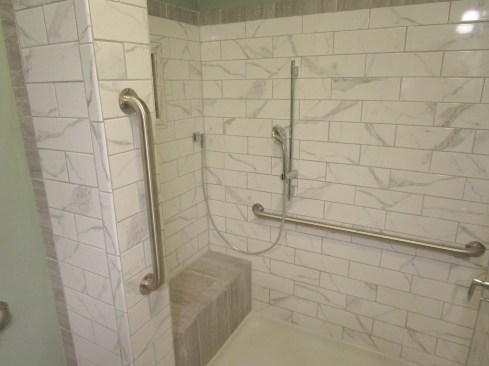
The features of the new shower, including the built-in bench seating, handheld shower, low curb, and new grab bars, make all areas of the 5-foot-wide bathroom safer and more accessible.
Per ADA recommendations, we installed the horizontal grab bars at 34 inches off the floor. We also installed vertical grab bars on both sides of the entry into the shower. Two of the grab bars have also proven to be helpful for using the toilet, which is next to the shower.
This bathroom doesn’t come close to meeting the ADA requirements for accessibility, which are written mainly for people in wheelchairs who are using public accommodations. While this bathroom is not accessible for an unaccompanied person in a wheelchair, it is much more accessible than it was before. My brother has been using it for a year and a half now and has told me that the modifications we made have worked extremely well. He particularly likes being able to bathe while seated using the handheld shower.
Photos by Matthew Navey.