
In a recent discussion with another carpenter, I was asked about the best way to handle the transition from a finished stair stringer, or skirtboard, to the baseboard. He was specifically asking about a skirtboard that ends near a corner at the top or the bottom of the stair. “My dad always just cut the skirt with a plumb cut,” he said, “but depending on how far the stair is from the corner and how tall the baseboard is, we would sometimes end up with a jump from the top edge of the skirtboard to the top edge of the baseboard. Or sometimes, he would need to make a level cut at the top, so the skirtboard didn’t project above the baseboard. I’m pretty sure there has to be a better way.”
Our Eye for Structure
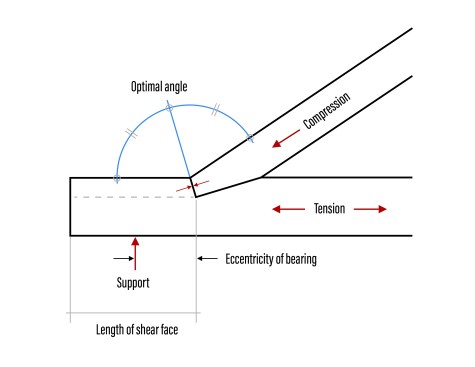
The traditional way to make this transition is to bisect the angle between the skirtboard and the baseboard. There’s a reason, I think, this looks “right.” It has a structural basis that is depicted in the illustration below, which shows a structural connection for bridge timbers. The optimal bisected angle efficiently transfers the load and offers equal bearing surfaces. Of course, the transition between a stair stringer and a baseboard is not structural, and there are no tension, compression, and shear stresses to resolve.
Ola Kwiatkowska
Structural basis for stair-to-base transition. The optimal bisected angle in this structural connection between a diagonal compression member and a horizontal tension member efficiently transfers loads and offers equal bearing surfaces. While the skirt-to-baseboard transition is not structural, the author posits that the “structural logic” of the bisected angle is what makes it pleasing to the eye.
If we imagine that instead of a skirtboard, there was a housed stair stringer, then the baseboard abutting the stringer would be supporting the stair at the optimal angle. Never mind that this optimal bisected angle makes the base cap profile line up. I believe the structural logic of a stair-to-baseboard connection probably predates the aesthetic rational for mitering a cap molding. The bisected base-to-skirt geometry makes structural sense, even though it is ornamental now.
This same logic works with door casing. It looks “right” when the head spans the two side pieces, forming a “header,” and would look incredibly off if the sides projected up past the head. Similarly, a window stool works best when it provides a “foundation,” and projects under the side casings. I think all these please the eye because they have an ancient structural logic behind them. When in doubt, go with what looks structurally solid.
Variations on a Theme
Bisecting the angle between the baseboard and the skirtboard becomes the “standard” transition that works at both ends of the stairs and at landings that wrap inside corners.
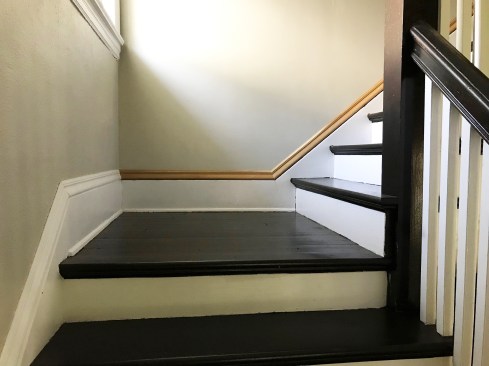
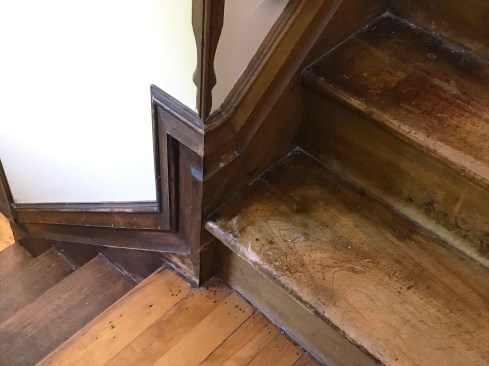
On this stair landing, the baseboards and skirtboards, as well as the profiled cap moldings, are joined with bisected angles.
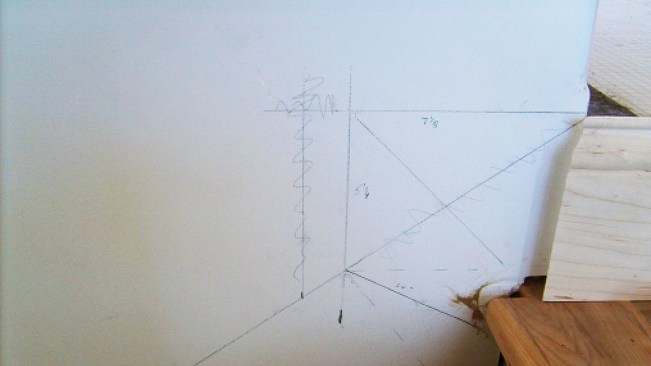
The layout shows how the author resolves a short wall run with a skirt that rises to meet a level baseboard.
But we end up having to vary this when the stairs end close to a wall corner or when the landing wraps an outside corner.
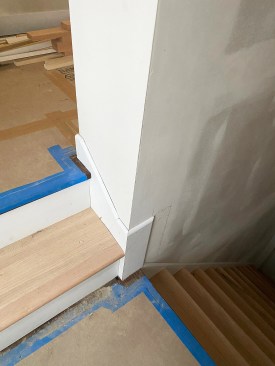
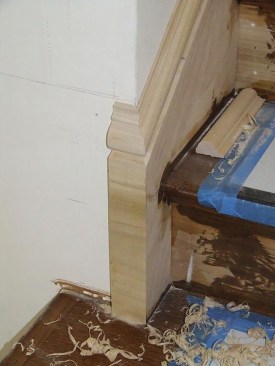
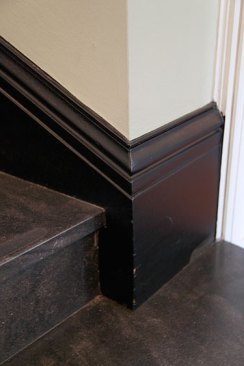
Close corners. As shown in the wall layout in the photo above (at left), I started with a line that projects onto the wall and is level with the top tread (the hallway floor level). Where this line intersects the top of the skirtboard defines the point where the trim rises vertically to the top edge of the baseboard, which wraps around the wall corner. I bisected the angle between the vertical rise and the top of the skirtboard. This angle is 127 degrees, so the bisected angle equals 63.5 degrees. (To find the angle you set on the miter saw, subtract 63.5 from 90. This equals 26.5 degrees.)
Note that on the wall layout, I crossed out the first rendition of this. It was the “right” way to begin, but I noticed that if the vertical line intersected the skirt line higher up the wall, the bisected angle would tuck in just below the top bullnose. The first way would have worked, but the joints would have no relation to the stairs. I also wanted to minimize the vertical. I could have moved this even farther up the skirtboard line to minimize it even more but chose to have the two angles converge around the top tread nosing. The important takeaway here is that there is no one way to do this. As a carpenter, I am always making judgment calls and adjusting the trim to align with other elements in a room.
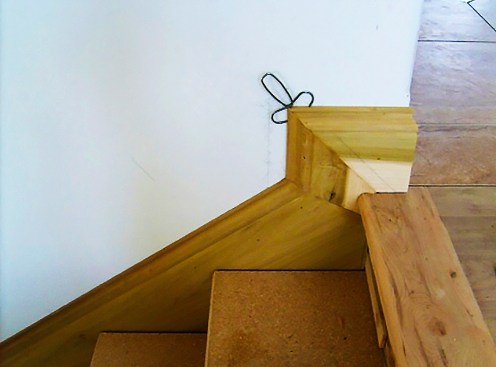
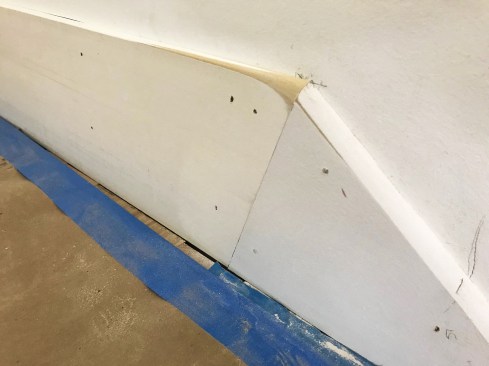
Where the trim rises vertically to the height of the baseboard, it joins the level baseboard at a 45-degree miter. The combination of these two angles—the optimal bisected angle and the 45-degree miter—ensure that the profiled top edges of the baseboard and skirtboard align perfectly where they join.
The traditional landing transition was done with a bisected angl…
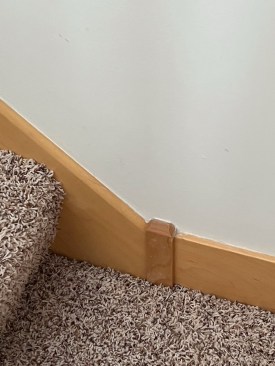
Inside corners of landing. At the inside corner of a stair landing that wraps an outside wall corner, there is even less room along the wall, so the skirt has to “jump” a level. The traditional way I have seen this resolved in older houses still uses the “standard” bisected angle, but in this case, that angle is made on the last tread above the landing, as shown in the slideshow at left. The trim levels out, so it can turn the corner at a 45-degree bevel. After the trim turns the corner, it extends in a level line and then drops vertically until it intersects the lower skirtboard. Once again, the two angles—the optimal bisected angle and the 45-degree miter—allow the profiled cap molding to align at each intersection. Depending on how the stair is laid out, the bullnose of this tread lands at the wall corner or at the corner on the plane of the skirtboard (both look good).
Further Adjustments
The idea of a plinth block is a go-to for a lot of carpenters. This is what I often see when carpenters don’t know how to manage transitions. It’s OK, but I think it draws too much attention to the joint and looks clunky if it’s not supporting a vertical element. (It works, for example, at the base of a door casing to enhance the effect of a “post footing.”) However, the plinth used in the slideshow (above), for instance, does have one justification: The profile on the skirtboard doesn’t match the profile on the baseboard stock. I prefer to sand, rout, or even carve the profiles to blend the rake profile with the two different profiles. Keith Mathewson has an excellent article, “Raked Baseboard Returns,” on ThisIsCarpentry.com that gives a nice presentation on how to carve the profiles to match, and the secod to the last photo in the slideshow shows a nice example of how he has done that on one stair where the nosing of the tread comes very close to the corner of the wall.
Photos by Brian Campbell except where noted.