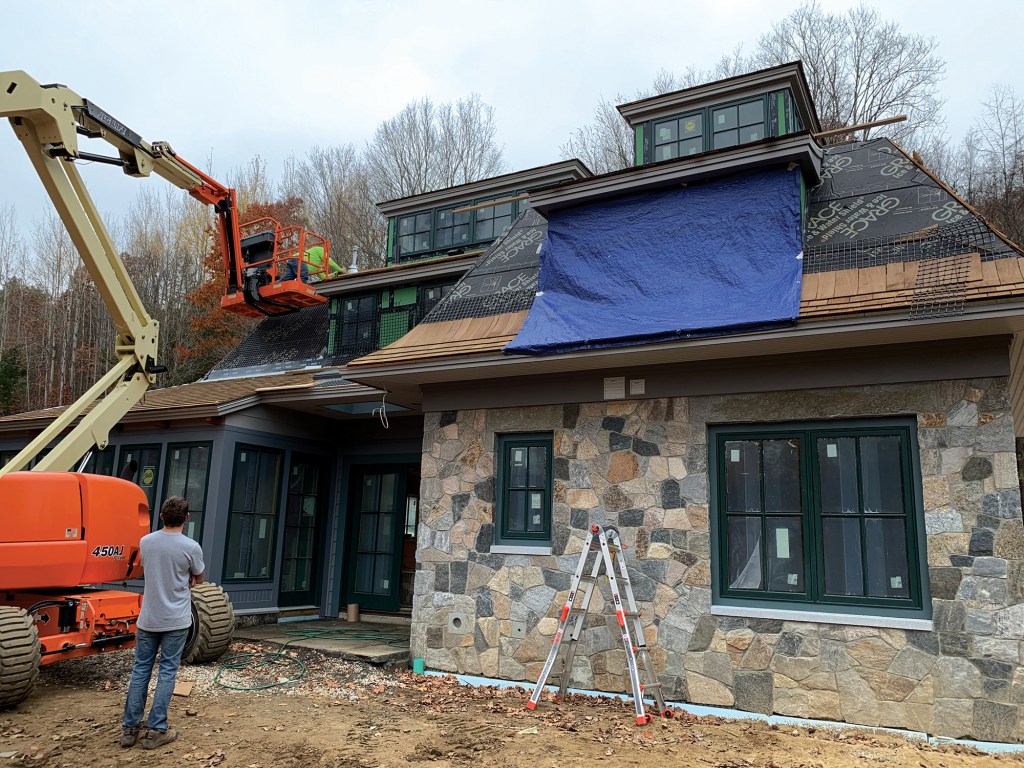
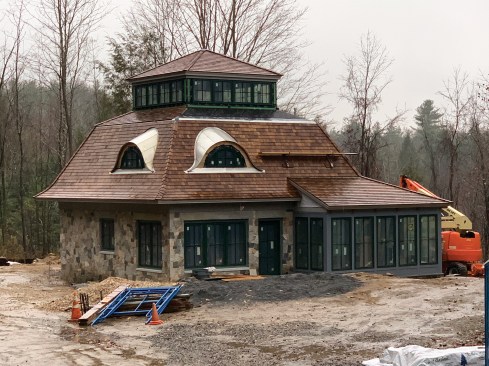
Most of our work is centered around Cape Cod, but a few years ago (right before the COVID-19 pandemic), we ventured into the Berkshires near Great Barrington, Mass., to install a red-cedar shingle roof on a home that was under construction. Normally, we roll out Cedar Breather woven nylon mesh over the sheathing before nailing down wood shingles to improve ventilation and drying potential underneath the shingles, but for this project, the general contractor had specified a rigid rainscreen product called Ventgrid12. We had never heard of it, but we were game for a challenge. It turned out to be quite simple.
Ventgrid12 is a semi-rigid, 1/2-inch-thick (12.7 mm; hence the “12” in the name) 4-by-8-foot panel made from recycled plastic. Designed for interior and exterior use on floors and walls, the 32-square-foot panels have an open grid design that allows for both drainage and ventilation. Weighing only about 8 pounds each, they are easy to handle, and they have an 8,000-psf load capacity—plenty strong for use underneath wood shingles.
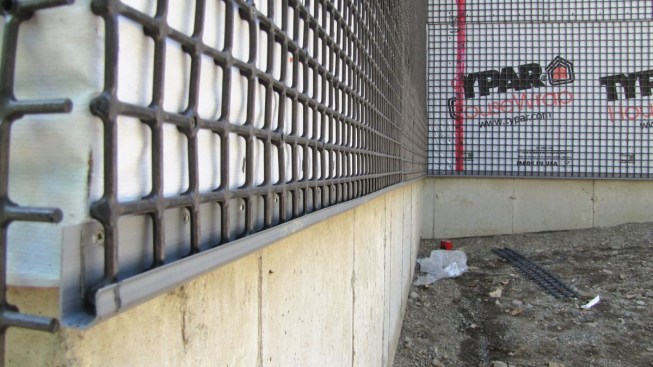
Ventgrid
Made from recycled plastic, Ventgrid12 rainscreen panels are designed for use under siding and – with an 8,000-psf load capacity – also under roofing.
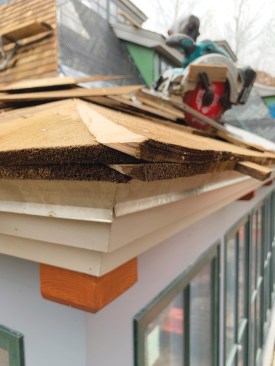
Installation. When we arrived on site, the GC had already installed an ice and waterproofing membrane over the Zip-sheathed roof, a belt-and-suspenders approach to account for our unpredictable New England weather and a long construction schedule. To prep the roof deck for the extra 1/2-inch thickness of the panels, his crew had extended the fascia and rake trim by 1/2 inch above the surface of the sheathing, effectively picture-framing the roof deck to conceal the edges of the panels and block insect entry. The manufacturer also offers a screened edge trim—called Ventrim10—that can be used in this application, but we didn’t use it on this project.
One of the first things we noticed was how easy the panels were to install. While Cedar Breather isn’t particularly difficult to install, rolling out a 200-square-foot roll and tacking it down is really a two-person job. With Ventgrid12, one person can easily lay the panels on the roof deck and tack them in place, driving a few roofing nails along the bottom edge through preformed attachment holes molded into the panels. We oriented the panels horizontally, with subsequent courses held in place by the course below.
The roofing crew installed the 4-by-8-foot panels over Grace Ice & Water Shield membrane, which the general contractor had installed.
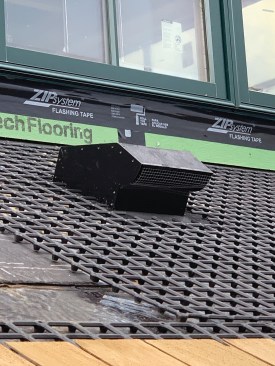
Weighing about 8 pounds each, the panels were easy to move up onto the roof. Workers used saws and snips to trim panels to fit at hips and around vents and other roof penetrations.
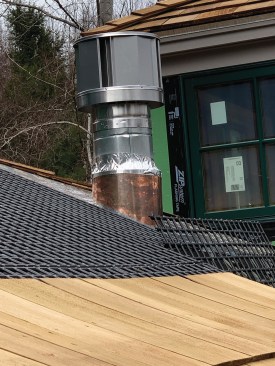
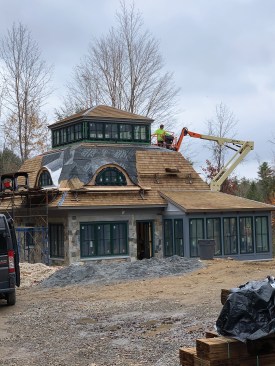
This was a fairly complex roof, with flares, hips, dormers, and a number of penetrations for mechanicals and ventilation. But this didn’t complicate the installation of the panels as we worked our way up the roof. At the hips, we used a small, battery-powered circular saw to cut the panels to size, fitting them as we went. For curved or more complex cuts around penetrations, we used heavy-duty shears or even a utility knife. And because the panels are fairly flexible, they conformed to the flare along the lower edge of the roof without any difficulty.
Ventgrid12 panels are flexible enough to conform to this home's flared roof deck.
Longer fasteners. Normally, we would use 1 1/2- or 1 3/4-inch 304-grade-stainless-steel ring-shank roofing nails to install the pressure-treated Perfection red cedar shakes that we used on this roof. To accommodate the extra thickness of the Ventgrid12 panels, we switched to 2 1/2-inch fasteners to make sure they would penetrate the shakes, the Ventgrid12, and all the way through the sheathing.
One advantage of the 4×8 panels is that they can be laid in place as needed as the crew works their way up the roof, making them easier to work with than a roll of material that has to be installed in long courses.
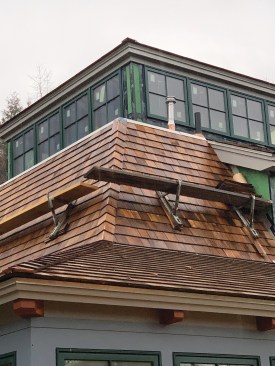
On this project, the red-cedar hip cap shingles were custom-fabricated off site to match the specific roof pitch where they would be used.
For us, one of the biggest benefits of using Ventgrid12 as a roof underlayment is that the wood shingle roof is now walkable without risk of damage to the shingles (Cedar Breather will compress, so shingles are more at risk of cracking if walked on). Not only is this a benefit during installation, but I think that it will make a big difference long-term for any other trade that has to access the roof to replace windows, clean chimneys, and so forth.
Because shingles are fully supported by the rigid panels, they won’t flex or crack under a worker’s feet as they might with a more compressible, fabric-style rainscreen material.
Cost. You need a little more than six Ventgrid12 panels to achieve the same coverage as a 200-square-foot roll of Cedar Breather. While I don’t know what the panels cost in 2019 when we worked on this project (since the GC sourced and ordered them), current pricing seems to run between $50 and $55 per sheet, or between $300 and $330 for the same coverage as a roll of Cedar Breather, which costs as little as $120 in our market. For a client who is already paying for a high-end roof, this is an upgrade that is well worth the extra cost because of the improved ventilation underneath the shingles, improved durability, and resulting longer life of the roof.