While it’s a stretch to say that every element of construction is downstream from organization, it’s not much of one. Gone are the days of building a wooden tool tote at the start of an apprenticeship and filling it with all the handsaws and chisels needed to build a house. Instead, the range of tools and supplies has burgeoned over time, placing an increasing importance on our capacity to keep the jobsite organized.
The market’s solution to this problem is the modular, stackable toolbox, Packout and Systainer being standouts in this category. Walk onto any jobsite, and it’s an easy bet that someone has their tools organized in a big red box or its market alternatives. These systems are durable and convenient, but they do not come cheap. When I priced out a comprehensive organization of my tools, the sum was well beyond my budget, and the merchandise left several of my key demands unsatisfied. The obvious solution was to build my own modular toolbox system.
Design
Ron Paulk’s torsion-box workbench inspired my design. Paulk’s designs are a modern classic, using a plywood torsion box to create a strong and portable bench. This construction was perfect for my idea of creating “blocks” that I could bring on site and stack, Lego style, in any configuration I needed. The resulting blocks, made with ¾- and ½-inch plywood, are lightweight enough to be easily carried up a ladder and durable enough to support several hundred pounds.
One of the issues I have with plastic toolboxes is that they’re not designed for standing on. Also, their uneven surfaces can’t take a hammer blow or function well as worktops. My blocks are solid and flat enough to serve both these functions. When doing interior trim work, I like to use two blocks as step stools to access each corner of the casing and, with their open, lipped interiors, I can easily grab them with my boots and slide them along the floor as I work along the head casing. I find these blocks much more comfortable to work from than any step stool.
This comfort comes, chiefly, from their size. The blocks are 20 inches square and 12 inches tall. I based these measurements on the totes used in lobster fishing and commonly used by carpenters on the Maine coast. This size is the perfect intersection between capacity and portability, with a 20-inch worktop just fitting under my arm, and a 12-inch height easily supported by my hip in transport.


Nathaniel Carlsen
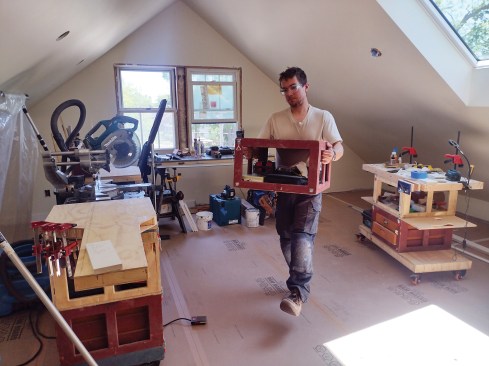
By making all the boxes the same size, the author saved on mater…
A benefit of the torsion-box design is that the side panel makes an excellent handle and, while I can’t carry a full load of tools with one arm as I can with a Packout, I can use two hands to carry more weight with greater comfort. The lower lip keeps loose tools from sliding out of the block, so I can securely keep and carry tools in blocks without drawers. Pattern routing and mass producing the components let me efficiently create 10 identical blocks.
Creating identical blocks was important because I wanted to fit some blocks out with interchangeable drawers. Using the quarter-quarter-quarter drawer construction (search online for “QQQ drawer system” for more information) and wooden slides, I built short and tall drawers, sized and installed so that each block can take two short drawers or one tall drawer. The drawers glide well on the wooden slides, which provide enough resistance to keep the drawers from easily opening on their own. Without metal hardware, the drawers easily slide in and out of different blocks and also open from both sides of a block. This means that if I set up my system in the middle of a room, my tools are accessible from both sides.
I fitted out the drawers with a tackle-box-style divider system, allowing me to customize the drawer organization to my needs. Between the blocks with drawers and the blocks that serve as open shelves, I can easily access all my tools without having to unstack anything.
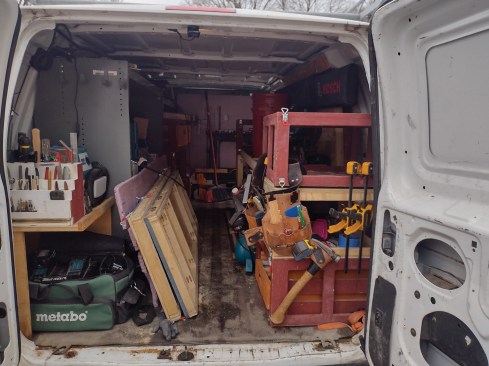
Because of this ease of access, the blocks can serve as organizers not only on the jobsite but also in the van. I set up my van in part around these blocks. They support a shelf for my miter saw and, by positioning my hand-tool and fastener blocks next to each door with open blocks stacked above, I have the essentials easily on hand while also having flexible shelf space to hold whatever tools I need for the current job. When that job is completed, those tools migrate back into the drawers deeper in the van, and the shelf space is freed up for whatever the next job requires.
The best part is that when I want to reorganize my van, the blocks are easy to reconfigure and, when I have to haul a bunch of material, the van is easy to empty. They even function as a ladder to help me climb onto my roof rack.
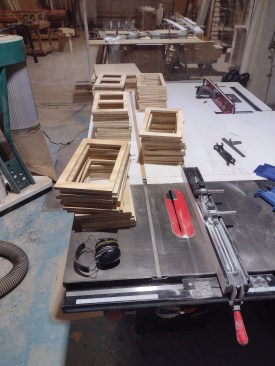
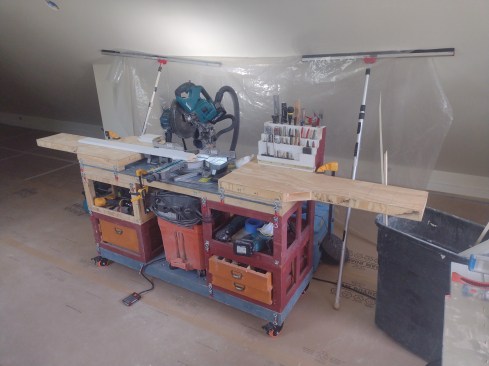
In addition to blocks, I also built a series of worktops and rolling bases, 20 inches wide and varying between 40 and 60 inches long. The tops are drilled out with 20mm bench dog holes to allow for MFT (multifunction table) style clamping, and my two smaller worktops are fitted out with a woodworking vise and a router table insert, respectively. These worktops, bases, and blocks all clip together with toggle clamps to form a robust, easily movable unit.
Because my system is modular and uniformly sized, I’m able to build new work surfaces that can clip on to my existing system. The other day, I diced up a few premade torsion boxes I had lying around, attached hardware and, just like that, I had the wings for my new miter-saw station. The capacity for iteration has become one of the most useful elements of this system.
In Operation
I came to the realization at the start of this process that I hate working on the ground, and I don’t even like having my tools on the ground. I find it to be both less efficient and less comfortable, so I wanted to create a system that would facilitate elevated and organized work equally well for jobs of different sizes. The modular nature of my block system has allowed me to experiment with many variations over the last year, falling into three general configurations depending on the size of the job.
For small, in-and-out work, I usually use blocks alone, without bases and worktops. When I rebuilt a deck, I loaded up a rolling dolly with two blocks (with drawers) and a trash can. This provided a small, flat work surface—helpful for changing blades and other smaller, fiddly tasks—and kept my tools organized and mobile. Nowadays, I use blocks without drawers for these smaller tasks, especially for punch-list work.
The other day, I went to a jobsite to adjust some doors, dial in some cabinet drawers, and do some caulking and touch-up, the usual punch-list smorgasbord. After arriving on site, I gathered all the tools I anticipated needing into two open blocks, which I then stacked inside the house close to where I was working. While this didn’t create a large working surface, it did keep my tools together and close at hand rather than spread out over the floor.
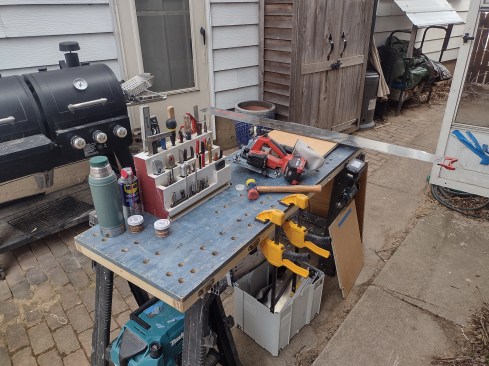
When I need a more substantial work surface but will be somewhere for only a day or two, I usually set up a worktop on sawhorses. While I have stacked blocks on top of this surface, I recently started hanging an open block from the worktop, clipping it securely in place. This allows me to use the same load and stack technique I mentioned before. With some tape-measure clips on the worktop to hang my drills from and my pyramid organizer for all my essential hand tools, this setup provides adequate storage for most medium-scale work I do.


Nathaniel Carlsen
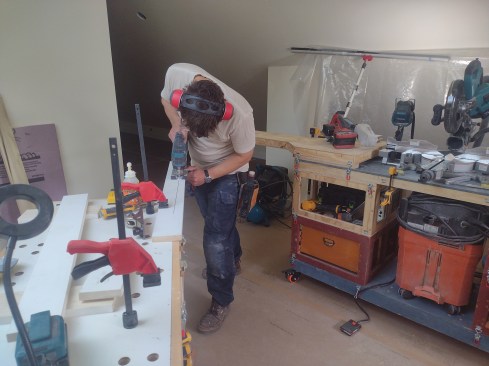
The author says the boxes are easy to carry and …
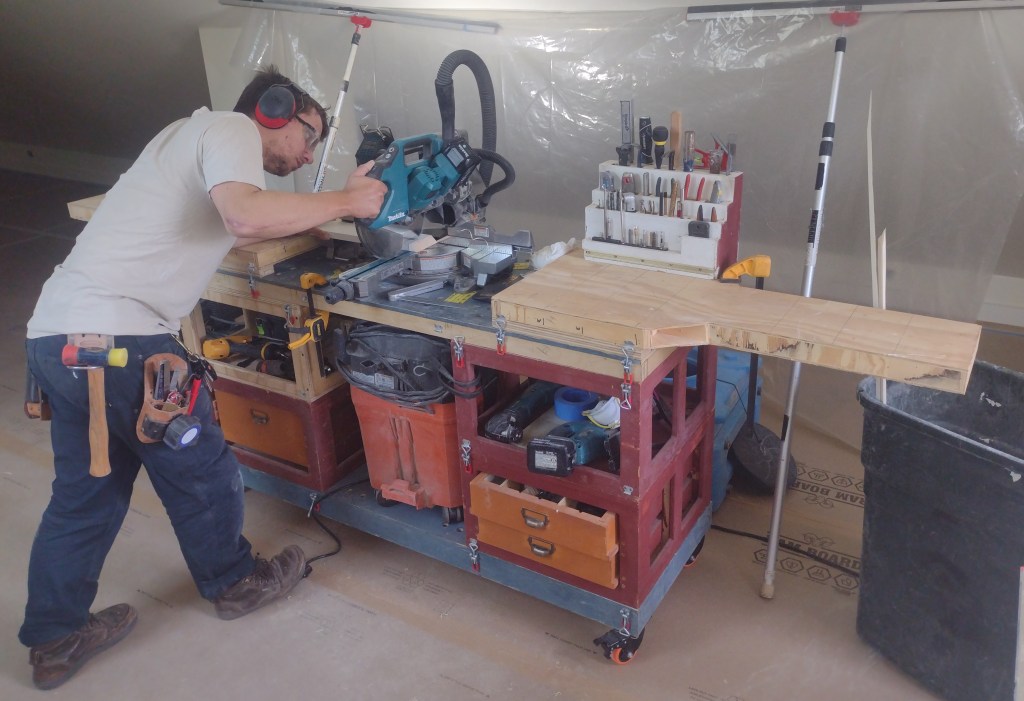
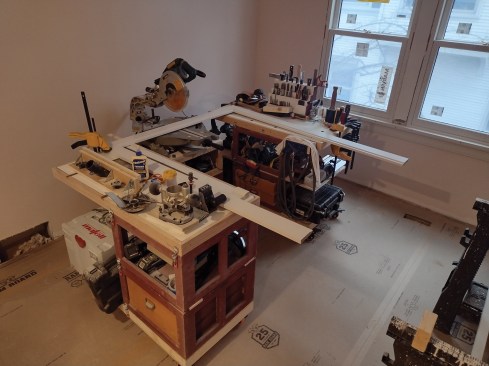
Adding miter-saw wings to the worktop yields a fairly substantial, lightweight, and economical setup. A cheap pair of plastic sawhorses usually does the trick, but I keep a pair of leveling sawhorses in my van to create a stable workbench on uneven ground. If I want a bit more space, I can augment this setup with a pair of stacked blocks to form a lower working surface, or I can use two blocks on edge with a piece of plywood to form a long, low shelf to hold other tools at a convenient height.
These capabilities are handy, but the system offers the most benefits when it’s time to move in somewhere for longer than a week, especially for interior trim jobs. Using my rolling bases, I can set up multiple workbenches that are level with one another and that I can roll around into whatever orientation best suits each task. This was especially useful for preassembling large casing on the bench.
If I am doing shop work, I can set up my workbenches with all my material and tools immediately at hand. I built the benches to line up perfectly with our shop table saw and outfeed table, allowing me to easily transport components around the shop. With so much mobility and capacity for improvisation, I have found that my ideal setup is to make a U-shaped pocket for myself, with all my tools and working space within easy reach. However, if I think an L-shape would be better for the task, the rolling bases make this shift incredibly easy.
I can roll a small workshop from room to room, then take it apart, move it one floor up, and restack to continue working. If I were setting up for a job that would take months, I would likely empty my entire van and use the blocks to build a complete workshop on site, with a stationary wall of tools and a full set of rolling workbenches.
Having used this system for the better part of a year, it’s hard to overstate its flexibility and efficiency. I sometimes joke that all I’m doing is fulfilling a childhood fantasy of having a giant Lego set, but the possibilities stemming from this metaphor are profound. If I want to prebuild a porch roof or other similar structure at a comfortable working height, I can use the blocks to support the structure. If I am going to cut irritatingly large closet shelves, I can use a block to elevate them off the ground to make the cut. If I need to assemble post wraps, I can use my blocks as a reliably square and flat clamping surface. I can stack a staircase, build staging, and perform many more iterations that I have yet to discover. My limitation is my imagination.
There is no denying the usefulness of the modular toolboxes on sale at the hardware store, and I need to be upfront: The time cost of building out my entire system was considerable. I spent many, many late nights in the TDS shop, and there were times I wondered whether I should have just bought some toolboxes and moved on with my life. However, the square, flat, stackable wooden blocks have considerable advantages over plastic boxes on the jobsite and perform functions no plastic box ever could.
Moreover, these blocks are tuned to me, sized to me, individualized to how I want to work. The worktops fit precisely under my arm, not under what someone decided was the average-sized arm. The openings and drawers are sized to fit the tools I own and use the most, not what some product designer decided was reasonable.
Walk onto any jobsite, and you will encounter the same conversation over and over: “Well, I love X about this toolbox, but Y just won’t fit,” or “If I could use the toolbox in Z way, it would be so much more useful.” It is the rare product that fully satisfies the demands of every tradesperson, and we accept trade-offs when it comes to power tools and hand tools because, realistically, most of us won’t build our own circular saws or forge our own chisels. But there was a day, not all that long ago, when carpenters did make their own toolboxes, sized to fit their tools exactly, with a handle shaved to fit comfortably in their grip. Though we are living in the modern world, with new tools and new ways of working, the homemade wooden toolbox still has its place.
Keep the conversation going—sign up to our newsletter for exclusive content and updates. Sign up for free