Working with composite, capped composite, and PVC decking comes with a host of installation problems and techniques that are far removed from gun-nailing pressure-treated decking as fast as it can be laid out. Mainly, unlike wood, the ends of composites need to be hidden.
Because the majority of these manufactured products have an underside, end profile, or core material that’s unsightly and unmatched to the face, hiding the ends of the boards becomes a necessary evil. Establishing a border of one or two board widths with mitered corners seems to be the most visually pleasing, as well as widely accepted, way for dealing with this situation.

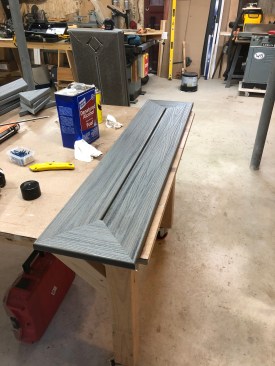
The result of some extra shop work is a nice, mitered “picture frame” look for each tread.
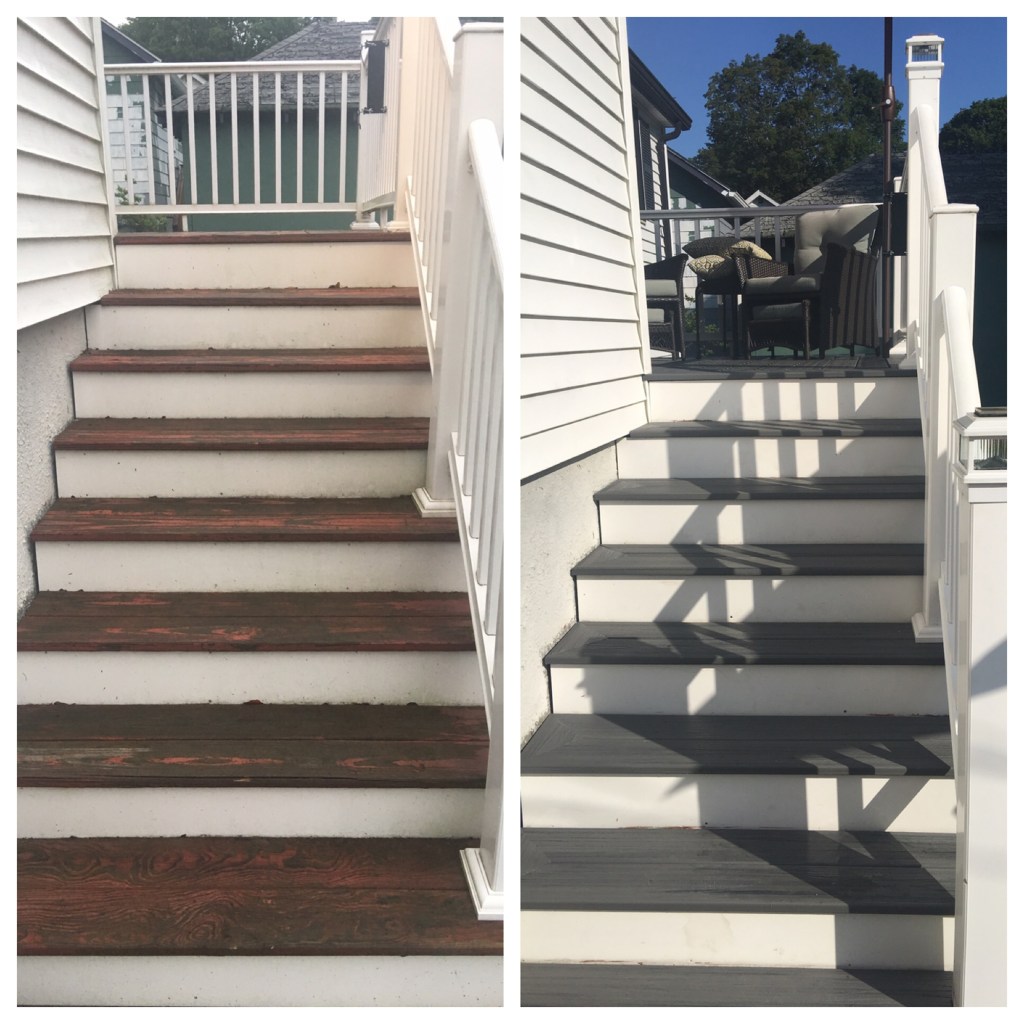
But, what about the stairs? I’ve seen (and done) many deck and porch staircases that simply have the ends squared off and exposed. But it’s not ideal, so many decking specialists will create a stair tread by mitering and returning the forward-sitting board back to the riser and infill a shorter board to match the field and border look of the deck. It looks nice and is a great solution; however, it requires blocking to support the returns and the shorter, inner piece.
Doing this in the shop increases accuracy, not to mention it’s hot out this summer and working inside is nice.
There’s another method that I learned about through social media a while back. The idea is to preassemble an entire stair tread—which I do in my shop—by mitering both front and back pieces of decking opposite one another and fitting a return on each end—kind of a picture frame, but no picture.
The entire tread is then assembled on a bench using construction adhesive and pocket screws. The result is a single-piece tread that can quickly and easily be set in place on the jobsite and secured with color-matched or plugged screws such as the FastenMaster Cortex screws and plugs used here.
The construction is simple enough: Establish the overall size of the tread including overhangs. For decks and porches, I size stairs to include a 1-inch overhang on the nose and ends. As most decking is 5 ½ inches wide, this allows for a comfortable 10 3/8-inch run with a 3/16-inch gap left at the riser and between the boards.
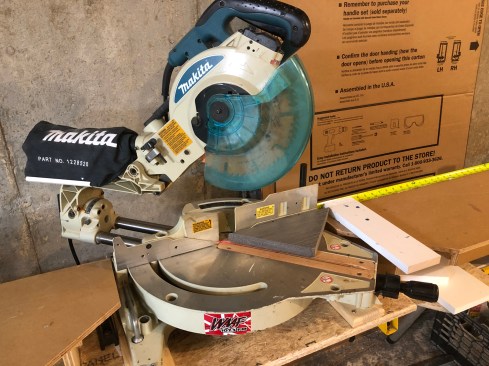
I build these treads in my shop. My saw is tuned up, I have infeed/outfeed, and I can use stops instead of measuring each piece.
To speed things up, I set a stop block on my miter saw wings to the desired length and cut, making opposing 45-degree miters on each end. For the returns, I simply double the overall width of the decking (measure this at the cross section, as the edges are often slightly convex) and add 3/16 inch for a gap. Another stop gets set and another set of cuts made.
After cutting, I then move on to joinery—pocket-screw joinery to be specific. I use an older Porter Cable 556 pocket cutter in my shop – made by (and still available from) Castle Machinery. It’s an awesome machine and does a great job (see a review of it here) Any pocket-screw system will work though. This particular stairway has an inboard handrail as well as a slight overhang from the home’s original cedar shingle flare. I settled on two screws per joint, but more could easily be added. For glue, I used OSI Quad clear sealant, though, in the future I might opt for PL Premium or a similar high-end polyurethane adhesive. For PVC, a weld-bond joint would be possible and ideal.
Doing this in the shop increases accuracy, not to mention it’s hot out this summer and working inside is nice.
Assembly goes easily enough. I place a bead of adhesive on the joint, line everything up, and use a pair of locking clamps to keep the joint aligned. One advantage of using a Castle-style pocket cutter is the low angle of entry that the screw makes. Not only is there little to no shifting of the joint, but a longer and heavier screw can be used. Here, I used Kreg coarse thread 1 ½-inch exterior screws. Once assembled, the squeeze out is cleaned off and it’s ready for installation. The best part though? Not having to do this on site in this summer’s brutal heat and humidity.
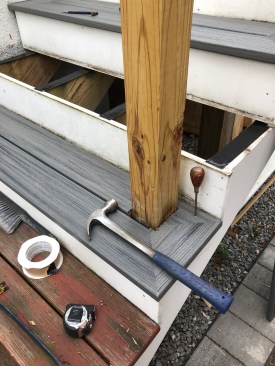
To install, I start the holes with a scratch awl. In this case, I had to make an adjustment for a housed post.
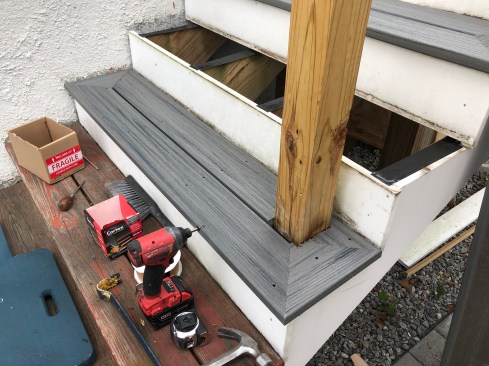
I also add flashing tape to the open grain of the pressure-treated stringer.
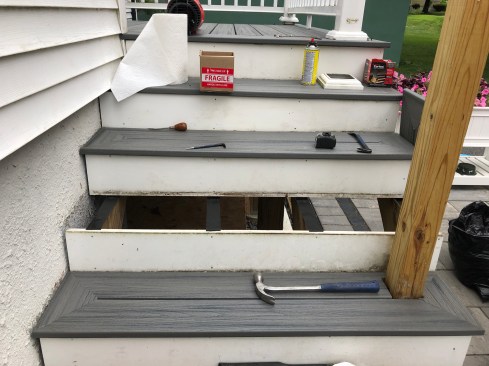
Installation is straightforward from here. Simply balance the overhangs, gap the joint, and screw it in place. I’ve found that a layout square and a scratch awl make for quick, neat marking and starting holes for each screw location. I should add that adding a simple 2-inch-wide block on the inboard side of each run is all that should be needed if a second stringer doesn’t sandwich the guardrail posts. Applying flashing tape is also a good idea to help keep rot and moisture in check.
And there we have a simple, fast, and good-looking stair tread that will get you off site and out of the heat a bit faster—or at least at a bench under a tent with a fan running.
And boom. Done. Awesome.
Photos by Nick Markey