
Round about 1980, when I was a young carpenter-to-be, I bought my dad his first electric saw: a Sears Craftsman circular saw. Thirty-five years later, I found it in his shop, pretty much in mint condition. He gave it a try, but he never gave up on his razor-sharp hand saws or his chain saws, with which he could fashion anything from totem poles to tent pegs. For most of us, though, circular saws do the lion’s share of the work on our framing jobs. It’s the first power tool we ought to learn how to use.
I spent a few years production framing on the West Coast, where wormdrive saws—especially the venerable Skilsaw Model 77—ruled the jobsites. But here in the East, where I’ve spent most of my working life, the standard saw is the 7 1/4-inch right-bladed sidewinder. Don’t ask me why; I’m one of those few bi-coastal guys who don’t think that one is any better than the other.
Most of the major manufacturers make good saws for less than $150, and the difference between cheap junk and a good saw is a small part of that. So buy a good one. Features I look for are comfort, balance, a sturdy base that will stay flat, easy adjustments (even when I’m wearing gloves), a blade guard that retracts easily, and a blade wrench that stays on the saw. A cord that’s at least 9 feet long is nice, as is a saw that can handle an 8-foot drop to the floor.
I know many people are framing with cordless saws now, and I certainly have a whole fleet of them on my truck. They’re unbeatable for carrying around the job, working on staging or on the roof, trimming sheathing, cutting openings, and all sorts of light-duty work. But corded saws are still faster, more powerful, and better for heavy-duty cutting. I’m always after my crew to run power cords—but they don’t care as much about speed as I do, and they’re not the ones buying the batteries.
Setting Up the Saw
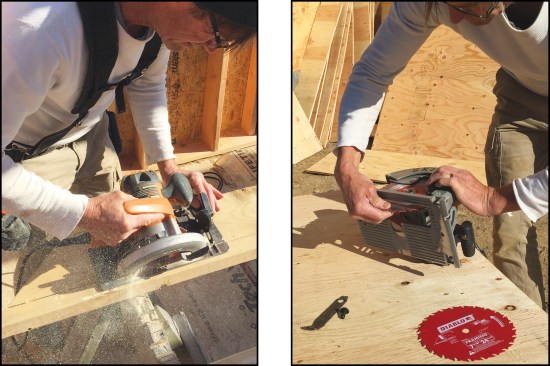
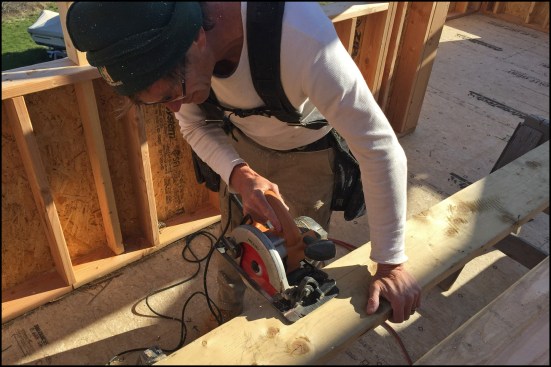
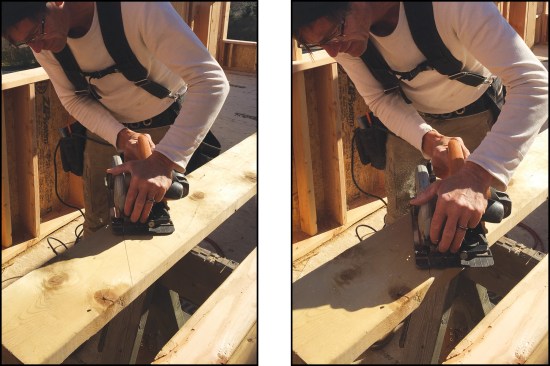
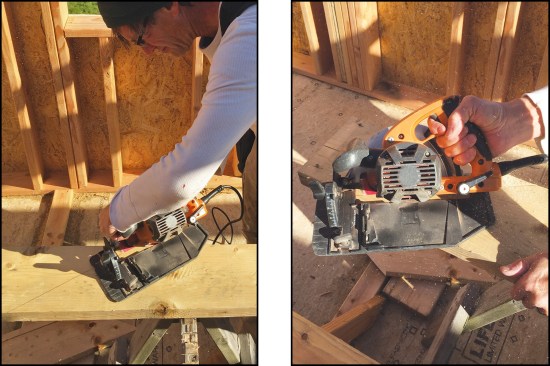
To avoid binding, adjust the blade depth so that cuts are only slightly deeper than the stock thickness (above left). To change a blade, hold the saw, blade lock, and retracted guard simultaneously with one hand while using the other hand to remove the arbor nut with the blade wrench (above right).

Most circular saws have a blade-depth setting, but it’s faster to hold the guard up and set the depth visually (above left). Calibrated markers on the front of the saw are used to set the bevel angle. Holding the saw up vertically keeps the weight of the table from moving the saw while you lock it in (above right).
It used to be that we’d routinely use a handful of different blades for our circular saws, depending on what we were cutting. But now, with specialty saws taking over many of the other jobs that we used to adapt our saws to, most of us just use the same basic 24-tooth thin-kerf carbide blades for all of our carpentry. These cost about $10 and do most cuts well enough. I keep a stack of used ones for demolition jobs too. If you were going to use your circular saw for cutting trim or paneling, you could get a 40- or 60-tooth finish blade, and of course, there are specialty blades for cutting plastic, steel, cement board, masonry, tile, or just about any other material you might have.
Many people don’t change blades as often as they should, and as a result, work themselves and their saws harder than they need to. If you use your hands efficiently, changing a blade is only about a 20-second procedure (see photos, above).
Circular saws are dead simple to adjust, but unlike more advanced tools, they are not precision instruments: You don’t fine-tune them for fractional degrees or cabinet-quality cuts. Out of the box, you just want to make sure that the table is square to the blade when set to zero degrees, that the built-in stop at 45 degrees is accurate, and that the depth scale is readable and close to right. When I get a new saw, or after I drop an old one off the roof, I make those quick checks with a layout square.
One of the things that sets a good saw apart from a bad one is a blade guard that works well. A good guard should retract easily as you start most cuts, and it should be easy to retract manually for more difficult cuts, like sharp angles or compound bevels. And of course, it should spring back into position reliably after every cut.
In the bad old days, we used to routinely pin up the guards or even remove them altogether, and even today, I see people doing that. It’s not worth the risk. In 40-plus years of construction work, I’ve seen a few bad accidents, not to mention countless cords cut and a lot of damaged materials. Even if you yourself can use an unguarded saw safely, remember that someone else may pick it up and hurt themselves, or you.
Crosscutting
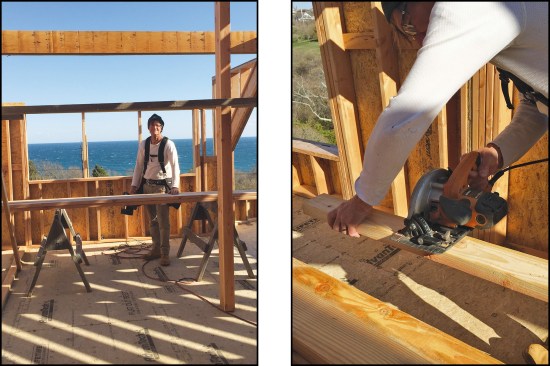
By setting sawhorses apart slightly less than half the length of your stock (for example, 7 1/2 feet for a stack of 16 footers), you can cut pretty much any length, from either end, without moving the horses or sliding the lumber very far (above left). When cutting off an end, reach across the saw before you finish the cut and catch your piece so you don’t need to bend over and pick it up (above right).
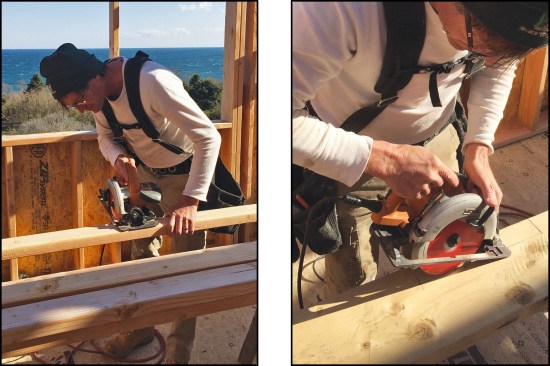
When cutting between the horses, use slight pressure up and back with your off hand to prevent binding. When the cut is done, hold one piece with your hand and the other one balanced with the saw—again, nothing drops to the floor where you would need to pick it up (above left). When notching a board, make the edge cuts first, setting the blade depth to avoid over-cutting. Then sight the blade over the cut line and ease it into the board to make the plunge cut (above right), flipping the board over to finish the cut.
The first thing to know about cutting stock to length is how to support your material. On many framing jobs, we cut a lot right off the stack, or on the floor, but there’s a reason we call those jobsite caballos “sawhorses.” It’s because they’re for sawing stuff. I often see people set their horses as though their primary purpose was to hold stacked material, but that’s a mistake. Horses should have almost half the material hanging off the ends. For example, for a stack of 16-foot material, sawhorses should be placed about 7 1/2 feet apart. That way, you can cut any length without binding up or straining (see photos, above).
The next thing to understand is the physics of making a straight cut through square material with a round blade. The blade needs to enter the material aligned with the cut and go straight through without turning. Until you’re good, use the handy notch on the front of the table to align the blade with the cut. As you make the cut, the stock needs to balance or be held so that the kerf doesn’t tighten on the blade, or it will bind or kick back. At the same time, you can’t let the kerf open too much, or the board will split and break before the cut is finished.
After you master the basics, you can work on refinements like cutting multiple lengths, gang cutting, or holding on to your off-cuts so that you don’t need to bend over and pick them up.
Angles and Bevels
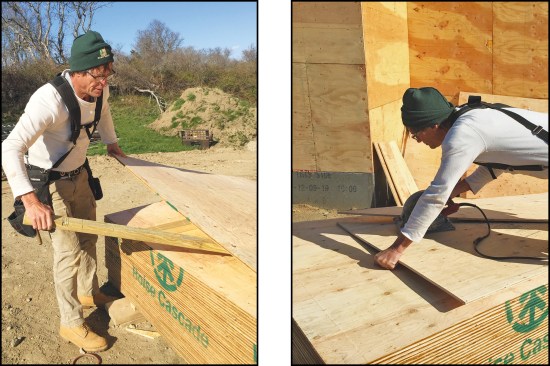
Start an angle cut by aiming the blade; if the notch is on the cut line and the blade also starts there, the saw is oriented correctly (above left). You’ll need to lift the blade guard to start most angled cuts (above right), but if the angle isn’t too acute, you can just lift the back of the saw slightly to get it started.

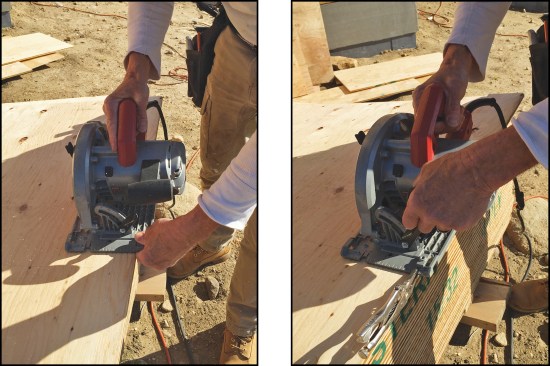
When making a bevel cut, use the alignment notch on the front to keep the saw aimed straight along the cut (above).
You almost always need to lift the guard to start compound cuts, while the saw angle makes lifting the guard and holding the front handle at the same time a little tricky (above left). Follow the cut line carefully to avoid binding the blade (above right).
I explain to new carpenters that an “angle” is when you draw the cut line other than square and a “bevel” is when you set the saw to an angle. If you do both, it’s called a “compound angle” or a “compound bevel” (see photos, above).
There are three keys to making these tricky cuts:
- Starting the cut so that it goes in a straight line
- Supporting the stock so that the kerf doesn’t bind
- Getting the guard to retract, either on its own or manually
The first two, starting the cut and supporting the stock, simply take practice and experimentation, but for getting the guard to retract, there are a few tricks worth passing along. For some cuts, you can lift the back of the saw slightly as you start the cut, or just compensate for the resistance of the guard by holding tight and forcing it to start. On most saws, another option is reach across with the thumb of your front hand and hold the guard up manually. For compound cuts, you almost always need to do this. Once the cut is started, let the guard spring back into its normal position.
Cutting Sheet Material
When cutting sheathing, lift the top sheet (or several, if you’re gang cutting) and throw one or two scrap pieces of lumber under it (above left). With two scrap pieces about 3 1/2 feet long, you can make wide rips, notches or odd shapes, and diagonal cuts right off the stack (above right).
When making narrow rips, clamp your fingers on the front of the base after starting the cut to help guide the saw (above left). Alternatively, you can do it visually using the scale or notches on the front of the table. For repetitive narrow rips, clamp locking pliers to the table to help guide the saw (above right).
A circular saw could be described as an upside-down hand-held table saw; it rips lumber and sheet material quite well. Rip fences are available—they either come with the saw or are an optional accessory—but I rarely see them used. Most of us rip by marking a pencil line or snapping a chalk line and following it; by eyeing a mark (or the edge) on the saw base; by using our off hand as a fence; or by clamping small Vise Grip–style locking pliers to the front of the saw (see photos, above).
Watch a good drywall hanger attacking a job, and you’ll understand the basics of what you need to know about cutting sheet stock. Work right from the pile; don’t move anything twice; measure, mark, and cut efficiently; and keep your scrap organized.
Depending where you’re cutting, either slide part of the sheet off the edge of the pile, or lift it up and throw a scrap or two under it for blade clearance. And of course, if you need a bunch of the same cuts, do them all at once—most saws will cut through three or four layers of sheathing at the same time.
Finally, whether you’re cutting sheet goods off the stack or dimensional lumber on a set of sawhorses, always set the depth of your blade to just a quarter inch or so more than the thickness that you’re cutting. This protects the material underneath, takes a lot of load off the saw, and reduces the chance of kickbacks.