Break out the confetti! Addison Homes has broken ground on the Attainable Zero project for the Abel family here in Greenville, South Carolina. Aside from a few unwelcome discoveries, the start went according to plan and set a positive tone for the rest of the build.
In This Series:
Attainable Zero: A JLC Case-Study Home
Attainable Zero: Building to ZERH Standards
Attainable Zero: Preconstruction Begins
Building in the Unknown: Pushing Forward with Attainable Zero
Attainable Zero: Permits and Preconstruction
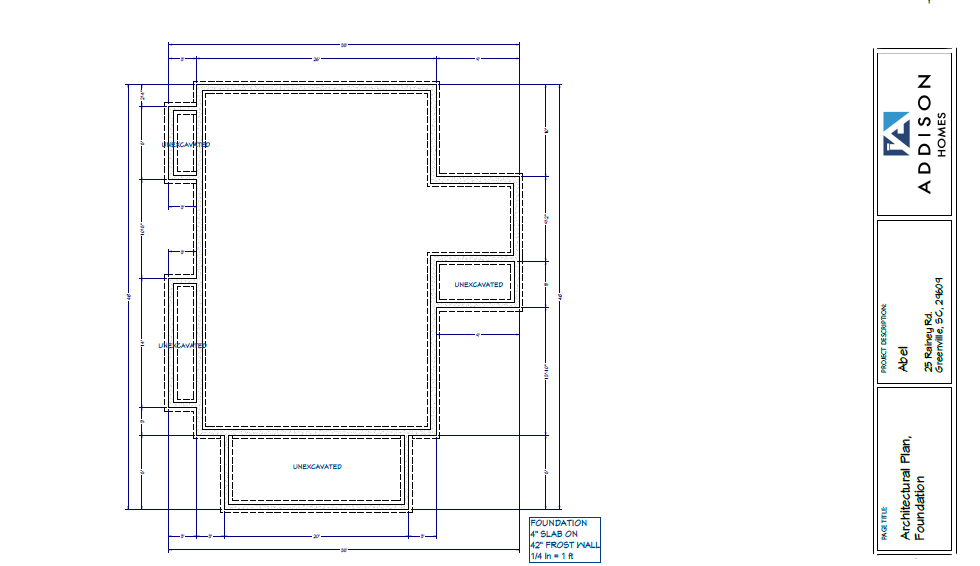
Attainable Zero: In the Ground
Attainable Zero: Building the Bones of the House
Stem-wall slab. After debating foundation options, we ultimately determined that a stem-wall slab was the best option for the site. We lay concrete masonry stem walls to handle the site’s changing topography, and the top of that wall forms a support ledge for the slab. It’s also where we install the slab’s perimeter insulation. We had previously considered an encapsulated, conditioned crawlspace, but once we sharpened our pencils, the stem-wall slab proved the less expensive path.
Site work helped push costs further in the right direction. The lot slopes about 4 feet across the footprint, so we cut from the high side and used compacted fill on the low side to tame the slope before installing the footings. That simple move shortened stem-wall heights, reduced imported fill, and streamlined the sequence for footings, under-slab plumbing, insulation, and the slab pour.
Insulation strategy is always a climate conversation. We’re on the edge between climate zones 3 and 4, so perimeter insulation is not required by local code, but for us it’s non-negotiable. Greenville gets cold snaps and, without that perimeter insulation, the slab would have a cold edge, which invites comfort problems, extra energy use, and potential condensation.
Continuous insulation beneath the entire slab is more case-by-case in our region. Few builders install it, and depending on the design there can be advantages to leveraging stable soil temperatures during cooling months. On this project we opted for continuous two-inch (R-10) rigid insulation under the slab across the footprint so the thermal boundary is clear and continuous.

Septic surprise. Then came the surprise every infill builder dreads: We hit an old septic system directly beneath a foundation wall. We knew the property once served three mobile homes, but there were no records showing the system’s location. We found it during excavation at the corner of the home’s footprint, and the tank was buried exactly where we planned to build. Fortunately, it hadn’t been used for years, so the fix was straightforward. The first task was to excavate the tank, dig down to competent soil, verify bearing, and rebuild the area with compacted stone so the footings could proceed on reliable ground.

Stone fill. One aspect I’m especially pleased with is our approach to stone. Instead of quarried gravel, we’re using recycled aggregate. A local recycler crushes reclaimed concrete and other solid products into graded products we can use for backfill and base. Even better, we’re closing the loop on site. As we cleared the property, we set aside old concrete pads, an asphalt drive, and the septic vault we removed. Before we wrap up site work, we’ll send this material to the recycler, who will resell the sorted and processed material for other future projects. That circular workflow minimizes trucking and turns waste into structure beneath the slab and walks.
With the foundation nearly complete, we should start framing within the next two weeks, weather permitting. Foundations don’t get the spotlight like kitchens or façades, but their contribution to durability and comfort is enormous. On the Attainable Zero project, choosing a stem-wall slab and insulating under the slab and along the interior face of the stem walls sets us up for better moisture control and a more comfortable home from day one.