
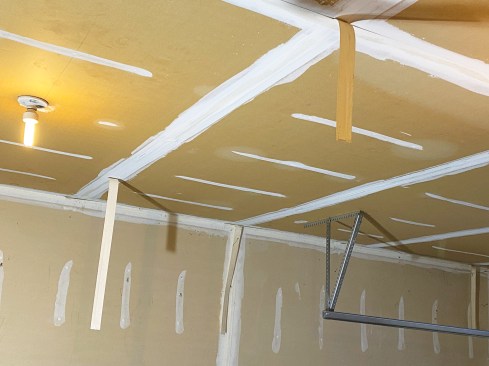
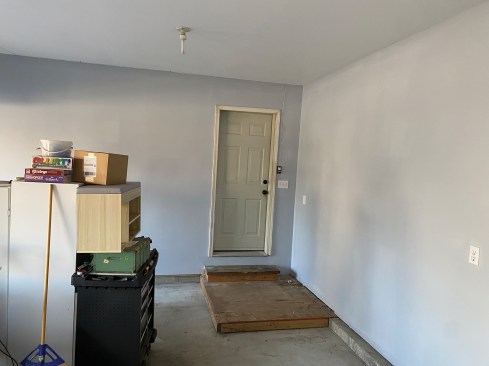
The garage is often the first part of a house people see when they arrive and the last part they see when they leave. But when the walls are yellowed and stained with drywall tape separating or falling off and no paint hiding screws and joints, it’s just ugly. As a drywall contractor, I don’t understand why we accept this look in garages when we would never allow it anywhere else in our homes. Most local building codes require that an attached garage be drywalled with all seams and joints taped. Typically, this one coat and done is called “fire taping,” and the 2024 IRC R302.6 lays out the required thickness of the drywall and where it needs to be installed to act as a fire break for the rest of the house. That’s why it’s drywalled, but does it have to look so bad?
Let’s analyze some situations that can cause the garage to look this way and see what we can do to fix it. For example, in a large garage, those big walls and ceiling can be subject to expansion and contraction that can cause cracks and seam separation. In that case, you may need to add a control joint if one isn’t already present. Any uninterrupted wall or ceiling 30 lineal feet or more should have one.
Myron Ferguson
Garage walls yellowed from time and light and marred by water st…
Next, check the attic for insulation. Lack of insulation allows extreme temperature fluctuations that can particularly affect ceilings but can cause walls to shrink and expand too. This will again cause separation at the seams and failure of the tape, along with screw pops.
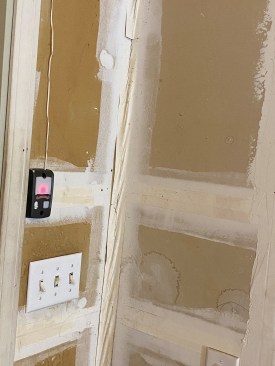
Another common problem is moisture, particularly in winter. Heat from a car’s motor will melt any snow the car brings into the closed space. Rain, too, adds moisture that has nowhere to go other than into the unsealed (unprimed and unpainted) walls and ceiling. This causes stains and movement in the drywall that in turn creates cracks. Finally, drywall left unpainted or not even primed will yellow over time, especially if occasionally exposed to direct sunlight. The combination of moisture, temperature fluctuations, movement, and lack of paint protecting the drywall results in yellowed and difficult-to-seal walls and ceilings and too many ugly garages.
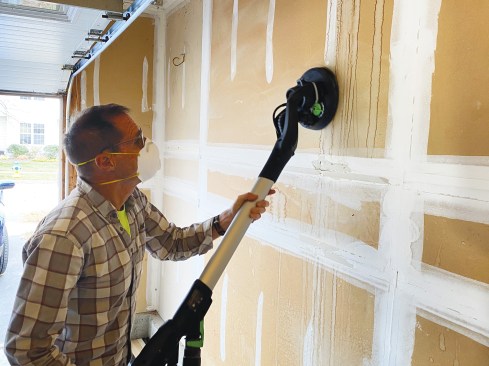
How do you fix this without tearing down the existing drywall? The first step I took in the garage shown here was to peel away all the loose tape and compound, which came off easily, as much of it had already fallen off. I then sanded every surface using 220 grit on a vacuum-attached power sander. The sanding does two things: Most garages have never been cleaned, so it gets rid of dirt and spiderwebs, and it removes some of the yellowed paper while scoring what’s left to be better able to take paint and compound.
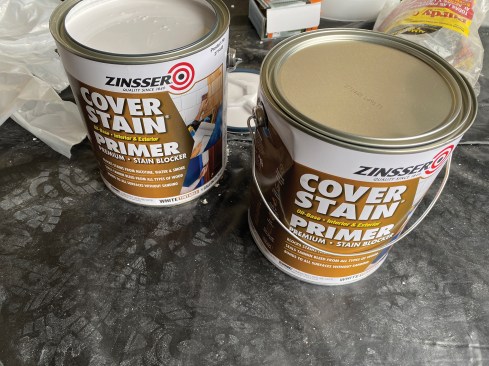
I want to seal the surfaces before I start taping so that any stains do not get pulled through the compound. For this, I use an oil-based stain blocking primer instead of latex; I feel, when I tape, I will be adding even more moisture to the drywall and pulling those stains back to the surface, and in past experiences using latex primer on heavy stains, they were drawn through the compound. The primer I used here seemed to work well as this job progressed, with no stains bleeding through. Oil-based primer is harder to apply as it is thick and sticky, so be prepared to take some extra time with it.
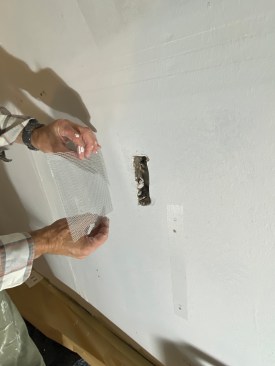
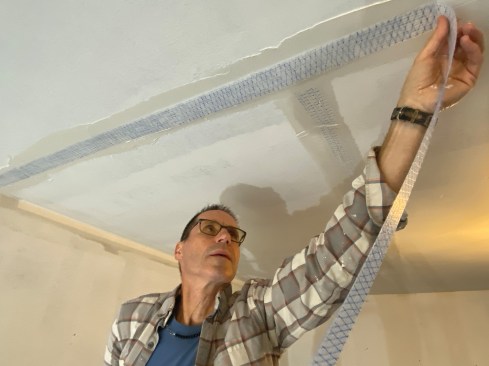
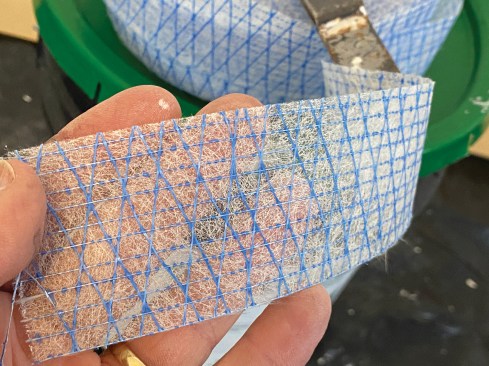
Once the stain blocker had fully dried, it was time to start taping. I wanted to strengthen the seams and the corners as much as I could, so I used an all-purpose heavyweight compound and the strongest tape I could find, FibaFuse Max. A lightweight compound wouldn’t have the strength or adhesion level needed to embed the tape. Another option would have been a setting compound, but while it has enough strength, I find that it does not have the adhesion of the all-purpose heavyweight compound. With this job, adhesion was important. The FibaFuse Max is a bit stronger than standard mesh tape and does a good job with difficult seams. I went with paper tape for the inside corners; for that application, paper tape is strong enough when properly embedded.
For the remaining coats of mud, I used a lightweight joint compound. It has better workability, and the strength of the heavyweight compound was needed only to embed the tape. Quite often in a garage, I have found the drywall install to not be the highest quality, and it can often take four coats of compound to get the surfaces looking right. The properties of the lightweight compound make it easier to apply, helping with these challenges.
Myron Ferguson
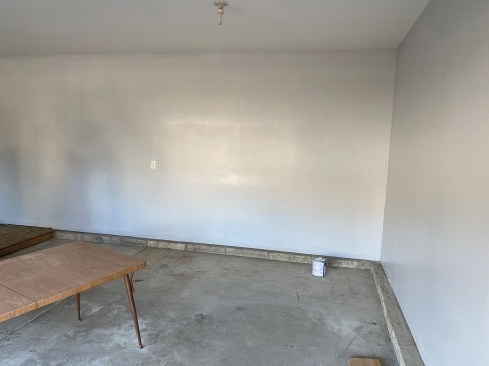
A garage is a dynamic place when it comes to moisture and temper…
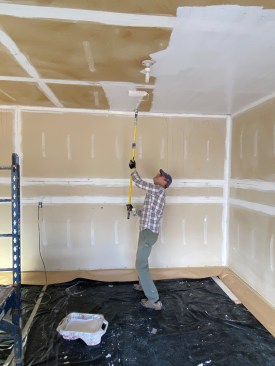
After sanding all my work, I primed the walls again with two coats of a latex stain-blocking primer/sealer. I made sure to allow each coat to dry thoroughly so that built-up moisture would not have a chance to pull stains through. The latex primer is easier to apply than the oil, and with plenty of dry time, no stains came through. This second round of primer/sealer is there to protect the mud and tape from future moisture spikes. With the primer done and the surface fully covered, I was able to paint the garage with just one coat of finish paint. For this, I used a light gray, as I find the gray covers better than white, and I like the finish look better too.
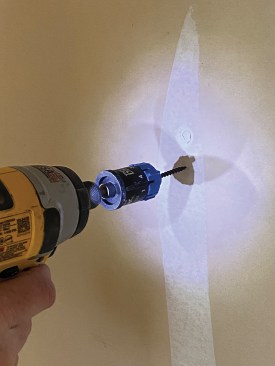
My goal with this garage was to fix everything. I went over all the screw pops and repaired, reset, and replaced them. There were also numerous dents and holes that I added mesh tape and compound to. This project also gave the homeowners an opportunity to go through all the things in the garage that they didn’t need but had been holding onto. I did not care whether the homeowners were going to put shelves back up or hang their garden tools. I wanted to leave them with a fresh start that looked as good as the drywall in the house and that would last. Now, when they pull their car in or out, they are left with a great impression of their home.