Tim Healey
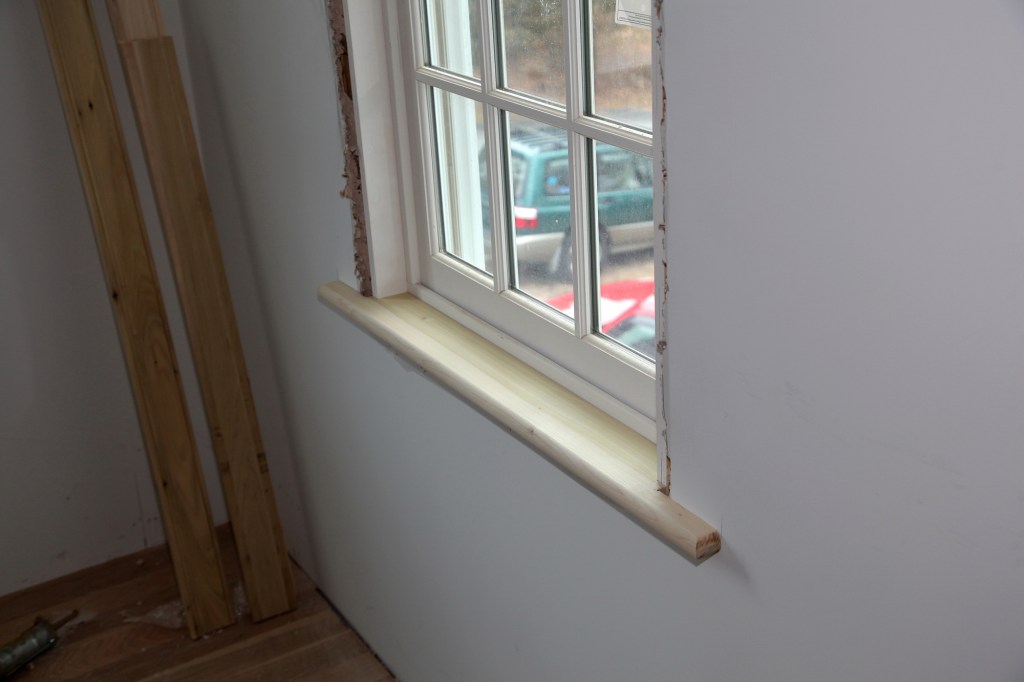
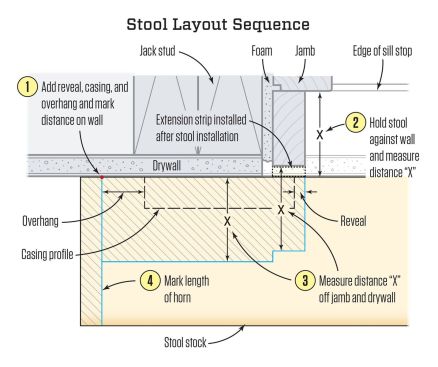
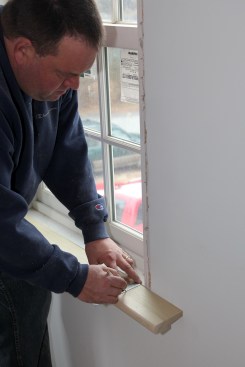
The stool is the part of the window trim that wraps from the inside of the window around and onto the wall. The rest of the window casing originates at the stool, so the stool needs to be installed first. To lay out the end of the stool where it wraps onto the wall, first add the reveal, casing width, and overhang, and mark the end of the horn on the wall. Hold a rough length of stock against the wall and measure in how deep the stool needs to be to meet the window. Measure out that distance to plot the cut lines. In this example, a small strip will be added to the factory jamb extensions to make them flush with the drywall.
Stool Layout
The first step in the stool layout is determining the stool’s overall length. Measuring out from the inside edge of the extension jamb, add the reveal and the casing width along with the desired amount of overhang, and mark that length on the wall. Repeat that process on the opposite side of the window. The distance between the marks is the overall length of the stool.
To determine the length of the stool, measure out the width of t…
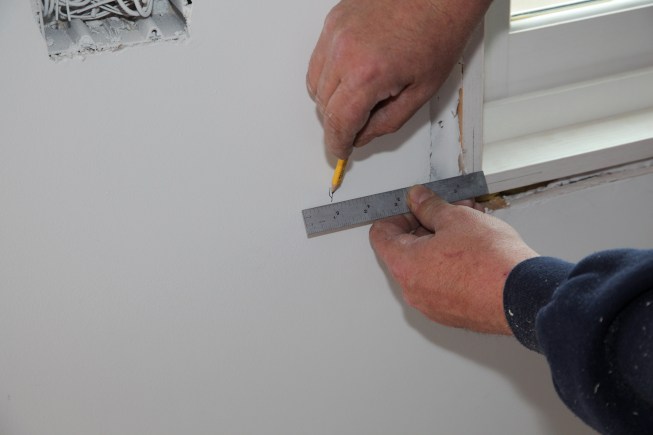
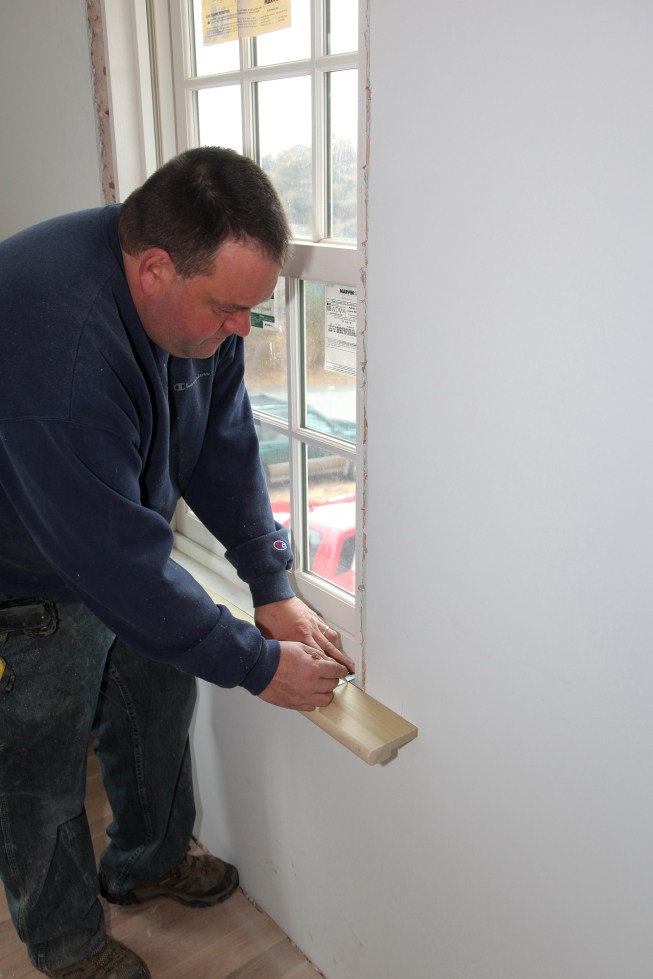
After cutting a rough length of stool stock, hold the stock against the wall and measure in how deep the stool needs to be to meet the inside edge of the window. A 6-inch metal ruler is an inexpensive and versatile tool to use for marking the measurements and making the layout lines.
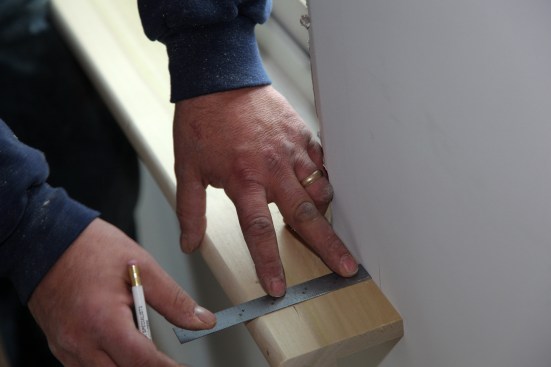
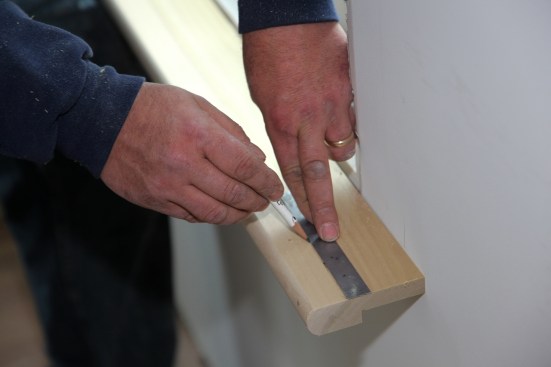
Hold the ruler against the side of the jamb and draw a line to mark the edge of the jamb on the stool stock. Measuring from the drywall next to the jamb, mark the distance recorded earlier between the stock and the window. Repeat that measurement from the jamb (if necessary) and from the drywall near the end of the stool. (In the examples in the photos, a small strip will be added to the factory jamb extensions to make them flush with the drywall after the stool is installed.)
Making two measurements off the drywall will transfer any discrepancy in the straightness or flatness of the wall. Draw lines to connect the measurement marks for the cut lines. The wood left after the cutting is the horn of the stool.
Tim Healey
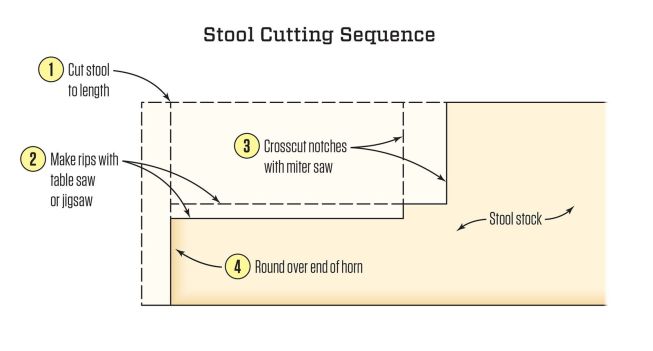
For the sake of safety, make the cuts for the stool horn in the proper sequence. First, cut the stool to length. Next, make the rip cuts to fit against the wall and, if necessary, the jamb. Use a table saw or jigsaw to make the rip cuts. Then cut across the grain over to meet the saw kerfs from the rips using a miter saw or a handsaw. Finally, round over the end of the horn with a roundover bit in a router.
Cutting the Horn
On a miter saw, first cut the stock to length. Then make the rip cuts (parallel to the grain) using a table saw or a jigsaw. Working away from the end, make any additional cuts (in this case, two cuts were necessary). Finish any cuts with a sharp handsaw.
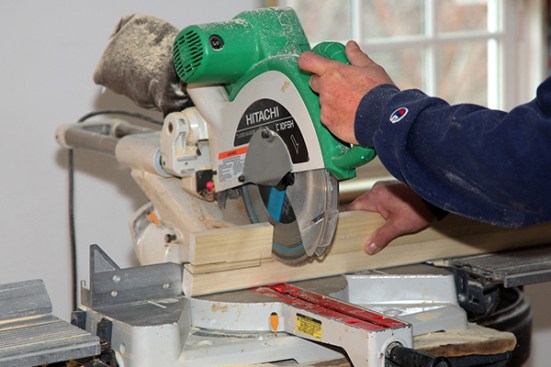
After ripping the straight lines with a table saw or jigsaw, make the crosscuts with a miter saw starting with the length cut and working over to the jamb cut.
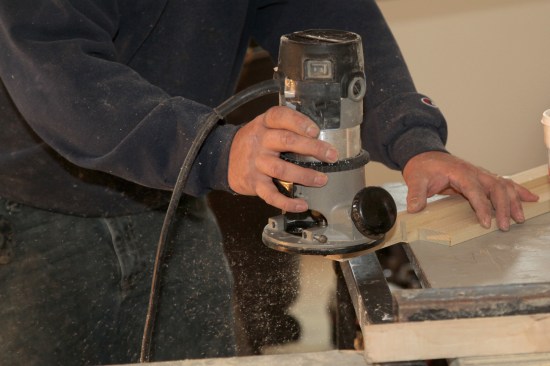
This stool had a simple bullnose (semi-circular) profile along the outside edge. The carpenter uses a round-over bit in a router to complete the profile on the return ends of the stool.
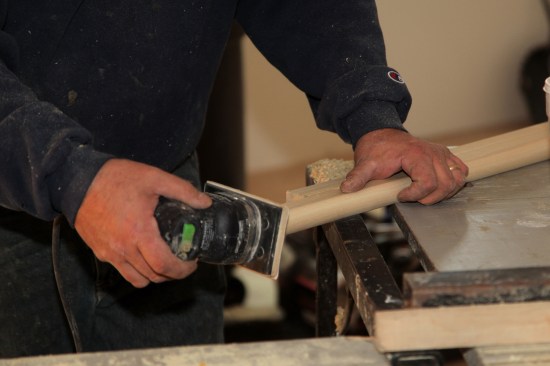
A vibrating sander smooths the round-over cut on the ends of the stool.
The stool profile in the photos has a simple bullnose or half-round edge. To continue that profile on the end of the horn, use a round-over bit in a router. Then sand the routed edge with a vibrating sander. The trim for the project in the photos is paint grade. If the trim was stain grade, a mitered return would be used to return the profile on the end of the horns.
Install the Stool
When you have finished cutting and sanding the stool, bring it to the window and dry fit it in place to check the fit. If satisfied, you are ready to install the stool. The carpenter in the photos opted to apply construction adhesive to back edge of the stool as well as to the horns. Many would argue that doing so makes it very difficult to remove the stool in the future should that become necessary. If you decide not to use adhesive, you can fasten the stool right away by driving finish nails through the stool and into the sill jamb or framing below.

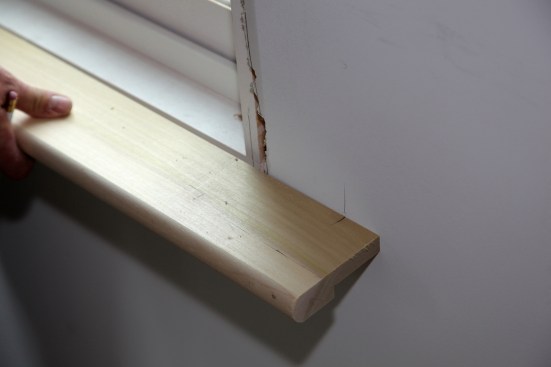
After making all the cuts, dryfit the stool to make sure that it fits tight against the window as well as against the drywall on both sides of the window.
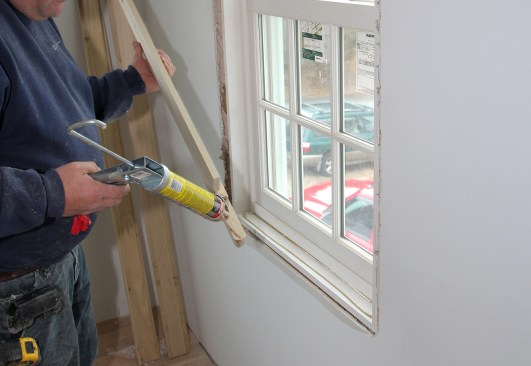
This carpenter opted to apply adhesive to the backside of the stool where it fit against the window and the drywall. Many carpenters skip this step to make the stool easy to remove in the future.

After applying the adhesive, set the stool in place one end at a time, taking care not to smear the adhesive where it will be seen.
If you opt to use adhesive, apply just a thin bead to the back edge of the stool and horns. Slip it into place one side at a time, taking care to avoid getting adhesive on exposed finished surfaces. When it is in place, drive nails through the flat section into the sill or framing below. To finish it up, drive a single nail through the horn and into the RO framing. This nail will draw the stool tight against the drywall.
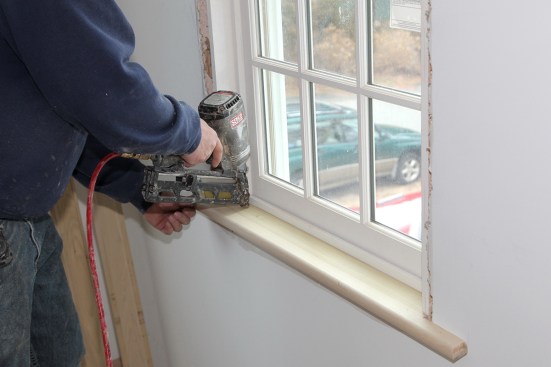
The carpenter drives finish nails to fasten the stool to the sill frame of the window.
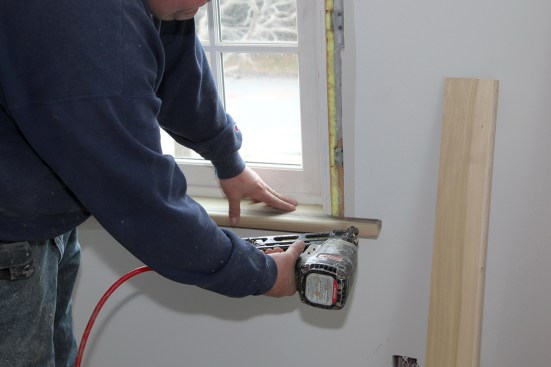
A single nail through the horn of the stool and into the RO framing draws the horn in tight against the drywall.
All photos by Roe Osborn