
Bending the Fascia
One of the trickier parts of this project was installing the curved fascia over the framework.
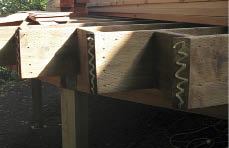
Figure 7. Construction adhesive will hold the first of the four thin layers of fascia to the ends of the joists.
The fascia consists of four layers of 3/16-inch-thick strips that I had the local lumberyard rip from 20-foot-long 2x8s of clear redwood. I applied construction adhesive (PL Premium) to the joist ends (Figure 7) and attached the first fascia ply to the joist ends with finish nails, holding it in place with clamps (Figure 8).
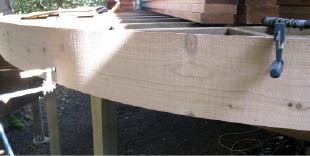
Figure 8. Clamps were used to bend the fascia, which was fastened to the joist ends with adhesive and finish nails.
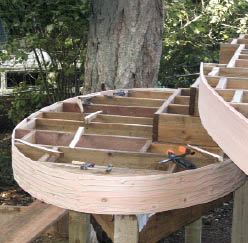
Figure 9. Each layer of fascia depends on lots of glue to hold it to the underlying layer.
Subsequent plies were added using finish nails and a copious amount of adhesive (Figure 9).
Starting at one end, I finish-nailed the newly added ply, clamping it into place and slowly bending it around the curve. Only one ply split on me, and that was from uneven clamp pressure. I solved the problem by adding full-height stickers between the clamps and the fascia, which equalized the pressure across the thin ply (Figure 10).
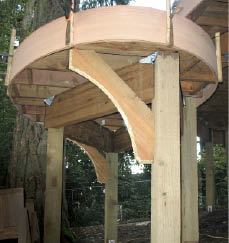
Figure 10. Full-height clamping cauls prevent the thin layers of redwood from splitting as they are bent.
The completed fascia was a little over 3/4 inch thick. To prevent water from collecting between the fascia plies and rotting out the thin wood, I sealed the top with flashing tape. The handrail would have top-mount metal posts, so I added solid blocking behind the fascia where the posts would be mounted, then flashed the blocking as well (Figure 11).
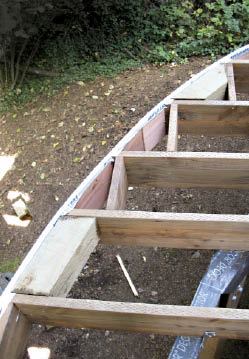
Figure 11. Flashing keeps water out of the fascia layers, and solid blocking prepares the frame to receive top-mounted railing posts.
Decking
I avoid random butt joints in my projects whenever possible. In this case, I knew the larger, upper section of deck was going to be longer than 20 feet (the longest decking I could buy), so I planned for a seam board. To support it, I ran blocking between the two joists at the middle of the larger deck.
I ran the field decking first and didn’t worry about where the boards ended as long as they fell within the area the seam board would cover. Before I cut the decking to its finished length to receive the seam board, it looked as if a drunk builder had laid it (Figure 12).
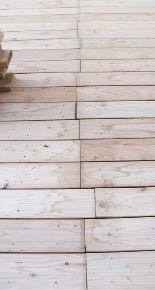
Figure 12. Before the seam board was installed, the decking boards met randomly in the center of the deck.
Once I cut the decking ends, I finished off the edges with a 1/8-inch roundover bit in a router (Figure 13).

Figure 13. Once all the decking was laid, it was cut and the edges were eased in preparation for the seam board.
Cutting the decking to match the curve of the fascia was a multi-step process. First I rough-cut the decking so it overhung the fascia by a maximum of 3 inches at any point. Then I made a U-shaped scribing tool out of a chunk of 2×6 (Figure 14), cutting the throat more than 3 inches deep so it would clear the decking ends when the tool was held sideways with the bottom arm touching the fascia. On the top edge of the tool I measured in 1 1/2 inches and drilled a hole to receive a Sharpie marker.
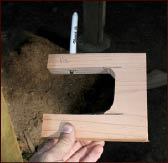
Figure 14. The author built a U-shaped jig to transfer the elliptical shape from the fascia to the decking. As he moved the jig around the perimeter of the deck with its bottom arm bearing on the curved fascia, the marker inserted in the top arm drew a matching curve on the top of the decking.
As I moved the tool around the perimeter of the deck, the bottom edge slid along the fascia while the Sharpie on top marked the decking for a 1 1/2-inch overhang (Figure 15).
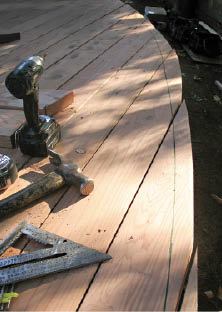
Figure 15. The decking was laid out to overhang the fascia by 1 1/2 inches.
The curve on the larger deck was gentle enough for me to cut it with my wormdrive. Setting the blade depth so it just barely cut all the way through the decking put less of the blade in the cut and made cutting the curve easier.
The tighter curves on the smaller deck required a jigsaw. After cutting the line, I smoothed the saw marks with a belt sander and finished the edges with a 3/4-inch roundover bit (Figure 16).
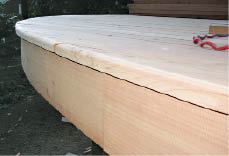
Figure 16. After being cut, the ends of the decking were belt-sanded smooth and the edges eased with a router.