As I drive to work each day, I can’t help but notice construction sites on the way, and it amazes me to see the huge number of windows that are flashed incorrectly. I see some windows installed with only sill flashing and no side flashing, some with no sill flashing and only housewrap as side flashing, and then others with only housewrap and no flashing at all. But the scenario that bothers me the most is a window installed over the housewrap and then flashed on all four sides—a sure recipe for disaster.
There are many ways to flash windows correctly. You don’t have to use proprietary systems; you just need to know that there are no chemical incompatibilities and follow basic principles. For the project in this article, I used material left over from another job: 6-inch 3M All Weather tape for the rough opening (RO) flashing, 6-inch Typar Flex Flashing for the sill pan, and 6-inch Grace Vycor Pro tape everywhere else. I’m aware that combining different products can void their warranties (such as the Zip System warranty). But knowing that there were no compatibility issues, I was willing to chance it because I felt confident that my window installation would outlast any warranty.
Prepping the Opening
Before installing the windows, I precut the flashing tape needed for each window and set the pieces next to each opening. Except for the pan flashing, I make all the lengths out of two pieces of tape. I often work alone, and I find that two shorter lengths of tape are easier to handle and install than a single long length.
Next, I make layout marks on the sheathing to guide placement of the flashing. On the sides, I measure out 3 inches (half the width of the 6-inch tape) and draw a plumb line with a level. At the top and bottom of the opening, the flashing will extend 6 inches beyond the opening, so I measure this distance on both sides and draw these plumb lines, as well.
Sill Flashing
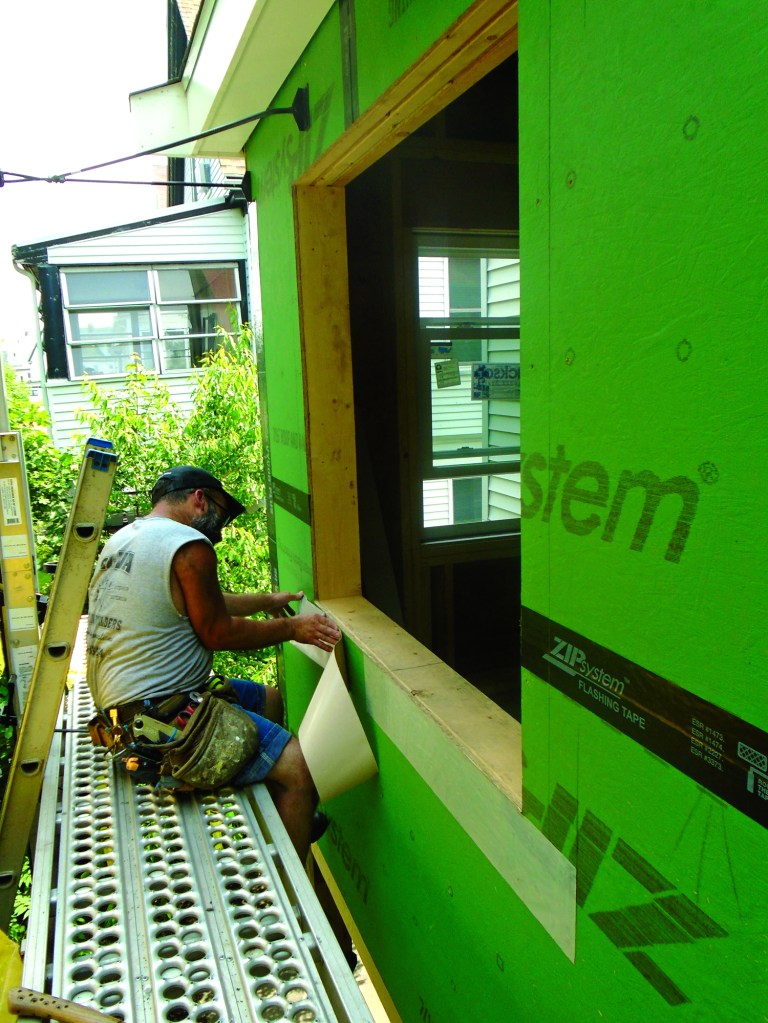
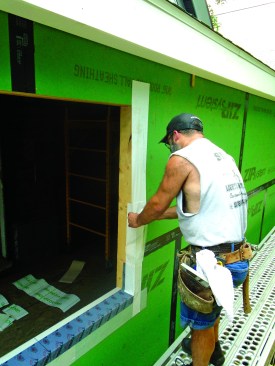
The first place I apply flashing tape is directly below the opening, which I consider to be cheap insurance. I trust the flexible sill pan flashing to adhere to the flashing tape more than to the sheathing. (The alternative, of course, is to use Zip System Stretch tape, but I was using stock I had on hand. As builders, we sometimes have to make practical choices.) I install the tape in two pieces, working from my marks at each end and overlapping the pieces about 6 inches in the center. Next, I nail a piece of beveled siding to the bottom of the opening. The bevel provides positive drainage on the sill.
I find it’s faster and more reliable to use flexible flashing to create a seamless, watertight pan than trying to turn corners with multiple pieces of straight flashing. To install the pan, I first mark both the center of the RO and the center of the flashing. I also draw a guideline on the beveled sill 4 inches from the edge of the RO. I peel off the backing, line up both center lines, and let the tape down onto the sill following the 4-inch line. I press the tape firmly into place by hand, working from the center to both corners and then smoothing the ends of the tape up the side jambs. When the sill portion is adhered, I press the remaining 2 inches onto the vertical wall surface, again working from the center toward the ends. When I reach the corners, I pull the tape outward to create a smooth and tight seal.
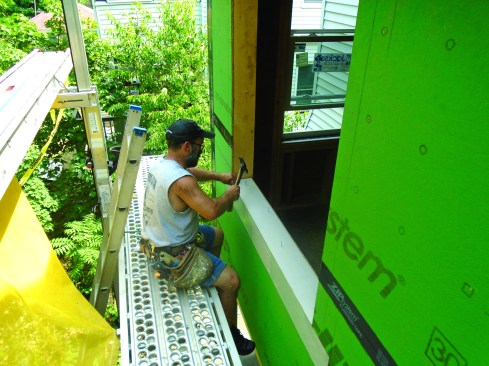
The flashing extends 6 inches beyond the opening on either side. A length of beveled siding pitches the sill for drainage.
Flexible flashing tape creates a one-piece sill pan that seals the bottom of the opening from moisture.
Side and Head Flashing
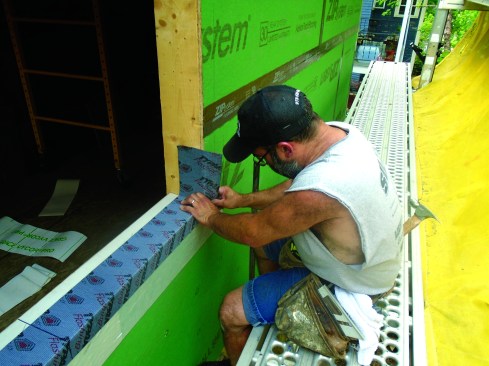
To keep water from entering between the sheathing and the framing, I flash the sides of the opening next. On the lower section of my two-piece side flashing, I cut out the bottom corner where it wraps over the sill pan. Some folks prefer just to slit the flashing at the corner, but in my experience, cutting that corner out helps to keep the tape from accidentally sticking to itself.
Before I peel off the backing from the tape, I hold it in place and mark the top edge on the wall sheathing. Using this mark as a starting point and using the plumb line I’d drawn earlier, I peel off the backing and apply the jamb flashing to the sheathing, working from top to bottom. Again, I create a wrinkle-free surface with pressure from my hand. With the bottom corners cut out, I wrap the flashing tape into the opening, stretching it slightly as I smooth it out and adhere it in place.
The sides of the opening are flashed in two pieces. The bottom piece laps over the sill flashing.
The top piece of flashing starts a few inches above the opening and laps over the piece below.
The upper piece of side flashing goes on next, extending over the lower piece in shingle fashion. Starting a few inches above the top of the opening, I adhere the top piece to the sheathing, again using the plumb line as a guide. I’ve found that cutting out the corner is not as helpful for the top jamb flashing, so instead, when the tape is adhered to the sheathing, I slit the tape along the top edge of the opening and then wrap it onto the jamb.
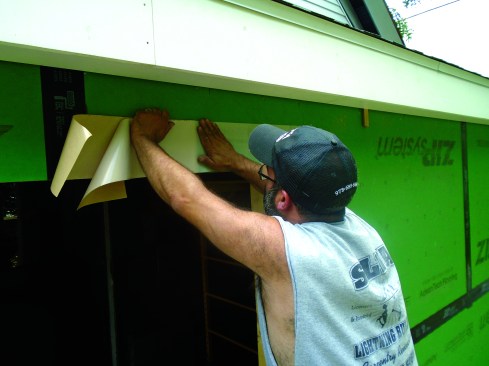
Then the head flashing laps over the side flashing.
At the head, I apply my two pieces of flashing tape, starting on the 6-inch plumb line and making sure it completely covers the top end of the side flashings. As I apply each side, I peel only half of the backing at a time to help keep the flashing from sticking to itself. As before, the two pieces overlap by about 6 inches.
Installing the Window
I usually remove the sash from the window frame so that installation requires just one person. First, I center the window frame in the opening and trace the outer edge of the nailing flange. I then remove it from the opening and run a bead of OSI Quad sealant along the top and sides of the opening, keeping the caulk inside the traced lines. The bottom edge of the opening should never be sealed, so that any moisture can drain from the opening.
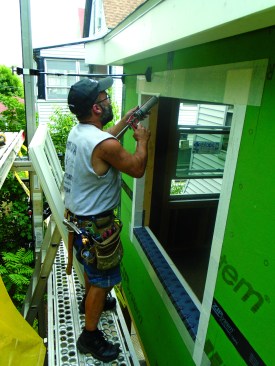
Sealant is applied to the opening before the window goes in.

After pressing the window into the wet sealant, the author levels the frame and nails the bottom corners.
Using the lines I traced as a guide, I press the frame into the wet caulk. I make sure the window is level in the opening, and then nail both bottom corners using 2-inch galvanized roofing nails. To ensure that the window is square, I measure across the frame diagonally and tack the center to hold the frame in place. After double-checking the diagonal measurements, I drive additional nails at the top corners. Before nailing the side flanges of the window, I measure across the opening in three spots to make sure the sides are straight. Finally, I secure the sides of the frame and nail off the bottom flange and any remaining holes in the flange.
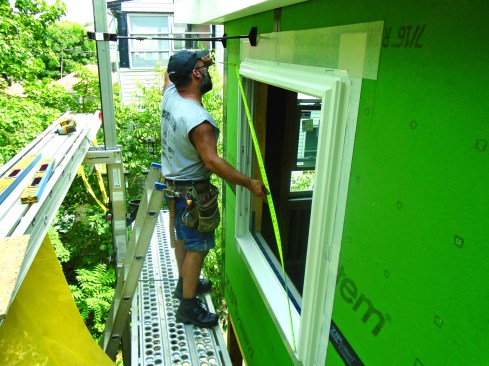
Diagonal measurements ensure that the frame is square.
Then the top flange is secured.
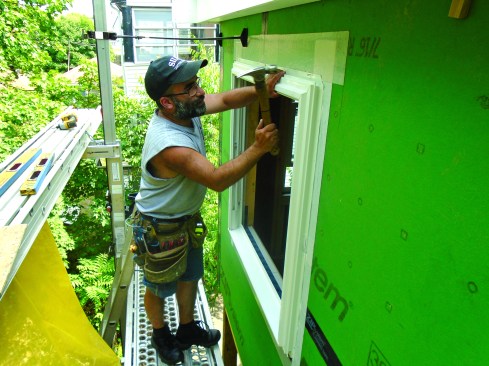
Flashing the Flange
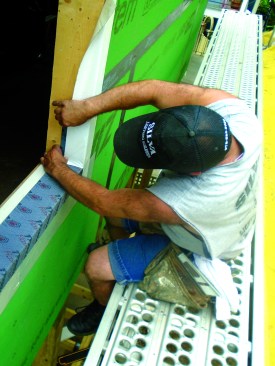
Before going any further, I re-install the sashes and make sure they operate properly. Once the window is set, I begin flashing the window flanges, using two pieces for each section of flashing. As before, I mark the starting point for top edge of the lower side flashing. After peeling half of the backing, I align the top edge with my mark and the inside edge with the corner where the flange meets the window frame. Then I press the tape into place, using my hand to smooth it out as I work my way down to the sill.
The author flashes the flange on the sides and top, with all the lengths done in two pieces. The side pieces extend past the top of the window.

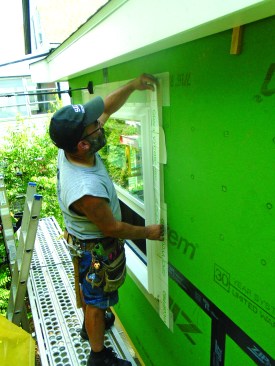
The top pieces cover the sides.
I start the top piece of side flashing a few inches above the top flange. Peeling off half the backing at a time, I press the tape into place, overlapping the lower piece by 6 inches. The final step is applying the head flashing. I install that in two pieces as well, using the outer plumb lines as starting points and overlapping the pieces by at least 6 inches where they meet.