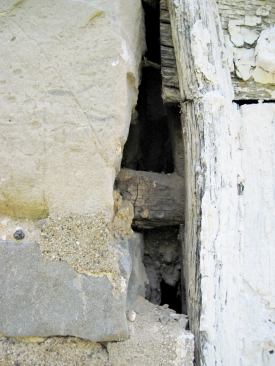
Securing the Old Jambs
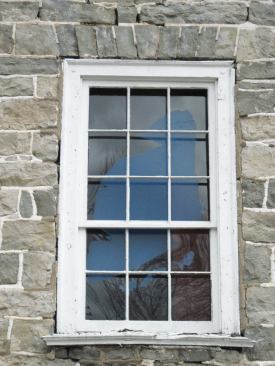
We started the replacement work with those windows that needed only new sills. The first step was checking the bucks to make sure they were square and in plane – not too likely after 200 years of settling. Correcting problems at this stage would make it easy to fit the new sash easier later on.
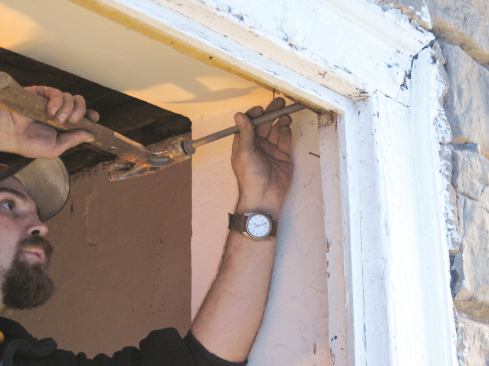
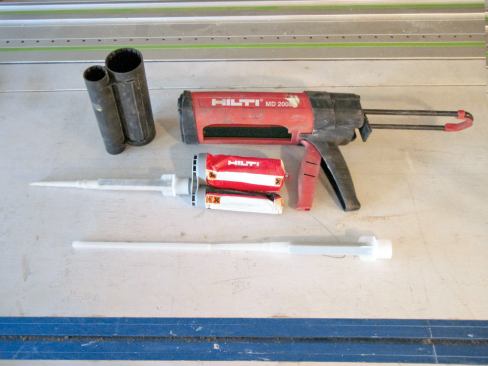
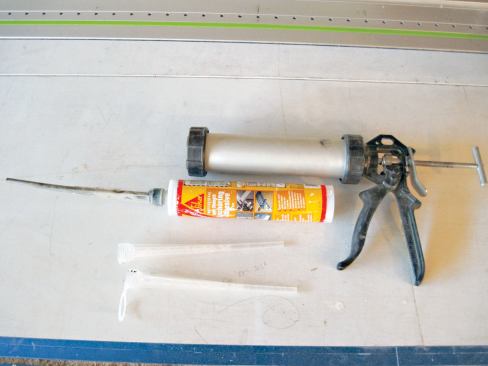
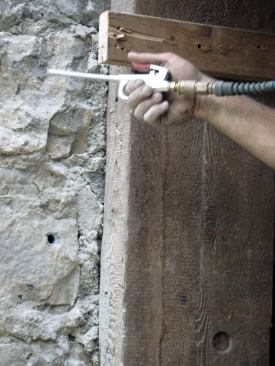
Using pipe clamps and 2×4 spacers, we held the jambs in exact position before drilling the anchor holes. Then, with the long Hilti nozzles, we squirted in the epoxy and inserted the threaded rod, being careful not to overtighten the nuts at this stage, which might distort the jambs. After the epoxy set up, we mortared the gap between the jamb and the stone, then made minor adjustments to the nuts, bringing the jambs into final position. Once all the bucks were fastened, we finished the holes with an Abatron epoxy filler.
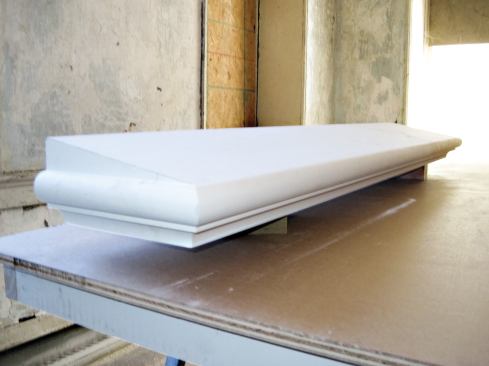
Scribing the Sills
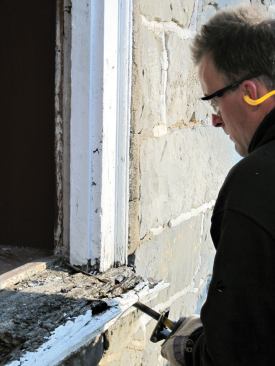
We used the original sills to establish the width of the replacements and to mark the first rough cutout for the extensions. We used a belt sander to quickly bevel the return, then scribed the sills in place. Because of the irregular stone surface, removing the material to the scribe lines was a bit tedious. A jigsaw was out of the question. What worked best was a combination of a multi-tool, a chisel, and a grinder fitted with a chain-saw blade. We used the multi-tool to kerf up to the scribe lines, then a chisel to waste the bulk of the stock. The grinder with the carving wheel did the final tweaking. Be careful the first time you use this setup in a grinder – it can chew up the work very quickly.
Anchoring the Sills
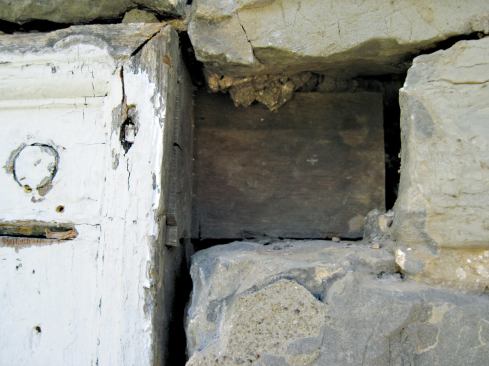
To give the new sills a fighting chance to last as long as the originals, we made sure that all cut edges – as well as the bottoms of the jambs – received two coats of oil primer. We also isolated as much wood as possible from the masonry with Vycor peel-and-stick.
The original bucks had been held in place with ears that extended into the masonry from each end of the sill. We achieved the same effect by drilling 5/8-inch holes about 6 inches deep in the ends of the sills and inserting threaded rod, which we secured with polyurethane glue. We fastened the sills to the bottom of the jambs with Timberlok screws; later, the threaded rod extensions were mortared into place.
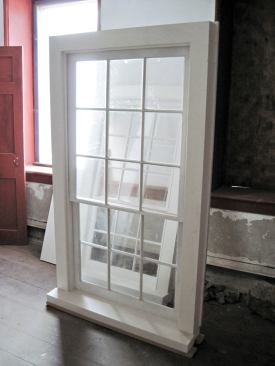
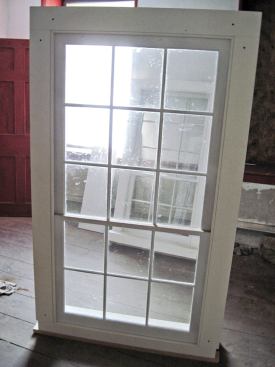
Installing the Replacement Windows
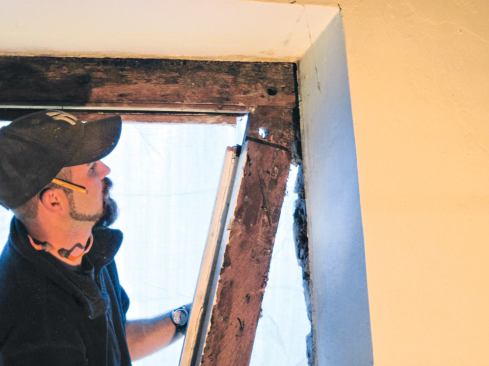
Installing the replacement bucks was a multi-step process. We first set the units in the openings and temporarily shimmed them into place so that we could scribe the sills. Early on, there had been a discussion about whether the millwork shop should mortise-and-tenon the sill to the buck, which is the way the originals were made. Ultimately we all concluded that the units would resist moisture better without all that through-joinery, so instead we had the sills attached with Timberloks. This made it easy to remove the sills for scribing.
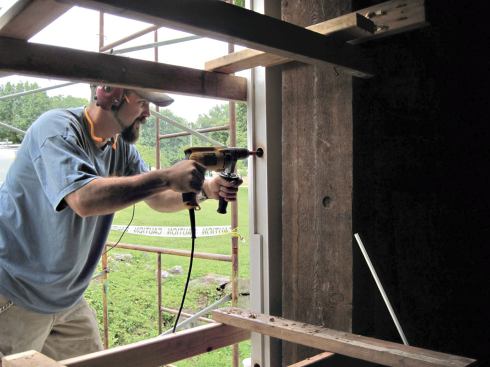
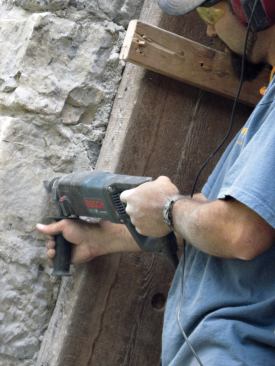
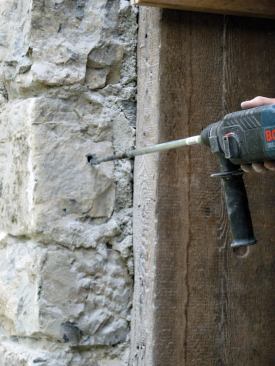
We also scribed the sides of the interior window well for the replacement casings. Once we were satisfied with the fit, we pocket-screwed the interior casings together and fastened them in place, followed by the window buck itself, which we wrapped on all four sides with peel-and-stick. We secured the window unit in exact final position with clamps and temporary braces, then drilled the holes for the epoxy anchors.
Job Costs
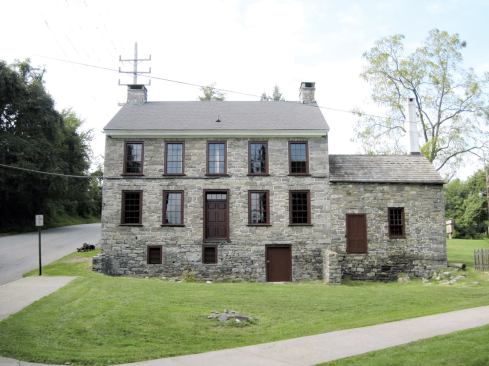
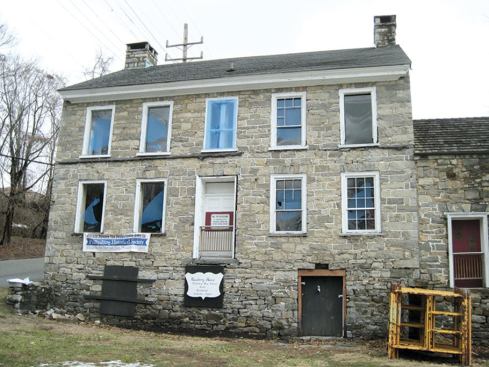
This job cost the client $41,000 for millwork, $37,000 for carpentry, $12,000 for painting, and $10,000 for masonry. The carpentry number includes nine full window-buck replacements, four sill-only replacements, three window-buck repairs, three door-buck replacements, the fitting of 16 pairs of new sash, and the installation of a new basement door, two louvered windows, a replacement transom, and scaffolding for the front, back, and one side of the building.
Noah Woodruff is a lead carpenter for R.J. Doerr Co. in Easton, Pa.