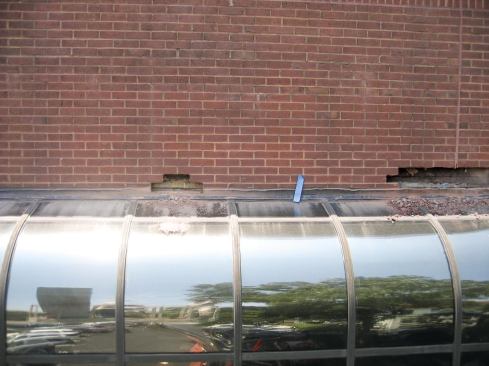
The offices under this curved glass roof had been getting wet fo…
The offices under this curved glass roof had been getting wet for years. The drops of water usually came down days after the rain — not surprising, given the height of the brick wall above, a likely water reservoir. I started with some controlled testing and discovered that water was showing up inside about 10 feet away from an area where I could see a lap in the metal through-wall flashing outside.
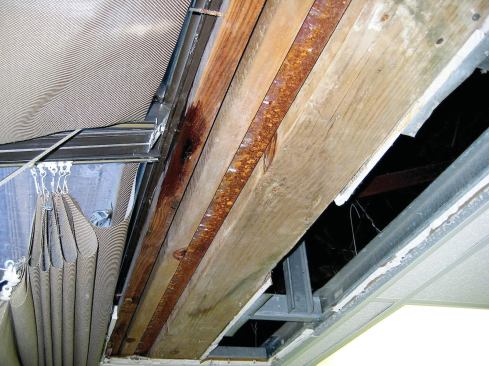
Next I called for removal of the drywall ceiling to further narr…
Next I called for removal of the drywall ceiling to further narrow the possible entry location. From what I could see inside, I suspected that the laps in the flashing had failed, if they ever worked in the first place. We had no choice but to rent a bucket truck and — very carefully, considering the glass below — start deconstruction.
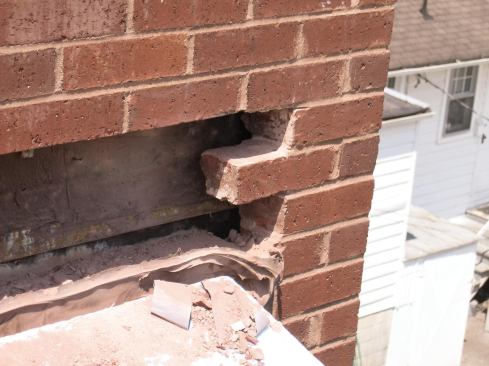
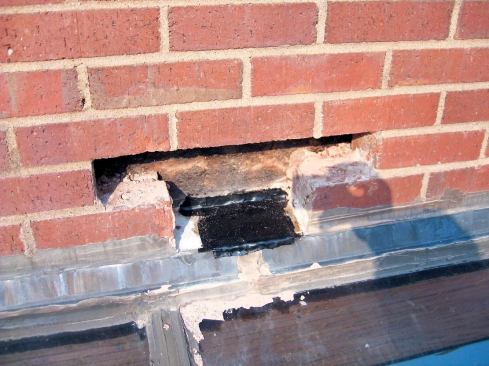
I also pulled off the brick at the end of the solarium, pretty s…
I also pulled off the brick at the end of the solarium, pretty sure that I would find no end dam in the flashing there. Without dams, water would eventually make its way down into the walls at each end.
MCA
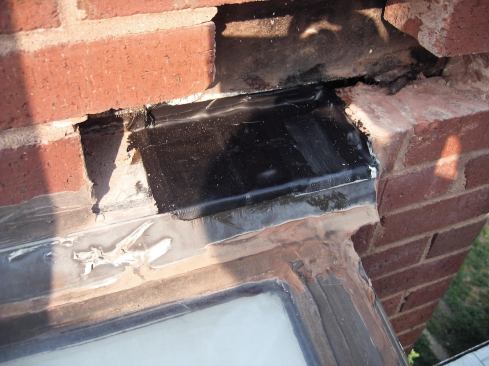
When the roofing contractor did the repair, he soldered the new …
When the roofing contractor did the repair, he soldered the new copper flashings wherever he could, and sealed them with Carlisle’s Water Cut-Off Mastic, a clay-based caulk that effectively stops water as long as it’s in compression and out of direct sunlight.
MCA
For good measure, we also added a layer of uncured rubber membra…
For good measure, we also added a layer of uncured rubber membrane over the flashing laps. . . .
. . . and at the ends of the flashing. It’s been years now and…
. . . and at the ends of the flashing. It’s been years now and they’ve not had any leaks since.
The main cause of moisture problems in the brick homes I investigate is the lack of proper through-wall flashings (see slideshow). For example, one common source of leaks is the counterflashing installed where a sloped shingle roof abuts a brick wall. The metal is usually 4 or 5 inches high, follows the shingles in a straight line parallel with the roof, and may have an occasional fastener through its face into a mortar joint.
Typically, the suspect flashing is turned in about 1/4 inch to 1/2 inch along the top and simply let into a kerf cut in the mortar or brick with a masonry blade. But the biggest warning signs are the nails and the copious amounts of caulk along the top edge. Even when I find the metal installed in stair-step fashion down a brick wall, it’s still most likely a saw-cut job, where the counterflashing was installed after the brick had been laid.