


Tim Uhler
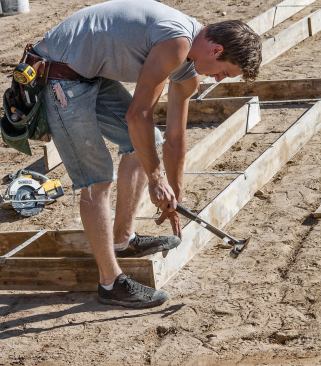
When laying out the footings, the author determines diagonal mea…
Footings
On most projects, we can form footings and tie steel in the morning, schedule the inspection for the afternoon, and pour the footings the following morning.
Reference points. We start by rough-measuring the hole, which allows us to quickly identify most potential problems. Once we’re satisfied the hole is big enough, we stake out two long lines that are exactly 90 degrees (perpendicular) to each other. These lines help us keep the footings roughly square as we build them, and serve as a reference for setbacks from the property lines.
To keep our foundations square, we calculate a lot of diagonals. I prefer to use my Construction Master Pro Trig calculator (calculated.com) rather than the 3-4-5 right-triangle method I learned as an apprentice, because it’s much faster and far more accurate. I just plug in actual perpendicular wall dimensions and determine each diagonal, using the largest squares possible.
If the foundation has any large odd angles, like a 135-degree or 130-degree dogleg, I ask the designer to calculate these diagonals and include them on the foundation plan. This helps us locate these corners on site, ensures that the angles are correct, and reduces the time we spend in the field figuring out these details.
Footing forms.Though code in our area allows 12-inch-wide footings for single-story homes, our typical footing is 16 inches wide. We form the footings with 16-foot-long 1×6 #2 pine fastened together with 6d duplex nails, and use 16-inch metal spreader cleats to keep the footings spaced uniformly. While we have a bucket of metal stakes, most of the time we fasten our form boards to inexpensive 1×2 wooden stakes. If the ground is too hard to pound in wooden stakes without breaking them, we predrill holes by driving in a metal stake and wiggling it back and forth, then pulling it out.
During most construction projects, each subsequent trade in the process works to increasingly tighter tolerances: Dirt guys generally work to within the inch, footing workers to within the half-inch, stem-wall builders to within 1/4 inch, framers to 1/8 inch, and finish carpenters to 1/16 inch (or less). But our goal during the foundation phase is to work within 1/4-inch dimensional tolerances, and to be within 1/16 inch of our target elevation. When we form footings, we’re aiming for perfect numbers — even though we know things will get moved around a little because of the nature of working in the dirt (or rain, mud, or snow).
Usually, we start forming with the longest, straightest run. Then two of us work from opposite ends of this run away from each other to assemble the remaining footings. Since most of our stem walls are 8 inches wide, we always add 4 inches to our measurements if the corners are “outside to outside,” and use the plan dimension if the corner is “inside to inside.” For example, if the longest foundation wall run is 40 feet, the footing will measure 40 feet 8 inches, plus the thickness of the form boards (assuming I am hooking my tape to the forms). If I have time, I try to put all these measurements on the plans themselves prior to forming.
Because 1×6 forms aren’t very stiff, we stake the forms every 4 feet to keep them straight. We orient the stakes directly opposite each other, with one stake at the center of all form board overlaps. We initially tack the form boards together with a single 6d duplex nail, which allows us to raise the forms to grade and pivot on that nail.
Before we get the whole footing formed, we square the largest 90-degree angle and stake the form boards so that they’re straight but not level or nailed to the stakes. We use this right angle as a reference point for the rest of the footprint.
Once all the footing forms are in place, we double-check the largest diagonals, parallel runs, and lengths against the foundation plan and our calculated diagonals just to make sure we didn’t make any mistakes. Then we finish staking in the entire footprint at the corners and where the forms overlap on long runs.