Working off the 6-foot-by-8-foot deck of the addition, the crew …
Assembling the Steel Beams
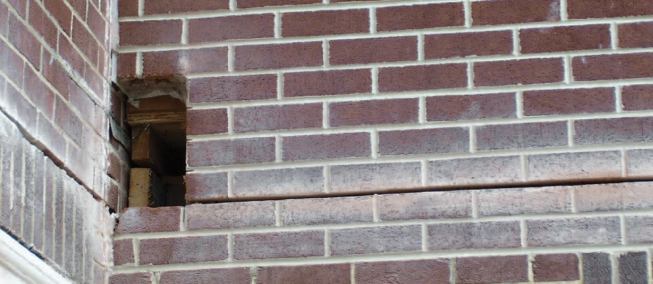
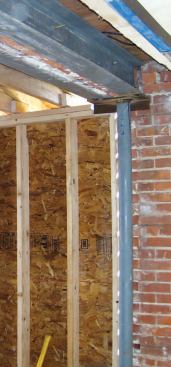
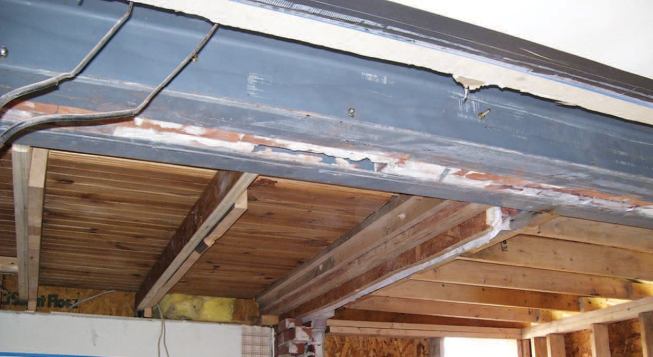
We first erected temporary support walls inside – from the second-story ceiling down to the ground in the basement – to pick up as much of the floor and roof load as possible. We then used a masonry saw and grinder to cut kerfs in the mortar joints to receive the steel angles. The veneer wall required only one 8-foot-long channel on the exterior face. The double-wythe wall of the original house needed two 14-foot-long channels, one of which we had to feed through a hole we made in the veneer wall. In fact, the only bricks we had to disturb during this process were the ones removed for the pass-through and several more inside where we needed vertical channels for the support posts. Because we had transferred the house loads to the temporary supports, we didn’t have any problems.
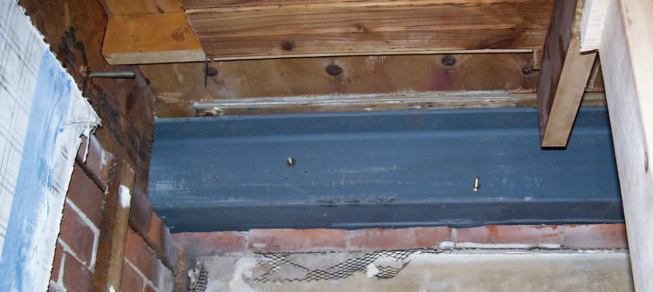
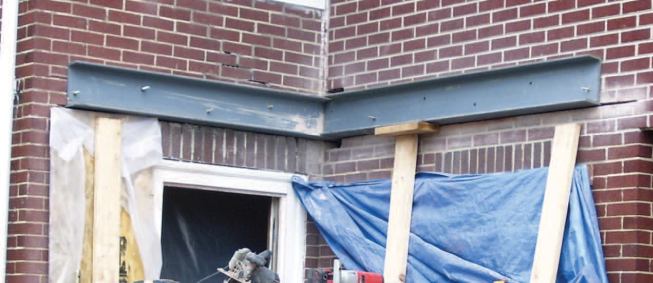
We secured the beam assemblies with a staggered pattern of 1/2-inch through-bolts and brought in a welder to create a structural connection at the inside corner where the longer and shorter channels meet.
The ends of the beams are supported by 4-inch-diameter 1/4-inch-thick steel columns with 5/16-inch-thick steel-angle caps welded on top. The column bases sit on the existing foundation wall and are grouted into place.
New Brickwork
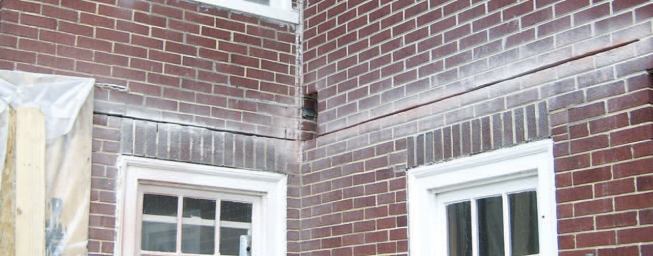
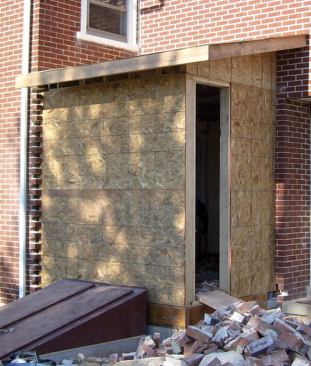
We waited until we had framed and sheathed the addition before removing any more brick. We started with a sledge, but after a few bricks were dislodged the rest popped out quite easily – reinforcing the importance of getting the steel beams in place first.
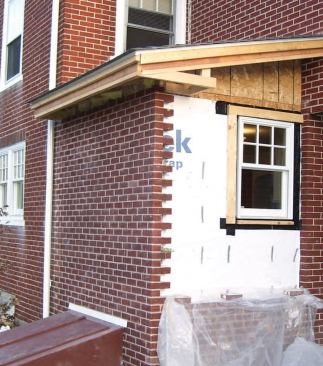
We had intended to re-use the old brick, but after trying to chip the mortar off we abandoned that idea. Fortunately, our bricklayer found a close match. The slight difference in color between the old and new brick would be most noticeable where the new addition met up with the original house. For a better blend, our bricklayer toothed the bricks together in that spot, and we also placed a downspout there. Where the addition meets the newer part of the house, the bricklayer used a simple vertical joint.
Project Costs
Even with these structural issues, we were able to give the clients a fixed price, and – as with most of our estimates – it was close to the actual job costs. Our usual target gross margin is 40 percent, and on this project we hit 39 percent. One reason we’re able to estimate so accurately is that we get input from everyone who will be involved in the project. On complex jobs like this, we always have a senior project manager on site during the estimate so we can anticipate issues that the architect, engineer, or estimator might not. In this case, our project manager was able to think through the entire process of getting the beam in place, including any potential problems.
The engineering and job-site procedures that are needed to keep masonry walls supported tend to make these types of projects expensive, and this was no exception. Our cost for the shell – including the structural work, new brick veneer, rough electrical, insulation, and finished drywall – was $56,570. The interior finishes – including cabinets, counters, sink and faucet, appliances, interior trim, painting, and flooring – were installed by another contractor and, according to the clients, added another $45,000 to $50,000 to the job.